
How to Build Wooden Garage Shelves
If you’re tired of cluttered floors and disorganized tools, building garage shelves out of wood is one of the most effective, affordable, and satisfying DIY projects you can tackle. With just a few sheets of plywood or OSB and a handful of 2×4s, you can construct heavy-duty shelving that holds hundreds of pounds for under $60. Unlike flimsy metal racks, wooden shelves are stronger, fully customizable, and easily mounted to your garage wall studs for maximum stability. This guide walks you through every step from choosing materials to securing your unit safely.
Whether you’re a beginner with a drill or a seasoned builder using pocket-hole joinery, you’ll learn how to build garage shelves out of wood that last for years and transform your cluttered garage into organized storage.
Choose the Right Design for Your Needs
Select a Build Method Based on Your Budget and Tools
Not all wooden garage shelves are built the same. Your choice depends on budget, tools, finish quality, and whether the unit will be wall-mounted or freestanding.
The 2×4 plus OSB method works best for budget builds. This approach uses standard lumber and engineered wood, creating strong shelves fast while ideal for hidden storage areas. The pocket-hole plywood frame delivers a cleaner look with hidden screws, great for garages where appearance matters, but requires a Kreg Jig and offers superior rigidity. The Ana White floating method fits perfectly for tight spaces or hybrid shed-shelf builds, allowing modular installation and easy reconfiguration.
Each design supports heavy loads, but the 2×4 plus OSB version remains the most popular due to its simplicity and low cost.
Match Shelf Depth to Your Load Type
Shelf depth directly affects strength and usability. Sixteen inches is the standard depth that fits most plastic totes and keeps weight close to the wall. Do not exceed 18 inches without adding center supports or upgrading to 3/4 inch plywood. For deeper storage like long tools or lumber, install a vertical center brace or use thicker material to prevent sagging over time.
Gather Materials and Tools
Buy Cost-Effective Lumber and Fasteners
You do not need exotic materials to build garage shelves out of wood that hold serious weight. For a 6-foot shelf unit using OSB and 2×4s, you will need twelve 8-foot 2×4s for frames, legs, and bracing. One 4×8 sheet of 7/16 inch or 1/2 inch OSB cuts into three 16 by 72 inch shelves. You will also need 100 to 120 number 10, 2 and 1/2 inch self-tapping wood screws to fasten frames and attach legs, plus 3-inch wood screws to mount the unit into wall studs. Wood glue is optional and adds stiffness but is not required.
The total cost comes in under $60 at most home centers. Upgrade to 1/2 inch plywood if moisture resistance or a cleaner finish is needed, as it costs more but lasts longer in humid conditions.
Essential Tools for the Job
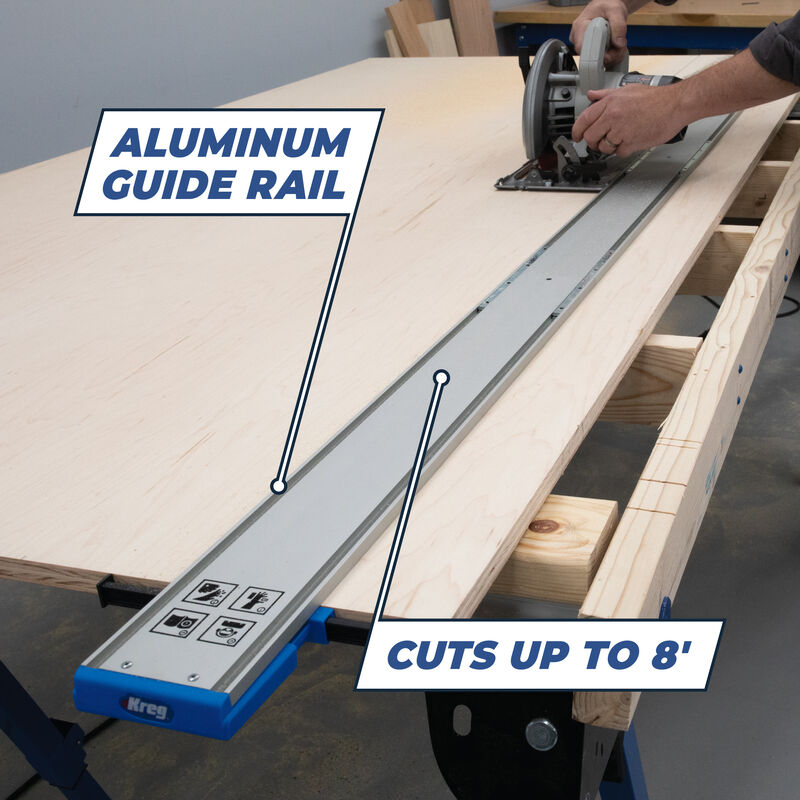
You can build garage shelves out of wood with basic tools found in most garages. A circular saw with a straightedge guide rips OSB cleanly by clamping a 2×4 as a guide rail. A miter saw handles short cuts like 13-inch braces most efficiently. A drill and driver drives screws quickly, and using a magnetic bit holder saves time. A tape measure and carpenter’s square ensure accurate, square layouts, while a level proves critical when marking and mounting. Clamps hold pieces during assembly, and a Kreg Pocket-Hole Jig serves as an optional tool for invisible, strong joints in premium builds.
Additional helpful tools include a jigsaw for notching shelves, a magnet to find studs, and spacer blocks for even shelf spacing.
Cut Lumber Efficiently
Prepare 2×4 Frame Pieces First
Start by preparing all frame components from your 2×4s. Cut eight long 2×4 supports to your shelf length, typically 72 inches for 6-foot units. Cut four 13-inch inner braces per shelf to prevent racking. Cut legs to a standard length of 75.5 inches, adjusting for floor slope by measuring the low side and cutting the opposite leg longer.
Always check for crown, which is the bow in boards. Mark the high side and orient all crowns upward so shelves sit flat when installed.
Rip OSB or Plywood into Shelves
Maximize sheet use by cutting strategically. Set shelf depth to 16 inches, which offers ideal strength and clearance. Rip a 4×8 sheet into three 16-inch-wide strips, which yields three full shelves. Cut strips to final length, such as 69 inches to allow overhang. Use the leftover 12-inch strip to create shorter shelves, like 23-inch pieces for utility zones.
Pro tip: Measure the distance from your circular saw base to the blade, usually about 1 and 1/2 inches. Clamp a straight 2×4 exactly 1 and 1/2 inches from your cut line and ride the saw against it for perfectly straight cuts every time.
Prioritize Safety During Cutting
Support both ends of boards when cutting using sawhorses or roller stands. Never stack lumber unless clamped, and use shims to prevent twisting. Cut short pieces on a miter saw to reduce kickback risk. Clamp two 2×4s together and cut them at once, which ensures identical lengths and speeds production.
Assemble Frames Squarely
Build Shelf Supports with Braces
Lay two long 2×4s parallel on the floor to form front and back rails. Mark brace positions 23 inches from each end. Place 13-inch braces perpendicular across the rails. Attach each brace end with two 2 and 1/2-inch screws. Use a carpenter’s square to verify 90-degree corners before final tightening. Repeat this process for each shelf level, using four braces per shelf to prevent sagging and add rigidity.
Attach Shelf Tops Securely
Place OSB or plywood on top of the completed frame. Fasten from above with screws or brad nails every 6 to 8 inches along edges and braces. No glue is needed since screws provide sufficient hold. Leave a 1/16-inch gap at edges if the wood has rounded corners to avoid binding. For pocket-hole builds, attach rails with pocket screws first, then secure shelves from below.
Add Side Supports When Needed
For freestanding units or added stiffness, cut 2×4 side pieces, such as 12 inches long, between front and back rails. Use pocket holes on the ends for clean, strong joints. Limit depth to 18 inches maximum without extra support to prevent sagging over time.
Assemble the Full Unit
Stack Shelves Using Spacer Blocks
Build the unit upside down starting from the top shelf. Cut 15-inch spacer blocks from leg offcuts. Place one block in each corner. Lower the next shelf frame onto the spacers. Insert legs and secure with three 2 and 1/2-inch screws per corner. This method ensures even spacing and lets you work alone without assistance.
Check for Square Before Final Tightening
Misaligned legs cause wobbly shelves that compromise stability. Measure diagonals from leg to leg. If the measurements match, the frame is square. If they do not match, push opposite corners until equal, then tighten the screws. Repeat this check for each level during assembly.
Modify for Garage Curbs or Obstructions
Many garages have a concrete curb at the door that affects leg placement. Position the unit where it will go. Mark where legs hit the top of the curb. Flip the unit and cut the legs at the marks. Reassemble the unit so legs sit flush on the curb and the entire structure stays level.
Mount to Wall Safely
Locate Wall Studs Accurately
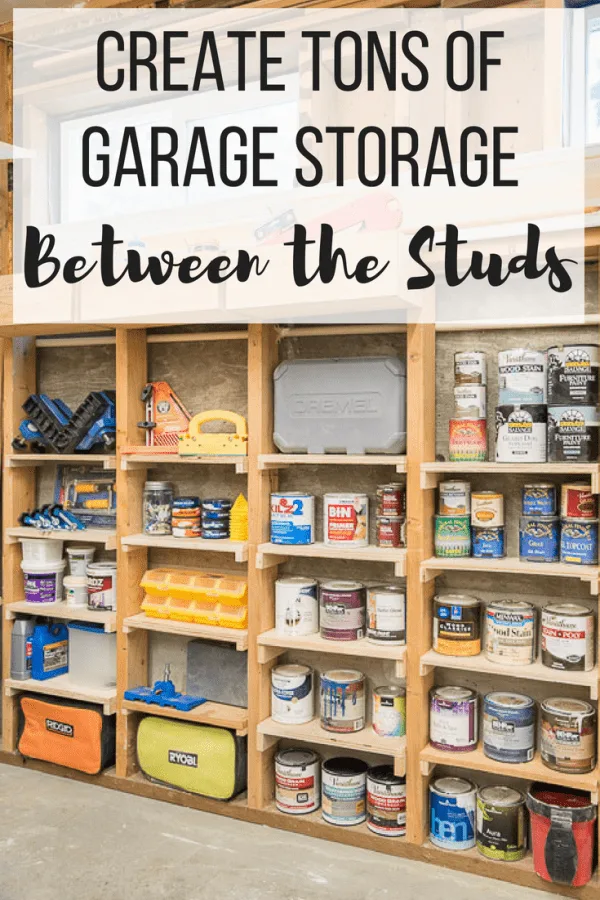
Never rely on drywall anchors for heavy shelves. Run a magnet along the wall to find drywall screws, which indicate stud locations. Mark stud centers with blue tape, typically 16 inches apart. Use a level to extend marks vertically. Only attach to solid wood studs using 3-inch wood screws for maximum load capacity.
Adjust for Sloped Garage Floors
Garage floors slope for drainage, often 1/4 inch to 1/2 inch over 6 feet. Place a long 2×4 on the floor with a level on top. Shim the low end until the level reads perfectly horizontal. Measure the shim thickness to determine the floor drop. Cut the low-side legs longer by that amount, such as 76 inches versus 75.5 inches. After installation, use 1/4-inch plywood shims under legs for fine-tuning if needed.
Choose Your Mounting Style
Wall-mounted units offer the best stability. Screws go into studs only, and legs may not even touch the floor. Freestanding units have legs resting on the floor, but require back bracing or a plywood back panel to prevent racking. The hybrid approach lets legs touch the floor while the unit is also screwed to the wall, providing the ideal balance of stability and support.
Maximize Strength and Load Capacity

Prevent Sagging with Proper Support
Even strong shelves can sag if overextended without adequate support. The maximum unsupported span is 48 inches for 16-inch depth shelves. For 18-inch depth shelves, the maximum span drops to 36 inches without a center rail. For spans over 48 inches, add a center 2×4 support running front to back. Use 3/4-inch plywood for deep or long shelves to maintain rigidity.
Real-World Load Testing Results
These shelves are built tough and proven in real use. They hold three 12-gallon totes per shelf with room to spare. The structure supports power tools, paint cans, wet saws, and 8-foot lumber without issue. One builder reported that the unit is so sturdy you could invite a few dozen kids to climb on it. Avoid placing point loads like a 100-pound weight on one corner, and always distribute weight evenly across shelves.
Customize for Your Space
Scale the Design Up or Down
This design is fully scalable to fit any space. Extend the length beyond 6 feet by adding more supports and adjusting cuts. Build from floor to 18 inches below the ceiling to allow clearance for tall items. Reduce depth to 12 inches for narrow walls near windows or doors.
Adapt for Specific Uses
For tool storage, add pegboard or hooks to the front edge. Stack bins of tile, paint, or soil for bulk supplies. Store beach chairs, holiday decor, and camping gear seasonally. For workshop zones, install LED strip lights under upper shelves for better visibility while working.
Upgrade the Finish
Apply paint or stain for better looks and moisture resistance. Use pressure-treated 2×4s only if legs contact damp concrete. Seal plywood edges with wood filler or primer to reduce swelling and extend the life of your shelving unit.
Try Alternative Construction Methods
Use the Floating Frame Technique
This clever method ensures perfect alignment of all shelves. Mount the first 2×4 rail to the wall at each shelf height using a level and 3-inch screws into studs. Temporarily screw a second 2×4 directly over it to create a double-thick rail. Build shelf frames and attach legs. Slide frames onto the wall rails. Remove the temporary top rail, and shelves now float on hidden brackets. Nail on OSB or plywood tops to complete the look.
Benefits include no floor assembly required, easy leveling, and removable shelves for future reconfiguration.
Build with Pocket Holes for a Premium Look
For cleaner, stronger joints using a Kreg Jig, cut legs, rails, and shelves to your specifications. Drill pocket holes on rail ends for leg attachment, setting the jig for 1 and 1/2-inch stock. Set the jig for 1/2-inch stock when drilling pocket holes on rail edges for shelf attachment. Assemble the frame with 2 and 1/2-inch pocket screws. Notch shelves if needed to fit around legs. Attach shelves from below with 1-inch pocket screws. The result is no visible screws and a professional appearance with excellent durability.
Maintain Your Shelves for Longevity
Inspect Annually
Even the best-built garage shelves need occasional checks. Look for loose screws, especially at wall-mount points where vibration can loosen fasteners. Tighten leg connections if wobble appears during use. Reshim if the floor settles unevenly over time.
Clean Without Causing Damage
Wipe shelves with a damp cloth and avoid soaking the wood. Do not let water pool on shelves, as prolonged moisture causes damage. Keep painted units dry to prevent peeling and maintain their appearance.
Protect Tools with Rust Remover
Bonus tip: Use WD-40 Specialist Rust Remover Soak on rusty tools stored in your garage. Soak parts for one hour with no scrubbing required. This removes surface rust quickly and keeps your workshop gear in top shape.
Key Takeaways for Building Garage Shelves Out of Wood
Building garage shelves out of wood is a smart, strong, and simple upgrade that transforms cluttered space into organized storage. With basic tools, under $60 in materials, and a few hours of work, you can create custom shelving that outperforms store-bought units in every way. Follow this guide to cut accurately, assemble squarely, mount securely into wall studs, and customize for your specific needs. Whether you choose the OSB-and-2×4 method or a pocket-hole plywood build, you are not just adding shelves, you are building a lifetime storage solution that holds hundreds of pounds and keeps your garage organized for years to come.
Frequently Asked Questions About Building Garage Shelves Out of Wood
How much does it cost to build garage shelves out of wood?
A complete 6-foot shelf unit costs approximately $60 or less using twelve 8-foot 2×4s and one 4×8 sheet of OSB. This makes it significantly cheaper than purchasing commercial metal or plastic shelving units.
What is the strongest wood for garage shelves?
2×4 dimensional lumber combined with 1/2-inch OSB or plywood provides excellent strength. The multiple cross-braces prevent racking, and direct mounting to wall studs transfers load safely to the building structure.
How do I make sure my garage shelves are level?
Measure floor slope using a level on a long 2×4, then shim the low end to determine the drop. Cut the leg on the low side longer by that amount. Use 1/4-inch plywood shims under legs for fine-tuning after placement.
Can I build garage shelves without mounting them to the wall?
Freestanding units work but require additional bracing. Add diagonal bracing or a plywood back panel to prevent racking. For best results, use a hybrid approach with legs on the floor plus wall attachment for maximum stability.
How much weight can wooden garage shelves hold?
Properly built wooden shelves with cross-bracing and wall mounting support hundreds of pounds. They easily hold three 12-gallon totes per shelf, plus heavy tools, power equipment, paint cans, and 8-foot lumber without sagging.
What tools do I need to build garage shelves?
You need basic tools including a circular saw or miter saw, drill and driver, tape measure, carpenter’s square, level, and clamps. A Kreg Pocket-Hole Jig is optional but recommended for cleaner joints and a more professional appearance.





