How to Upgrade Wire Closet Shelves
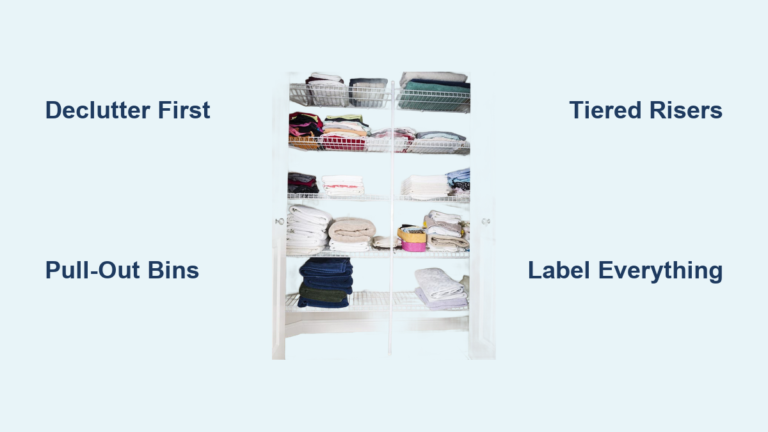
You open your closet, pantry, or linen cabinet only to be greeted by a cold, industrial grid of wire shelves. Items fall through the gaps, dust collects in the corners, and the whole space feels unfinished. If your wire shelving clashes with your home’s style, you are not alone. Millions of homeowners and renters face the same problem. The good news? You do not need to replace your wire shelves to make them look better. With simple, budget-friendly upgrades, you can transform them into sleek, custom-looking storage that mimics high-end cabinetry without the cost or demolition.
This guide reveals proven methods to upgrade wire shelves using materials like wood, foam core, contact paper, and pre-made kits. Whether you are a DIYer with tools or a renter seeking reversible fixes, you will find a solution that fits your skill level, budget, and design goals. From pantry overhauls to linen closet makeovers, we will walk you through step-by-step techniques, cost comparisons, and expert tips to achieve a polished, organized look fast.
Cover Wire Shelves with Solid Panels for an Instant Upgrade

The most effective way to make wire shelves look better is to cover them with solid panels. This instantly eliminates the industrial look, prevents items from falling through, and creates a clean, built-in appearance that transforms your entire closet.
Use Wood Panels for a Custom Built-In Look
Wood overlays give wire shelves the warmth and elegance of real cabinetry. They are ideal for permanent upgrades in pantries, linen closets, or laundry rooms where you want a sophisticated, lasting transformation.
Gather ¼-inch plywood or MDF board, a jigsaw, sandpaper in 120 and 220 grit, wood stain or paint, and a 1×3 pine board for the front lip. Measure your shelf dimensions precisely, then cut the plywood to match. Sand all edges smooth until they are free of splinters. Stain or paint the board to complement your existing decor. Attach the 1×3 pine board to the front edge using wood glue and brad nails, creating a finished lip that hides the wire completely. Slide the panel onto the wire shelf once dry.
For a floating shelf illusion, route a ¼-inch ledge into the front board and glue the plywood into place. This method hides the wire completely and mimics high-end built-ins. Pro Tip: Orient the wood grain front-to-back for a seamless, professional look that makes visitors think you installed custom cabinetry.
Try the Dollar Tree Foam Core Hack
One of the most popular budget upgrades uses foam core boards from Dollar Tree, costing under $5 per shelf. This method is perfect for renters or anyone avoiding permanent changes because the result is a smooth, modern surface that hides the wire grid and elevates your space instantly.
Measure your shelf and cut foam core to size using an X-acto knife and ruler for clean edges. Create a front lip by cutting a 1.5-inch strip from leftover foam core and taping it to the front edge using packing tape. Wrap the entire panel with wood-grain or marble contact paper, smoothing out air bubbles as you go. Slide the completed panel onto the wire shelf. In tight spaces like narrow linen closets, tilt the panel upward to insert it, then rotate it flat once inside the frame.
User Insight: Foam board and contact paper made my linen closet look custom for under $5. The transformation took less than an hour and required zero tools.
Install Pre-Made Shelf Cover Kits for Quick Results
If DIY is not your thing, snap-on shelf covers like John Louis Home Renew or Shelftacular offer instant upgrades with zero tools required. Simply slide them onto your existing wire shelves and enjoy an instant transformation.
These covers come in walnut, oak, and espresso finishes to match various interior styles. They are made from durable MDF or composite materials designed to fit ClosetMaid, ShelfTrack, and similar wire shelving systems. The installation takes about 10 minutes per shelf, making it ideal for quick pantry or utility closet makeovers before guests arrive or when selling your home.
Bonus: Some brands offer free sample programs so you can test the finish and fit before committing to a full purchase.
Apply Contact Paper and Vinyl Tiles for Fast Updates
For quick, temporary fixes, liners and wraps are the easiest way to refresh wire shelves without structural changes or permanent modifications to your rental property.
Apply Contact Paper for an Instant Makeover
Peel-and-stick contact paper transforms wire shelves in under 15 minutes with no tools required. This method works especially well in dry areas like bedrooms, offices, and guest closets where humidity is not a concern.
Choose a wood grain, marble, or solid color that matches your decor. Duck Brand offers excellent quality and a wide variety of patterns. Cut the contact paper slightly larger than your shelf dimensions, peel the backing gradually, and smooth out air bubbles as you apply. Trim excess material with an X-acto knife for a clean edge.
While contact paper does not fully hide the wire grid underneath, it adds warmth and pattern that dramatically improves the overall appearance. This is perfect for kitchen pantries or office storage where you want visual improvement without major investment.
Watch for: Edges peeling over time, especially in humid areas like bathrooms or laundry rooms. Press edges down firmly during application and consider using a heat gun on low setting to seal them.
Use Self-Adhesive Vinyl Floor Tiles for Durability

For a durable, non-slip surface that stands up to daily use, use 12×12-inch vinyl floor tiles pressed directly onto your wire shelves. This approach provides exceptional durability and moisture resistance compared to paper-based options.
No cutting is needed for standard shelf widths. Simply press the tiles into place for an instant wood or stone look. These tiles are easy to clean, resist moisture, and provide a stable surface that prevents canned goods and bottles from sliding around. They are ideal for pantries with heavy items or high-traffic areas where stability matters most.
User Favorite: I used dollar store vinyl tiles in my pantry and it was a total game changer. The non-slip surface keeps everything in place and clean-up is effortless.
Replace Wire Shelves for Permanent Results
When durability and design matter most, replacing wire shelves with solid wood or upgrading to modular systems delivers the ultimate transformation with long-term value.
Swap Wire for Solid Wood Shelves
Keep your existing support brackets and simply install new wooden shelves for a permanent, high-end finish that increases load capacity and stability. This method delivers maximum customization and a luxury appearance that adds real value to your home.
Remove the wire shelves and measure the existing support system. Cut solid wood to fit exactly within the brackets, allowing for proper weight distribution. Sand thoroughly, apply your chosen stain or paint, and seal with two coats of clear satin polyurethane for durability. Slide or bracket the new shelves into place.
This approach is best for homeowners remodeling kitchens, pantries, or custom closets who want a permanent solution that will last decades rather than years.
Upgrade to Pull-Out or Modular Systems
For next-level functionality, replace the entire unit with pull-out drawers, baskets, or modular systems from brands like Rev-A-Shelf or ClosetMaid ShelfGenie. These premium options include sliding mechanisms, dividers, and soft-close features that revolutionize how you access stored items.
While more expensive and complex to install, these systems offer tremendous long-term value and convenience, especially in deep pantries where reaching items in the back was always a struggle. Professional installation is recommended for complex units, but the payoff in daily usability is substantial.
Match Your Interior Design Style for a Cohesive Look
The right finish makes your upgraded shelves blend seamlessly with your home’s aesthetic rather than standing out as an obvious modification.
Modern and Minimalist: Go Sleek and Light
Use white or light gray contact paper or marble-look vinyl tiles to brighten dark closets and enhance the sense of space. Add a motion-sensor LED light with warm white glow around 2700K to 3000K for automatic illumination when you open the door. Light colors reflect available light and make small closets feel larger and more inviting.
Farmhouse and Rustic: Add Warm Wood Tones
Use wood-grain contact paper or real pine overlays for instant warmth and character. Opt for reclaimed barn wood panels if you want authentic rustic charm without the work of finishing raw wood. Pair your upgraded shelves with galvanized or woven baskets to complete the farmhouse aesthetic in linen closets and pantries.
Luxury and High-End: Mimic Built-In Cabinetry
Install walnut or espresso pre-made covers for a rich, sophisticated appearance. Use routed wood panels with seamless edges that eliminate any visible transition between the cover and the wall. Add under-shelf LED strips for ambient lighting that highlights your items and creates a premium built-in feel. These details make wire shelves look like custom installations worth thousands of dollars.
Maximize Functionality with Smart Organization
Once your shelves look better, optimize how you use them with strategic storage accessories that work with your new solid surface.
Add Storage Accessories That Complement Your Upgrade
Airtight canisters for cereal, pasta, and snacks keep food fresh and create a unified visual display. Lazy Susans for spices and oils provide 360-degree access while reducing clutter. Expandable shelf risers for canned goods double your vertical storage capacity. Narrow bins for spice packets and small items prevent lost items in corners. Bread keepers for lower shelves maintain freshness while keeping bulky items contained.
Pro Tip: Use mounting putty on bin corners to prevent sliding, especially on smooth surfaces like contact paper or vinyl tiles.
Follow Smart Bin Placement for Easy Access
Position top shelves for frequently used items within easy reach. Reserve middle shelves for dry goods and canisters that you access daily. Store heavy items like water bottles on bottom shelves for safety and stability. Use door or side wall space for turntables and spice racks that benefit from extra visibility.
Choose the Right Solution for Your Needs
Not every method works for every situation. Here is how to pick the best one based on your priorities.
Best Budget Option: Foam Core and Contact Paper
This approach costs under $5 per shelf, takes 20 to 30 minutes, and requires beginner-level skill. It is perfect for renters, temporary fixes, and quick makeovers before moving out.
Best Aesthetic Upgrade: Wood Overlays or Pre-Made Kits
This option costs $10 to $25 per shelf, takes 1 to 2 hours for DIY or 10 minutes for kits, and suits intermediate to beginner skill levels. It is ideal for pantries, linen closets, and permanent homes where appearance is the top priority.
Fastest Fix: Contact Paper or Vinyl Tiles
This solution costs $1 to $6 per shelf, takes under 15 minutes, and requires zero skill. It is best for instant visual refresh when you need results immediately.
Most Durable: Solid Wood or MDF Replacement
This method costs $50 or more per shelf, takes 2 or more hours, and requires advanced skill. It is recommended for long-term upgrades and high-traffic areas where durability matters most.
Renter-Friendly: Removable Liners and Snap-On Covers
These options cause no damage to property, are fully reversible, and comply with lease agreements. They remove easily when you move out without leaving any trace of modification.
Maintain Your Upgraded Shelves for Long-Lasting Beauty
Even the best upgrades need care to last and continue looking their best over time.
Monthly Maintenance Tips
Inspect edges for peeling, especially on contact paper and foam-based covers in the first few weeks. Wipe surfaces with a damp cloth and mild cleaner, avoiding soaking foam core panels that could degrade. Reinforce tape joints on foam panels with additional packing tape every few months. Reapply polyurethane every 1 to 2 years on wood surfaces to maintain protection against wear and moisture.
Avoid moisture exposure in laundry rooms and bathrooms unless your materials are properly sealed. Consider removing foam core covers entirely in humid environments to prevent damage and mold growth.
Key Takeaways for Transforming Your Wire Shelves
Wire shelves do not have to look cheap or industrial. With the right approach, you can turn them into stylish, functional storage that rivals custom cabinetry at a fraction of the cost.
Renters should use contact paper, snap-on covers, or foam core panels that remove easily without damage. DIYers can build wood overlays or foam core panels for dramatic transformations under $25. Perfectionists should install solid wood or modular systems for permanent, high-end results that add real value to their homes.
All methods preserve the adjustability and strength of wire shelving while giving you the look you have always wanted. And with organization accessories, your space will not just look better, it will work better too.
Start small. Try one shelf. Snap a before-and-after photo. You will be amazed at how much difference a simple cover can make. Your closet, pantry, or laundry room deserves to look as good as it functions, and now it can.
Frequently Asked Questions About Making Wire Closet Shelves Look Better
Does covering wire shelves affect their weight capacity?
Solid panels like wood overlays and pre-made cover kits maintain the original weight capacity of your wire shelving because they simply sit on top of the existing frame. Foam core and contact paper add minimal weight. However, replacing wire with solid wood can actually increase load capacity depending on the wood thickness and bracket support.
Can I use these methods in humid areas like bathrooms or laundry rooms?
For humid environments, avoid foam core and contact paper which can warp or peel. Use sealed wood panels, pre-made MDF covers, or vinyl floor tiles that resist moisture. Check seals and reapply protective finishes annually in these challenging locations.
How do I remove wire shelf covers when moving out?
Foam core panels slide right off. Contact paper peels away but may leave adhesive residue that requires Goo Gone or similar remover. Pre-made snap-on covers uninstall in seconds. Wood overlays may require unscrewing if attached, but the brackets remain untouched so no wall repair is needed.
Do I need to remove the wire shelves first?
No. All covering methods install directly over existing wire shelves without removal. This preserves your original shelving system, makes the project reversible, and takes a fraction of the time compared to full replacement.
What is the cheapest way to make wire shelves look better?
The Dollar Tree foam core hack costs under $5 per shelf and requires only an X-acto knife, ruler, and packing tape. Contact paper alone costs $1 to $3 per shelf and transforms appearance in under 15 minutes with zero tools required.
How long do wire shelf upgrades last?
Wood overlays and pre-made kits last 5 to 10 years or more with proper care. Foam core and contact paper typically last 1 to 3 years before requiring replacement, especially in high-use areas. Vinyl floor tiles fall in the middle at 2 to 5 years of durability.