
How to Build Kitchen Cabinet Pull Out Shelves
Do you struggle to reach items buried in the back of deep lower cabinets? You are not alone. Most standard kitchen cabinets waste up to half their depth because contents become invisible and inaccessible. Building kitchen cabinet pull out shelves transforms this dead space into fully usable storage without requiring a full remodel. With basic tools, scrap wood, and the right drawer slides, you can install smooth-gliding, custom-fit pull-out shelves for as little as $10 each. This guide walks you through every step from measuring your cabinet and selecting materials to building sturdy shelves and installing them with precision.
Measure Cabinet Interior Dimensions
Before cutting any wood, accurate measurements are critical. A pull-out shelf must fit within the cabinet while allowing full extension without binding or interference.
Record Width, Depth, and Height
Use a tape measure to capture three key dimensions. Interior width measures between the inner side walls excluding the face frame. Interior depth measures from the back wall to the inner edge of the face frame. Interior height measures from floor to top wall if stacking multiple shelves. Write these numbers down as they determine your shelf size and slide placement.
Adjust for Face Frame Overhang
In face-frame cabinets, the 1×2 frame typically extends ¾ inch to 1¼ inches into the cabinet on each side. This reduces usable width and affects mounting. You will need spacer blocks or shims to create a flush surface for slide installation. For frameless European-style cabinets, no adjustment is needed because sides are flush with the opening, so slides mount directly.
Pro Tip: Use a level to confirm cabinet walls are plumb and parallel. Uneven cabinets cause misalignment and binding.
Choose the Right Drawer Slides
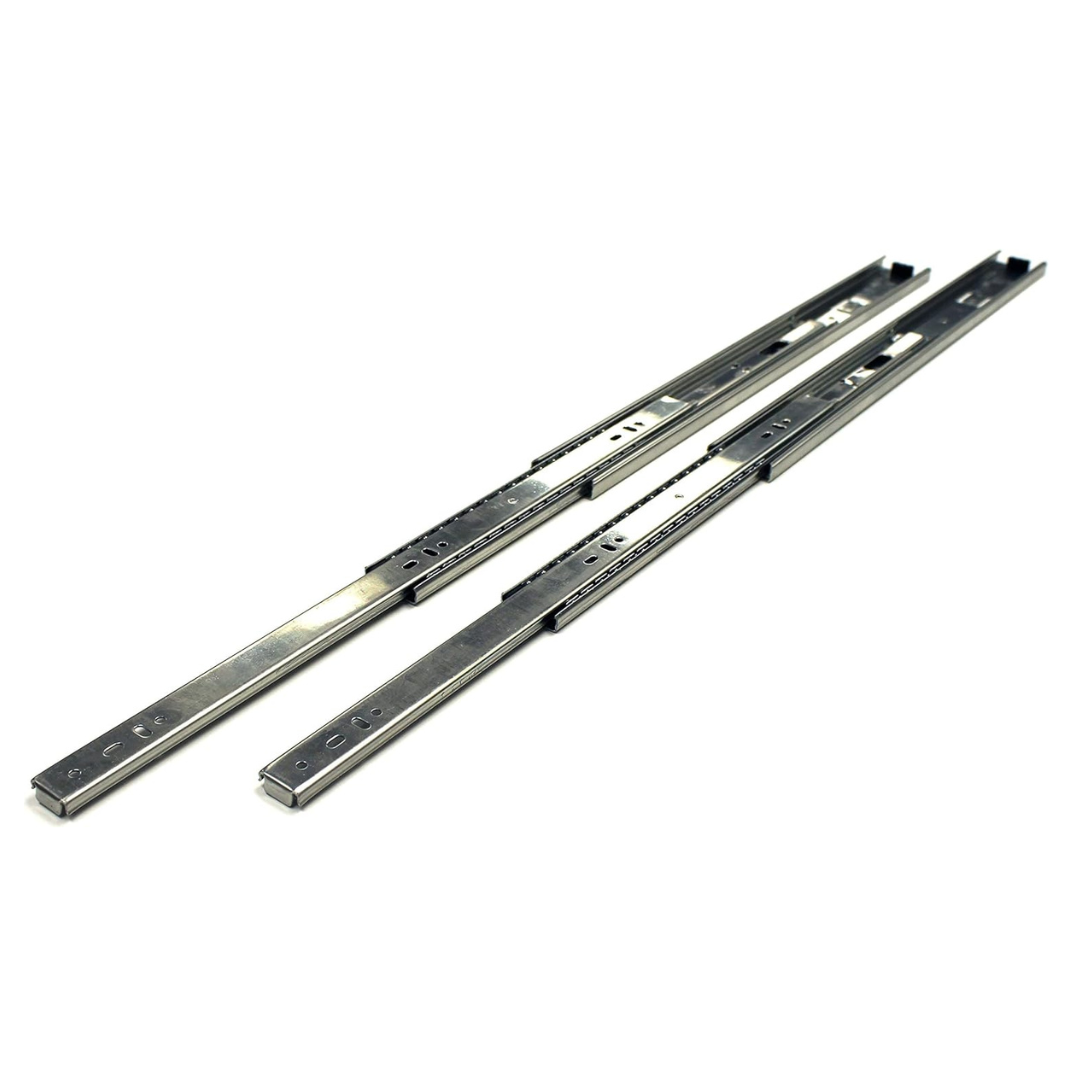
The slide system is the heart of your pull-out shelf. Choosing the wrong type leads to poor performance, premature failure, or installation frustration.
Select Full-Extension Ball-Bearing Slides
For durability and smooth operation, ball-bearing full-extension slides are ideal. They support 75 to 100 plus pounds, extend completely, and last for years. Avoid cheap roller slides because they bind under load and wear out quickly.
Recommended slide types include Euro bottom-mount slides which are best for retrofitting existing shelves, and side-mount slides which are ideal for new box-style builds and offer stronger support. Standard lengths are 20 or 22 inches for most base cabinets.
Cost Note: Quality slides cost $16 per pair but prevent future issues. Cheap ones cost $7 per pair and are not worth the risk.
Match Slide Thickness to Cabinet Space
Most slides are ½ inch thick each, so you lose 1 inch total width (½ inch per side). Your shelf must be narrower than the interior cabinet width by this amount.
Calculate Shelf Width: Interior Cabinet Width minus 1 inch equals shelf width.
Example: Cabinet interior width is 21 inches. Slide thickness is ½ inch times 2 equals 1 inch. Cut shelf to 20 inches wide.
If using spacer blocks, measure between them instead.
Convert Existing Shelf to Roll-Out
The fastest and cheapest way to add pull-out functionality is by upgrading a fixed shelf.
Remove and Resize Old Shelf
Take out the shelf by unscrewing or lifting off support pins. Cut to width using a circular saw with an Acu-Cut guide for straight edges. Trim depth if needed by subtracting 1 inch for slide clearance at the back.
Tip: Flip the shelf upside down because many have factory-finished undersides perfect for reuse.
Attach Bottom-Mount Drawer Slides
Position slides on the shelf bottom aligned with the front edge. Secure with screws using a drill driver. Mount cabinet-side brackets by aligning the front of the slide with the cabinet opening. Use a level to ensure both sides are even. Drive screws into slots leaving them slightly loose for adjustment. Test fit by sliding the shelf in and out, then adjust alignment if binding occurs.
Add Safety and Finish Touches
Install a back lip using ¾ inch by 2 inch scrap wood to prevent items from falling off. Optionally attach a 1×3 to hide the shelf edge and match cabinet style. Sand and finish with Danish oil or paint for a clean look.
Time Required: 1 to 2 hours
Total Cost: Approximately $10 (mostly for slides)
Build Full Box-Style Pull-Out Shelf
For heavier loads or a cleaner look, build a full drawer-style box from plywood.
Cut Plywood Components to Size
Use ¾ inch plywood for strength. Baltic birch is best because it is void-free and holds screws well.
Example dimensions for a 21 inch wide by 22 inch deep cabinet:
Bottom piece measures 20 inches wide by 21 inches deep. Side pieces measure 21 inches deep by 6 inches high. Front piece measures 20 inches wide by 6 inches high. Back piece measures 20 inches wide by 6 inches high or shorter for hinge clearance.
Cut all pieces with a table saw or circular saw plus straightedge.
Assemble with Pocket Screws or Wood Screws
Drill pocket holes along the bottom edges of the front, back, and sides using a Kreg Jig. Apply wood glue to joints. Attach sides to bottom, then front and back. Clamp and let dry for 30 minutes. Sand all edges smooth.
Alternative: Use 1¼ inch wood screws and glue. This is less precise but effective.
Finish and Reinforce
Add edge banding to hide plywood layers using iron-on or glue-down options. Line bottom with Polywall for durability and easy cleaning. Apply finish such as Danish oil, polyurethane, or paint to visible surfaces.
Install Slides in Face-Frame Cabinets

Face frames complicate slide mounting but spacers solve the issue.
Add Spacer Blocks for Flush Mounting
Cut scrap wood blocks to ¾ inch to 1¼ inch thick matching the face frame depth. Position blocks at front, back, and middle for heavy shelves. Secure with construction adhesive plus brad nails or screws. Ensure blocks are level and aligned vertically.
Only shim where slides attach. There is no need to cover the entire side.
Mount Slides to Spacers
Attach cabinet-side slide brackets to the blocks. Align front edge with cabinet opening. Use a level because misalignment causes binding. Center screws in adjustment slots for fine-tuning later.
Alternative Fix: Modify face frame to be flush, then add ¾ inch plywood strips behind slides to maintain alignment.
Build for Frameless Cabinets
No face frame means installation is simpler.
Mount Slides Directly to Cabinet Walls
Measure height from cabinet bottom to desired shelf position. Mark identical points on both sides. Attach slide brackets using a level. Secure shelf-side slides to the box.
No spacers are needed. The cabinet side panels provide a flat, flush mounting surface.
Ensure Clearance for Hinges and Doors
Leave at least 1/8 inch gap between shelf and cabinet walls. Test door swing because the pull-out should not interfere with hinges or closed doors. If doors do not close flush, add a thin liner strip such as Polywall to the inside door edge.
Customize for Specific Storage Needs
Tailor your pull-out shelf to the items you store.
Design Pot and Pan Organizer
Build a deeper box (6 to 8 inches high). Add an internal shelf for lids. Tilt the bottom slightly backward (3 to 5 degrees) to keep lids from sliding. Use ¾ inch plywood and heavy-duty slides with 100-pound capacity.
Pro Tip: Add beveled back strips for hinge clearance.
Create Tupperware Drawer
Build a medium-height box (5 to 6 inches). Mount slides 2½ inches below the top edge. Orient for backward pull-out (opens toward the rear) which is ideal for tight front space. Skip dividers or dowels because many users find them hard to use and ugly.
User Feedback: One builder removed dowel pegs after finding them impractical.
Optimize for Cleaning Supplies or Dog Food
Use chemical-resistant finish (polyurethane) for under-sink units. Reinforce the bottom with extra support for heavy dog food bins. Install full-extension slides so tall bottles are fully accessible.
Test, Adjust, and Finalize Installation
Even perfect measurements can lead to issues, so testing ensures smooth operation.
Perform Full Extension Check
Slide shelf fully out. Verify 100 percent access to the back. Load with real items and retest.
If the shelf does not extend fully, shorten depth by ½ inch or adjust slide position.
Fix Common Problems
Binding or sticking is fixed by re-leveling slides and ensuring same height on both sides. A wobbly shelf needs a center support or middle shim block. If doors will not close, attach a Polywall strip to the door interior. Squeaky slides respond to silicone spray lubrication, but avoid oil-based lubes.
Final Tip: Tighten all screws after the first few uses because wood can shift slightly.
Finish and Maintain Your Pull-Out Shelves
A little finishing elevates your DIY project from functional to professional.
Apply Protective Finish
Danish oil (medium walnut) enhances grain, is easy to apply, and is water-resistant. Polyurethane is the most durable option ideal for high-use areas. Paint matches modern kitchens, and semi-gloss provides wipeability.
Skip finishing the underside unless it is visible.
Maintain for Long Life
Clean with a damp cloth and avoid soaking. Lubricate slides every 6 to 12 months with silicone spray. Check screw tightness annually. Do not exceed weight limits because most slides support 75 to 100 pounds.
Warranty Note: Many ball-bearing slides come with a limited lifetime warranty. Register if possible.
Evaluate DIY vs. Pre-Made Options
While DIY saves money, pre-made units offer plug-and-play convenience.
Consider Commercial Pull-Outs If
You lack tools or woodworking skills. Cabinet dimensions are irregular. You want guaranteed fit and finish.
Top brands include Rev-A-Shelf for high-quality corner and blind cabinet units, and Shelves That Slide (Arizona-based) for custom sizes from 5 to 39 inches wide in 1/16 inch increments. Depths range from 11¾ to 31¾ inches. Materials include Baltic birch with KV or Wurth slides. They ship nationwide and require no remodel.
Cost: $85 to $104 per unit, much higher than DIY is $10 to $50 range.
Build a New Cabinet with Integrated Pull-Outs
For full kitchen upgrades, build a base cabinet from scratch.
Construct Cabinet Box
Cut ¾ inch plywood for two sides, one bottom, and three internal support strips. Cut toe kick notches (3½ inches high by 4½ inches deep) at front bottom corners. Assemble with pocket screws and glue. Clamp and square using a framing square.
Add Face Frame and Back Panel
Build the face frame from 1×2 lumber. Use a Kreg Micro Jig for clean pocket holes on thin stock. Attach with glue and screws. Staple ¼ inch back panel for stability.
Install Drawers and Finish
Mount 20-inch side-mount ball-bearing slides. Build drawer boxes from ¾ inch sides plus ¼ inch bottom. Test fit, adjust, then install. Attach toe kick cover strip (¾ inch plywood or 1×4). Fill holes, sand, caulk seams, then paint or stain.
Optional: Secure countertop through top support members.
Final Tips for Success
Building pull-out shelves is a high-impact upgrade that pays off in daily convenience.
Start simple by converting one shelf first to gain confidence before building boxes. Invest in quality slides using ball-bearing, full-extension models that last longer. Measure twice and cut once because precision prevents binding and misalignment. Build a slide jig because for multiple cabinets, a reusable frame ensures consistency. Use ¾ inch plywood because thinner material sags under load. Test with real items by loading the shelf before finalizing installation. Consider custom kits if DIY feels overwhelming because Shelves That Slide offers exact-fit solutions.
Frequently Asked Questions About Building Kitchen Cabinet Pull Out Shelves
How much does it cost to build DIY pull-out shelves?
DIY pull-out shelves cost approximately $10 to $50 per shelf, depending on materials. The biggest expense is drawer slides ($7 to $16 per pair). Reusing existing shelves reduces costs significantly.
What type of drawer slides are best for pull-out shelves?
Ball-bearing full-extension slides are best. They support 75 to 100+ pounds, extend completely, and provide smooth operation. Avoid cheap roller slides because they bind under load and wear out quickly.
How do you measure for pull-out shelf installation?
Measure interior width between side walls, interior depth from back wall to face frame edge, and interior height from floor to top if stacking shelves. Subtract 1 inch from width to account for slide thickness.
Can you add pull-out shelves to any cabinet?
Yes, both face-frame and frameless cabinets can accommodate pull-out shelves. Face-frame cabinets require spacer blocks to create a flush mounting surface. Frameless cabinets allow direct slide mounting.
How do you fix a pull-out shelf that binds or sticks?
Re-level the slides and ensure both sides are mounted at the same height. Check that the shelf is not too wide for the cabinet interior. Loosen screws slightly and adjust position if needed.
Key Takeaways for Building Kitchen Cabinet Pull Out Shelves
Building pull-out shelves transforms inaccessible cabinet space into fully usable storage. Start with the simple conversion method (reuse existing shelf plus $10 in slides) before attempting full box construction. Invest in quality ball-bearing slides because they determine smooth operation and longevity. Measure twice, cut once, and always test with real items before finalizing installation. Whether organizing pots, cleaning supplies, or pantry items, these DIY shelves eliminate wasted space and make your kitchen smarter and more efficient, all for under $50 per unit.





