
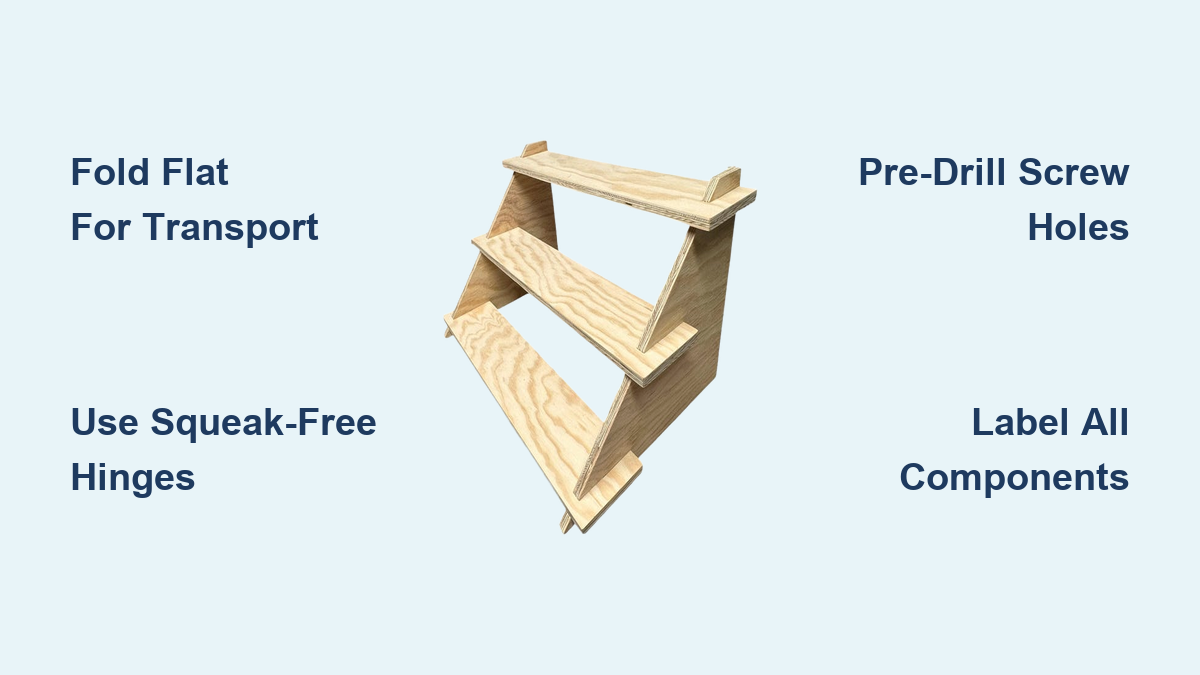
How to Make Collapsible Display Shelves
If you’re a vendor at craft fairs, farmers markets, or pop-up shops, you know the struggle: setting up a professional-looking display quickly, without hauling around bulky, heavy shelving. The solution is collapsible display shelves that are lightweight, portable, and easy to assemble, yet sturdy enough to showcase your products with flair. Whether you’re selling candles, jewelry, or handmade soaps, these shelves elevate your merchandise and improve visibility. Best of all, you can build them yourself using basic tools and affordable materials. In this guide, you’ll learn two proven methods, including exact cut lists, hinge specs, finishing tips, and real-world performance insights so you can create a display that’s durable, brand-aligned, and ready in minutes.
Choose Your Design Method
Frame-Based vs Modular Build
Two main approaches dominate DIY collapsible shelving: the pine frame method and the modular step-shelf method. Your choice depends on portability needs, load capacity, and build skill.
The pine frame method uses 1×4 and 1×10 pine boards to create hinged, L-shaped side frames that fold flat. Shelves slide in after setup. It’s sturdier, supports heavier loads (20–30 lbs per shelf), and is ideal for frequent reuse at weekly markets.
The modular MDF method breaks down completely into flat pieces. It uses Tetris-style plywood bases and MDF shelves joined with wooden battens. Lightweight and ultra-compact, it’s perfect for micro-businesses with limited storage.
Match Design to Use Case
Ask yourself three questions before building: How often will you use it? How much do you need to carry? What products will you display?
For heavy merchandise like bottles or ceramics, go with the frame-based pine design. Its rigid structure resists wobbling and supports substantial weight.
For lightweight items like stationery or jewelry and tight transport space, the modular MDF version wins. It fits in a tote bag and reassembles in under 10 minutes.
Both are beginner-friendly, but the pine method requires a stapler and hinges while the modular version relies on glue and precise cutting.
Build the Pine Frame Shelving Unit

Cut and Prepare All Lumber
Start by cutting all components at once to ensure consistency. Use a miter or circular saw to cut eight pieces of 1×4 pine to 72 inches for frame sides, 16 pieces of 1×4 pine to 17 inches for shelf supports, and four pieces of 1×10 pine to 72 inches for shelves.
Sand every piece including edges, faces, and ends to prevent splinters and ensure a smooth finish. If painting or staining, do it now before assembly.
Label each frame set (e.g., “Left Side,” “Right Side”) to avoid confusion during hinge installation. Pre-finishing now saves time and avoids paint drips on joints later.
Mark Shelf Support Positions
Precision matters when marking where supports attach. On the inner face of each 72-inch 1×4, measure and mark from the bottom at 0 inches (bottom shelf), 26 inches, 50 inches, and 66 inches.
Use a framing square to draw clean, perpendicular lines across the board. These guide your stapler and ensure shelves sit level.
Repeat for all four frame assemblies (two per folding half). Double-check spacing because misaligned supports cause wobbling or uneven shelves.
Assemble the Frame Units
Lay two 72-inch boards parallel, spaced 10 inches apart (just wide enough to fit a 1×10 shelf). Dry-fit the 17-inch supports at each marked height, ensuring they sit flush with the outer edges of the verticals.
Secure with 1¼-inch staples using a crown stapler. Apply 4–5 staples per support with one staple near each end. Avoid stapling where hinges will go.
Repeat to build four identical frames (two per side). These pair up with hinges to form the folding structure.
No stapler? Use 1¼-inch brad nails or wood screws instead. Screws add strength but take longer to install.
Install Heavy-Duty Hinges

This is the critical step that makes the shelf collapsible. Position two frame units side-by-side with a 1/8-inch gap between them. This gap allows smooth folding.
Align 3-inch squeak-free door hinges at the top and bottom. Center the hinge pin in the gap.
Attach with 1-inch wood screws (2 per hinge). Skip screw holes if they hit staples.
Test the fold before tightening all screws. The unit should open and close smoothly without binding.
Use matte black hinges because they’re stronger than standard butt hinges and resist rust. Avoid lightweight hinges that fail under repeated use.
Construct the Modular Step-Shelf Unit
Cut and Shape the Step Pieces
This design uses nesting plywood “steps” that create tiered levels. Cut three 30 cm × 30 cm (12″ × 12″) squares from ½-inch plywood.
With a jigsaw, remove a 10 cm × 10 cm (4″ × 4″) square from the bottom-right corner of each. The result is a stepped “L” shape.
Label them as follows: Bottom (all three squares intact after corner removal), Middle (two squares), and Top (one square). These stack in a pyramid with the largest at the base and smallest on top.
Save offcuts because they can reinforce joints or become shelf stops.
Prepare MDF Shelves and Battens
Cut three MDF strips to match shelf width and 10 cm (4″) deep. Use 9 mm MDF for light items and upgrade to 12–18 mm for heavier loads.
Sand all edges smooth because MDF splinters easily.
Now cut wooden battens from scrap wood: approximately 1 cm thick × 10 cm wide, with length matching shelf width.
You’ll need 2–3 battens per shelf (one at each end, plus a center support for spans over 24 inches). Battens act as sliding joiners that glue to the shelf and slide into slots under the step pieces.
Glue Battens to Shelves
Apply PVA wood glue to the edge of the MDF shelf using a brush or cocktail stick. Position the batten flush with the shelf edge and clamp lightly or hold by hand.
Glue one side at a time. Let the first side set partially before attaching the step piece.
Label shelves clearly (Top, Middle, Bottom). Do not glue battens to the step pieces because this allows disassembly. The batten sticks to the shelf while the step slides on and off.
On sunny days, glue sets faster. Work in shade or indoors to control cure time.
Assemble and Deploy Your Shelves
Set Up the Frame-Based Unit
Unfold both hinged halves into “L” shapes. Place them side-by-side, 72 inches apart.
Slide in the 1×10 shelf boards one by one. They rest on the 17-inch supports.
Check that each shelf sits level and is fully supported at both ends. No tools are needed—just slide, align, and load.
When done, fold the frames together. The unit collapses to 4–5 inches thick, fitting in an SUV or hatchback. Shelves store separately or alongside the frame.
Assemble the Modular Step-Shelf
Place the bottom step piece flat-side down. Slide the bottom shelf onto the battens. Set the middle step on top, aligning the corner. Add the middle shelf. Finish with the top step and shelf.
The result is a compact, tiered display with built-in depth.
Disassemble by reversing the steps. Everything breaks down flat.
For quick reassembly, color-code battens or use numbered labels. Store in a tote with padding to prevent chipping.
Select the Right Hinges and Fasteners
Use Squeak-Free Door Hinges
Not all hinges are created equal for folding shelves. Three-inch squeak-free door hinges are essential because they’re made of heavy-duty steel, resist wear, and fold smoothly without binding.
Available at Harbor Freight or hardware stores, they cost under $3 each.
Avoid lightweight butt hinges because they bend under stress and fail after a few uses.
Install one hinge at the top and one at the bottom of each frame joint. Center the hinge pin in the 1/8-inch gap for clean folding.
Secure with Proper Screws
Use 1-inch wood screws to attach hinges. Pre-drill pilot holes if working near board ends to prevent splitting.
Tighten firmly but do not over-torque because this can strip the wood.
Check screws after 2–3 uses and retighten as needed. For high-traffic use, add a drop of thread-locking adhesive to prevent loosening.
Never rely on nails or staples for hinge attachment because they pull out under repeated stress.
Optimize Shelf Layout and Product Display
Group Items by Category
Use zoning to guide customer attention. Group products by type (e.g., candles, soaps), by color (rainbow order), or by price (budget to premium). This reduces decision fatigue and encourages browsing.
Leave breathing room between items. Do not overcrowd. A clean, organized shelf looks more professional and invites touch.
Position Focal Items at Eye Level
Place your best sellers or new arrivals between 50–66 inches from the floor. This is natural eye level for most customers.
Use tiered shelves to elevate small items like jewelry. Add risers or small boxes under tiny products to bring them forward.
Avoid cluttering the top shelf. Keep it simple for visual balance.
Use Lighting and Branding
Install battery-powered LED strips under shelves for subtle glow. Add vinyl decals with your logo or brand colors. Drape fabric over the back or sides for a polished look. Use clear signage for pricing and product info (no handwritten tags).
These touches transform a simple shelf into a branded retail experience.
Finish and Customize Your Shelves
Choose a Protective Finish
Unfinished wood looks rustic but wears fast. Apply one of these options: Paint (matches brand colors, ideal for MDF), Stain (enhances pine grain, gives artisanal feel), Clear polyurethane (protects without changing color), or Raw (for eco-minimalist look, only if using sealed MDF).
Paint or stain before assembly. Mask batten joints with tape to avoid glue contamination. Sand lightly between coats for a smooth finish.
Prevent Paint Buildup on Joints
Critical tip: Leave batten contact areas unpainted in the modular design. Paint or glue in these zones prevents smooth sliding.
Mask off the last 1–2 cm of the shelf edge before painting. For hinged frames, avoid paint on hinge pins and wipe clean if needed.
This ensures reliable assembly and disassembly over dozens of uses.
Add Decor Without Clutter
Use minimal greenery (a small faux plant adds life without blocking views). Avoid hanging decor that sways or distracts. Use felt pads on the bottom to protect floors and prevent slipping.
Color-code shelf levels for product organization (e.g., blue for candles, green for soaps). These small details boost professionalism and usability.
Transport, Store, and Maintain
Pack for Easy Transport
Frame-based units fold flat. Store in a padded bag or blanket wrap. Modular sets fit in a labeled tote with compartments.
Use bubble wrap on corners to prevent chipping. Keep shelves and frames together (do not lose small parts). Label components (Top, Middle, Bottom) for fast setup.
Store in Dry Conditions
Moisture warps MDF and swells plywood. Store in a climate-controlled space (not a garage or shed).
Lay components flat to prevent bowing. Avoid stacking heavy items on top. For long-term storage, place silica gel packets in the tote to absorb humidity.
Maintain for Longevity
After each event, wipe down with a damp cloth. Inspect hinges for loose screws and retighten any that have vibrated loose. Check shelves for cracks or sagging.
Reapply finish if paint chips or wood fades. Sand and repaint MDF if edges begin to flake. With care, both designs last 12+ events or more.
Compare Both Methods Side-by-Side

Frame-Based Strength and Stability
The frame-based method delivers 20–30 lbs load capacity per shelf with high durability that survives weekly use. Setup takes 5–10 minutes with practice. This design works best for heavy products and frequent vendors.
Use this if you need a workhorse shelf that stays solid under load.
Modular Portability and Compactness
The modular method offers lightweight construction that’s easy to carry and breaks down flat to fit in small cars. Setup time is 5–10 minutes with no tools required. This design works best for pop-ups, micro-businesses, and tight spaces.
Choose this for ultra-portability and quick breakdown.
Key Takeaways for Building Collapsible Display Shelves
Collapsible display shelves are a game-changer for mobile sellers. The pine frame method offers strength and reliability while the modular MDF version delivers unmatched portability. Both are affordable, customizable, and buildable with basic tools. By selecting the right design, using durable hinges, and applying a professional finish, you create a display that boosts visibility, speeds setup, and strengthens your brand every time you unfold it. Start with the method that matches your specific needs, invest in quality 3-inch squeak-free hinges, and maintain your shelves after each event for years of reliable service.
Frequently Asked Questions About Collapsible Display Shelves
How much weight can a pine frame shelving unit support?
A properly built pine frame unit supports 20–30 lbs per shelf when the 1×10 shelves are secured to 1×4 braces at the recommended intervals. The modular MDF version supports 5–10 lbs per shelf using 9 mm material, but upgrading to 12–18 mm MDF increases capacity.
What tools do I need to build collapsible display shelves?
For the pine frame method, you need a miter or circular saw, crown stapler, drill, framing square, and sander. The modular method requires a jigsaw, clamps, sanders, and basic hand tools. Both methods are beginner-friendly with no advanced joinery required.
How long does it take to set up collapsible display shelves?
With practice, the frame-based unit sets up in 5–10 minutes. The modular step-shelf assembles in 5–10 minutes as well. Initial build time is longer (several hours) but subsequent deployments are fast.
Can I customize the dimensions of my display shelves?
Yes. The pine frame method is highly customizable. You can shorten the 72-inch height, adjust shelf spacing, or modify depth. The modular method scales easily by changing the 30 cm base square size.
How do I prevent my shelves from wobbling during use?
Ensure shelf supports are flush with frame edges and secured with adequate staples or screws. The 1/8-inch hinge gap must be consistent. Check that all screws remain tight and consider adding a center support for spans over 24 inches.
What’s the best way to transport collapsible shelves?
The frame-based unit folds flat (4–5 inches thick) and fits in a vehicle with shelves removed. Wrap in a padded blanket or storage bag. Modular pieces fit in a labeled tote with bubble wrap on corners. Keep components organized and labeled for fast reassembly.





