
How to Make Reclaimed Wood Floating Shelves
Imagine transforming weathered barn wood or salvaged hotel railings into sleek, modern floating shelves that anchor your living room, kitchen, or office. Reclaimed wood floating shelves blend eco-conscious design with rugged charm, and each board carries a history of dents, nail holes, and grain variations that no new lumber can replicate. Whether you’re drawn to farmhouse warmth or minimalist elegance, making your own shelves lets you control the size, finish, and strength of a piece that’s both functional and artistic.
This guide walks you step by step through sourcing, preparing, building, and installing durable reclaimed wood floating shelves using proven DIY methods. You’ll learn how to hide hardware for a clean look, reinforce weak spots, and mount securely, even on tile. With the right tools and attention to detail, you can create custom storage that supports up to 40 lbs per stud and becomes a centerpiece in any room.
Source Quality Reclaimed Lumber
Choose the Right Wood Species
Selecting the best reclaimed wood starts with identifying durable hardwoods like white oak, walnut, maple, ash, cherry, or mahogany. These species withstand wear, resist warping, and develop rich patinas over time. White oak and walnut are especially prized for their density and striking grain patterns. Avoid softwoods like pine unless they’re thick and stable, as many lack the strength needed for wall-mounted shelves.
Look for wood salvaged from barns, staircases, floorboards, or old industrial buildings. These sources often yield long, solid planks with character. One builder repurposed dark-stained railings from a hotel renovation, turning them into dining room shelves with industrial charm.
Find Local Reclaimed Wood
You don’t need to demolish a barn yourself. Many cities have salvage yards, architectural reclamation centers, or antique malls where reclaimed lumber is sorted and sold. Check online marketplaces like Craigslist or Facebook Marketplace for local contractors clearing renovation sites. Some homeowners even give away old wood for free.
Avoid wood showing signs of mold, insect damage, or structural rot. Small cracks and nail holes are desirable because they add visual interest.
Prepare the Wood Safely
Inspect and Repair Damaged Boards
Start by laying out your reclaimed plank and inspecting for major splits, insect tunnels, or soft spots. Minor imperfections enhance character, but large cracks compromise safety. For splits, follow these steps:
- Apply wood glue deep into the crack.
- Clamp tightly across the grain.
- Let cure for at least 12 hours before sanding smooth.
Save scrap pieces for testing finishes or reinforcing joints later.
Sand Off Old Finish Safely
Use a belt sander to strip paint, varnish, or grime. This step takes time, about 1.5 hours per 6-foot board, and generates significant dust, especially if the wood was painted decades ago.
Wear a respirator, goggles, and gloves. Older paint may contain lead, so proper protection is essential. Sand with progressively finer grits, starting at 60 and finishing at 120, until the natural grain emerges. Wipe clean with a dry cloth between passes. Use a detail sander for corners or textured areas.
Cut to Final Shelf Dimensions
Measure your wall space and decide on shelf length and depth. Common widths range from 10″ to 22″, depths from 6″ to 12″, and thicknesses between 1.75″ and 2″ for solid support.
Cut using a circular saw, miter saw, or table saw, ensuring ends are square. Mark your cut lines clearly and support the wood fully to prevent splintering. After cutting, check edges for warping or cupping. Reject any piece that curves significantly.
Choose a Floating Mounting System

Hidden Steel Tube Method
For a seamless, modern floating look, embed ½” × 1″ rectangular steel tubes into the shelf back. Follow these steps:
- Drill three evenly spaced holes in each steel tube.
- Mount tubes vertically to wall studs using screws.
- Use a router with a ½” bit to carve a channel along the back edge of the shelf. The depth should equal the tube thickness, and the width should match the tube height.
- Stop routing ½ inch from the front edge so the face remains solid.
- Slide the shelf onto the tubes. The hardware disappears completely.
This method works best for kitchens, offices, or minimalist interiors where clean lines matter.
Bracket Insert System
A simpler alternative uses L-shaped brackets with vertical posts. Follow these steps:
- Drill upward-facing holes in the bottom of the shelf, matching the bracket post diameter.
- Attach brackets to the wall using screws and wall plugs. Wall plugs are essential for tile or drywall.
- Place painter’s tape over tile to prevent drill bit slippage.
- Use a carbide or diamond-tipped tile bit to drill slowly and avoid cracking.
- Lower the shelf onto the posts until it seats fully.
This method works best for DIYers who want hidden hardware without complex routing.
Custom Wooden Brackets
Build L-shaped supports from 2×2 reclaimed lumber for a rustic, visible design. Follow these steps:
- Cut vertical and horizontal legs. The height should be slightly less than shelf depth, such as 9.5″ for a 10″ shelf.
- Add a diagonal brace to form a triangle. This prevents sagging.
- Secure brackets to wall studs with 3″ screws.
- Set shelf on top and optionally screw up through the bracket into the shelf underside.
This method works best for farmhouse, industrial, or cabin-style rooms where brackets are part of the décor. Use 2 to 3 brackets per shelf, and for 6-foot spans, use 3 to 6 supports to prevent bowing.
Finish for Beauty and Protection
Test Finishes on Scrap Wood
Never apply finish blind. Use offcuts to test different options. Tung oil warms the grain and provides a natural look without needing stain. Poly-acrylic offers durability with a slightly glossy, scratch-resistant surface. Wax provides a soft sheen with minimal color change.
One builder preferred Tung oil because it deepened the wood tone without masking its history. Apply with an old T-shirt, rubbing in circular motions. Let each coat dry fully, 12 hours is ideal, before adding the next. Work in a ventilated area and wear gloves.
Preserve Character, Not Flaws
Keep nail holes, saw marks, and paint flecks if they add charm. But seal all surfaces, especially the back and ends, to prevent moisture warping. Tung oil soaks in, while poly-acrylic forms a protective shell.
Re-oil every 1 to 2 years to maintain luster and protection.
Install Shelves Securely
Locate Studs and Mark Positions
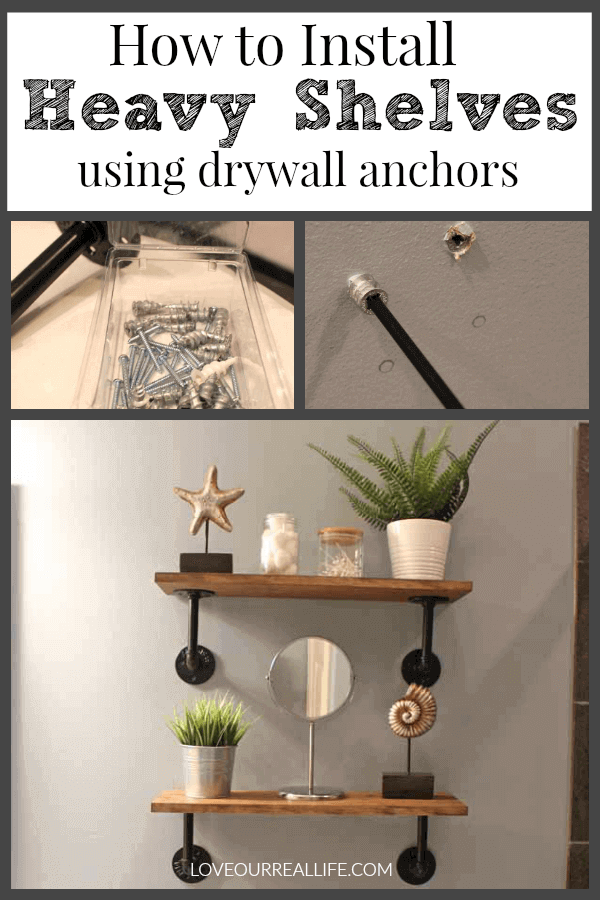
Use a stud finder to identify wall framing. Mark stud centers with pencil or tape. For floating shelves, mounting into studs is critical because each connection can support up to 40 lbs.
If studs don’t align with your design, use toggle bolts or heavy-duty anchors rated for your shelf’s expected load.
Drill Pilot Holes and Set Anchors
For tile walls, apply painter’s tape over the drill point. Use a tile-specific bit and drill slowly with light pressure. Insert wall plugs before screwing in brackets.
For drywall or stud mounting, drill pilot holes slightly smaller than screw diameter. Drive screws firmly into studs or anchors. Screws should sit flush, not sinking too deep or protruding.
Level and Attach the Shelf
Use a laser level or bubble level to ensure brackets are perfectly horizontal. Double-check spacing for multiple shelves.
Once supports are set, slide the shelf onto steel tubes or bracket posts. Confirm it sits flush and level. Gently press down to ensure full seating. Optionally, secure from below with small screws hidden by the shelf edge.
Style and Maintain Your Shelves
Decorate with Balance and Flow
Style with a mix of function and beauty. Vary heights by stacking books vertically, adding a tall vase, then a small plant. Mix materials including wood, ceramic, metal, and glass. Leave intentional negative space and don’t overcrowd. Let the wood’s texture shine.
Rotate seasonal décor to keep the display fresh. Swap in pumpkins in fall and greenery in winter.
Clean and Inspect Regularly
Dust weekly with a soft, dry cloth. Avoid wet wipes or harsh cleaners that strip finishes.
Every few months, check screws and brackets for looseness. Tighten any hardware. Reapply oil if the wood looks dry. Never use ammonia, bleach, or abrasive pads.
Optimize Size and Strength
Match Shelf Size to Use Case
Different rooms call for different dimensions. For kitchens, aim for 10 to 12 inches deep and 24 to 48 inches long. Bathrooms work well with 6 to 8 inches deep and 12 to 24 inches long. Living rooms suit 10 to 12 inches deep and 36 to 72 inches long. Offices need 8 to 10 inches deep and 24 to 48 inches long.
Longer shelves over 48 inches need at least three supports to prevent sagging. For spans over 6 feet, use 4 to 6 brackets.
Maximize Load Capacity
Strength depends on wood thickness, support spacing, and mounting method. Wood thickness of 1.75″ or 2″ is ideal. Support spacing should be no more than 16 to 24 inches apart. Stud-mounted connections outperform anchor-mounted ones.
A 36″ shelf with two stud mounts can hold approximately 80 lbs if weight is evenly distributed.
Customize for Your Space
Match Finish to Room Style
Natural wood with a clear coat suits modern and Scandinavian spaces. Dark stain with steel supports creates an industrial look. Painted walls behind the shelf, such as Antique White, provide farmhouse contrast. Visible wooden brackets add rustic charm.
One builder painted brackets to match the wall, making them nearly invisible.
Build Mixed-Hardwood Shelves
Combine different reclaimed species in one shelf for dynamic texture. Join pieces with biscuits or splines, then sand and finish uniformly. This approach works best for accent walls or living rooms where visual interest matters.
Key Takeaways for Making Reclaimed Wood Floating Shelves
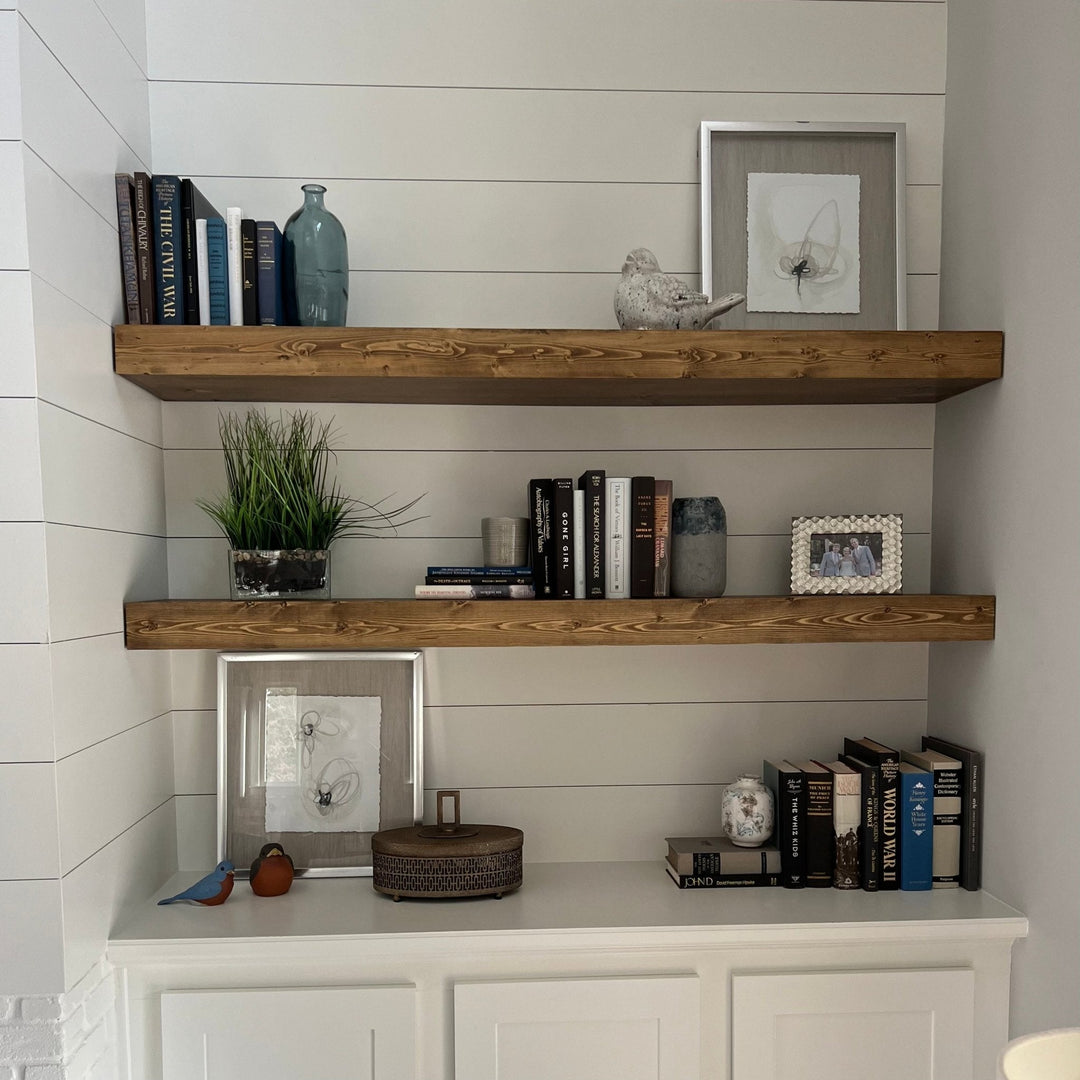
Reclaimed wood floating shelves are more than storage. They are stories in wood. With careful prep, smart mounting, and a finish that honors the grain, your DIY shelves will last for years while reducing waste and adding soul to your space.
The key is precision, patience, and pride in repurposing the past. Whether you’re mounting in a kitchen, bathroom, or entryway, choose durable hardwoods, test your finish before committing, and always mount into studs for maximum strength. If you come across discarded lumber, take it home. You never know when you might need it.
Frequently Asked Questions About Reclaimed Wood Floating Shelves
Are reclaimed wood floating shelves strong enough?
Yes. When installed into wall studs or with proper anchors, solid reclaimed wood shelves can safely hold books, kitchenware, décor, and electronics. Load capacity depends on wood thickness and species, number and quality of supports, and wall type and installation method.
How do you decorate reclaimed wood shelves?
Mix functional and decorative items such as books, plants, ceramics, and framed photos. Vary object heights for visual interest. Leave intentional negative space to emphasize wood texture, and rotate seasonal décor throughout the year.
What’s the difference between floating and standard shelves?
Floating shelves have hidden hardware for a minimalist, seamless aesthetic. Standard shelves use visible brackets for a more traditional, structural look. Floating installation is more complex but creates a cleaner appearance.
Can you install reclaimed shelves on tile?
Yes. Use a tile-specific drill bit, painter’s tape to prevent slipping, and wall plugs for secure fastening. Drill slowly with light pressure to avoid cracking the tile.
Do all shelves need to hit studs?
Ideally yes. For longer or heavier shelves, at least two supports should anchor into studs. For drywall-only mounting, use toggle bolts or heavy-duty anchors rated for the expected load.





