
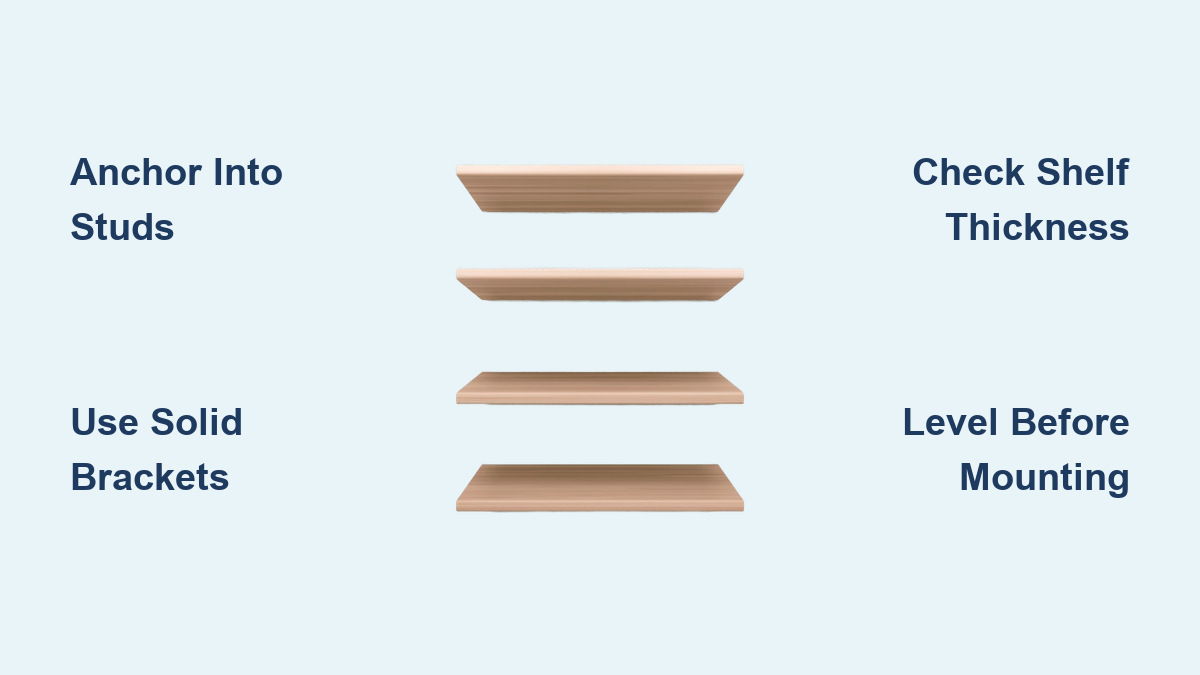
How Floating Shelves Work: Hidden Support Explained
You’re staring at a sleek wooden shelf mounted on the wall, seemingly defying gravity. No brackets. No visible supports. It just… floats. But how do floating shelves work, really? The secret isn’t magic—it is mechanics. Hidden behind that minimalist design is a carefully engineered system that transfers weight into your wall’s structure, creating the illusion of levitation while safely holding books, decor, or even a TV.
Floating shelves rely on concealed support brackets anchored directly into wall studs. These brackets—made of solid steel and precisely installed—carry the load from the shelf and its contents, channeling it into the building’s frame. Without this structural connection, the shelf would collapse. Drywall alone cannot support weight; the real strength comes from screws driven into solid wood studs or added blocking between them.
In this guide, you will learn exactly how floating shelves stay up, how much weight they can hold, the best materials and brackets to use, and critical installation tips that prevent sagging or failure. Whether you are installing one shelf or designing a full wall display, this breakdown ensures your setup is safe, strong, and stunning.
The Hidden Support System Behind Floating Shelves
Floating shelves do not actually float—they are held up by concealed brackets mounted inside or behind the shelf. These brackets are invisible once installed, creating the clean, modern look everyone loves. The shelf slides over or locks onto the bracket, which is securely fastened to the wall’s structural frame.
There are no external arms or L-brackets. Instead, the support is built into the design: a steel rod, flat ledge, or flush plate hidden within a routed channel in the back of the shelf. When installed correctly, only the wood is visible, giving the illusion of a shelf suspended in midair.
How Weight Travels From Shelf to Wall
The stability of a floating shelf depends on a clear load path—the route weight takes from the shelf to the wall and into the building’s structure.
- Weight on shelf (books, decor, etc.) pushes downward.
- Shelf material transfers the load to the hidden bracket.
- Bracket channels force into the wall via screws.
- Screws anchor into wall studs or blocking, distributing weight safely.
If any part of this chain fails, like using drywall anchors instead of hitting studs, the shelf can pull out, sag, or collapse. That is why studs are non-negotiable for anything beyond very light loads.
Why Drywall Cannot Hold Weight
Drywall is made of gypsum sandwiched between paper layers. It is designed to cover walls, not support weight. Even heavy-duty drywall anchors can fail under prolonged stress, especially with leverage from deep shelves.
A 50-pound shelf mounted only into drywall may seem stable at first, but over time, vibrations, shifting loads, or humidity can cause the anchors to loosen. The result is a sudden drop and damaged walls.
For real strength, every critical screw must go into a stud or blocking, solid wood that connects directly to the home’s frame.
Bracket Types That Make Floating Shelves Work
Rod Brackets for Sleek, Simple Installations
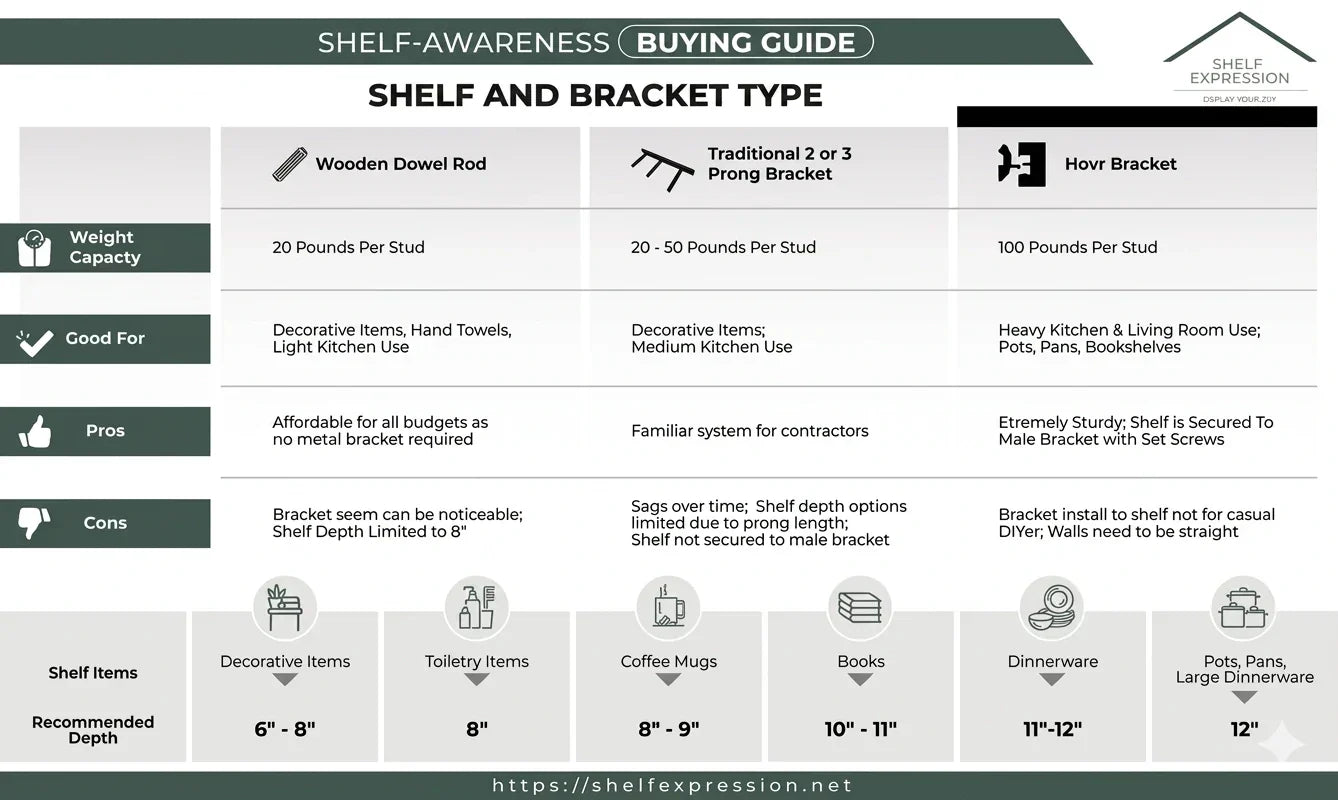
Rod brackets use a wall-mounted plate with one or more steel rods (¼ inch to ⅜ inch thick) that extend outward. The shelf has a routed hole or pocket to slide over the rod.
• Best for shallow shelves up to 10 inches with light to medium loads
• Pros: Fully concealed, easy to install
• Cons: Less support for deep or heavy shelves
Use set screws from underneath to lock the shelf in place and prevent accidental sliding.
Low-Profile Brackets for Heavy Loads
These are flat steel ledges mounted horizontally to the wall. The shelf rests on top, often with a routed channel that fits snugly over the bracket.
• Best for deeper shelves between 10 and 14 inches with heavier loads
• Pros: More surface contact means better weight distribution
• Cons: Slight gap may be visible under the shelf
Low-profile brackets handle daily use without sagging, provided they are installed into studs.
Flush-Mount Brackets for Seamless Stability
Flush-mount systems use a steel plate mounted flush to the wall. The shelf has a precision-cut pocket that locks onto the plate, creating a gap-free, wobble-free fit.
• Best for high-end displays, media shelves, and TV mounts
• Pros: Maximum stability, no visible gap
• Cons: Requires exact milling and higher cost
This type resists tipping and lateral movement, making it ideal for heavy or frequently used shelves.
Specialty Brackets for Heavy-Duty Applications
Some shelves go beyond decor, holding TVs, desktops, or full cookware sets. For these, standard brackets will not work.
• Xtra Duty (XD) Brackets: Support shelves up to 17 inches deep, ideal for heavy storage
• Yuri Floating Desk Bracket: Handles depths up to 24 inches, perfect for floating desks or countertops
• Drake Countertop Bracket: Engineered for structural support of solid surfaces
These systems use thicker steel, multiple attachment points, and are designed for maximum load capacity with minimal visibility.
Finding and Hitting Wall Studs
Studs are the foundation of shelf strength. In most homes, they are made of 2×4 or 2×6 lumber, spaced 16 or 24 inches apart. Floating shelves must be anchored into at least two studs for safety.
Use a stud finder to locate them. If you do not have one, try these alternatives:
• Knock test: Tap the wall. Studs sound denser than the hollow spaces between them.
• Check outlets: Electrical boxes are usually attached to studs.
• Measure from corner: First stud is typically 16 inches from an exterior wall.
Mark each stud’s center with a pencil before mounting your bracket.
Why Every Hole Should Hit Wood
Here is a pro secret: every screw hole in your bracket should go into solid wood, not just the ones that line up with studs.
If your bracket spans three studs but only two holes align, do not leave the third hole floating. Instead, drill through the bracket’s backbar, install blocking (horizontal wood pieces) between studs behind the wall, and screw every hole into solid wood.
This method, called full blocking, dramatically increases strength and is the gold standard for heavy or long shelves.
Leveling on Uneven Walls
Most walls are not perfectly flat. If you mount the bracket directly to an uneven surface, the shelf will tilt.
Fix this by placing wood shims between the bracket and wall, leveling the bracket before tightening screws, and trimming excess shim with a utility knife.
Never shim between the shelf and bracket. This creates instability. Always shim at the wall connection.
Shelf Materials That Will Not Sag
Best Woods for Strength and Style
Not all wood is created equal. For floating shelves, you need solid hardwood that resists warping and holds weight.
• Walnut: Dense, rich grain, perfect for living rooms
• White Oak: Strong and moisture-resistant, great for kitchens
• Maple: Hard and light-colored, ideal for high-traffic areas
• Reclaimed Wood: Unique look with solid core, best for rustic styles
Avoid particleboard or MDF. These engineered materials can sag under load and do not hold screws well over time.
Minimum Thickness for Stability
Thicker shelves resist bending and distribute weight better.
| Bracket Type | Minimum Shelf Thickness |
|---|---|
| Light Duty | 1.25 inches |
| Medium/Heavy Duty | 1.5 to 2 inches |
A 1.25-inch thickness is the bare minimum. For shelves over 12 inches deep or holding books, go 1.75 inches or thicker.
How Milled Channels Hide the Hardware
The back of the shelf is routed (milled) to fit the bracket like a glove. This pocket hides the hardware completely.
After installation, only the back edge of the shelf is visible, maintaining the floating illusion. Precision milling ensures a tight fit, reducing wobble and stress on fasteners.
How Much Weight Can Floating Shelves Hold

A common rule is 45 to 50 pounds per stud. So a shelf anchored into two studs can safely hold 90 to 100 pounds, but only if the bracket is rated for the depth, the shelf is thick enough, and the screws are in solid wood.
Deeper shelves reduce capacity due to leverage. A 14-inch shelf with 50 pounds creates more torque than a 10-inch shelf with the same weight.
Factors That Affect Strength
| Factor | Impact on Capacity |
|---|---|
| Number of Studs | More studs equal more support |
| Bracket Quality | Solid steel outperforms thin metal |
| Shelf Depth | Deeper means more stress |
| Material Thickness | Thicker means less sag |
| Installation Method | Blocking is strongest, then studs, then drywall anchors |
Never exceed the manufacturer’s weight rating. Overloading leads to failure.
Preventing Sag and Failure
Sagging is the number one complaint with floating shelves, and it is preventable.
Common causes include: shelf too thin or too deep, not enough stud attachments, poor bracket quality, and uneven wall or misaligned installation.
Solutions: Use thicker wood (1.75 inches or more), install into three or more studs or add blocking, choose heavy-duty brackets, and shim the bracket, not the shelf.
High-quality systems like Aksel or Shelfology are designed to resist sagging for years.
Room-by-Room Installation Tips
Kitchen: Functional and Stylish
• Depth: 10 to 12 inches, fits plates and mugs
• Height: 18 to 24 inches above countertop
• Spacing: 12 to 15 inches between shelves
• Material: Sealed hardwood, resists grease and moisture
• Avoid: Mounting directly over cooktops
Use for daily dishes, spices, or coffee essentials. Keep heavy items centered over studs.
Bathroom: Moisture-Resistant Storage
• Depth: 6 to 8 inches
• Height: 24 inches or more above toilet, 12 inches or more above sink
• Material: Properly sealed wood or moisture-resistant finish
• Use: Towels, candles, small baskets
Humidity is the enemy. Wipe spills quickly and avoid excessive moisture.
Living Room: Display with Impact
• Depth: 6 to 10 inches
• Height: 10 to 12 inches above couch, 4 to 5 feet for focal points
• Styling Tip: Fill 70 percent of space, group items in threes, vary heights
Ideal for books, photos, and decor. Use symmetry for balance or offset layouts for visual interest.
Home Office: Smart and Organized
• Depth: 6 to 8 inches, enough for books
• Height: 12 to 18 inches above desk, 4 feet from floor when seated
• Use: Reference materials, plants, small decor
Keeps essentials within reach without cluttering the desk.
Design Layouts That Maximize Impact
Symmetry Stack
Three or more shelves aligned vertically and horizontally create order and balance. Center on a focal point like a TV, sink, or artwork. Space them 12 to 16 inches apart.
This layout is perfect for kitchens and bathrooms.
Offset Gallery
Shelves staggered in height and position add movement and interest. This works great for art, plants, and books.
Offset by one-third of shelf length, and keep heavier items low for stability.
Corner Cascade
Shelves wrap around a corner to maximize unused space. Anchor each run into separate studs, and use light wood to keep the area bright.
This is great for small rooms or awkward corners.
Pro Tip: Use painter’s tape to mock up shelf placement. Live with it for 24 hours before drilling.
Maintenance for Long-Term Success
Monthly Checkups
Even the best-installed shelves need care.
• Check for wobble and tighten set screws or wall screws
• Balance weight by moving heavy items over stud locations
• Verify level and re-shim if needed
A quick monthly inspection prevents long-term issues.
Cleaning by Finish Type
| Finish Type | Care Instructions |
|---|---|
| Whitewash / Light Stains | Water-based cleaners, touch up with matte topcoat |
| Natural Oil / Hardwax | Light re-oiling as needed |
| Dark Tones (Walnut) | Dry microfiber cloth, avoid oil polishes |
| Reclaimed Wood | Dust gently, vacuum cracks |
Avoid abrasives, ammonia, or soaking with water.
Frequently Asked Questions About Floating Shelves
Do floating shelves need studs?
Yes. Studs are the only reliable support. Drywall anchors alone are unsafe for anything beyond very light decor.
Can I install floating shelves without studs?
Only for shallow, lightweight shelves. Use all drywall anchors, but expect limited strength. This is not recommended for books or TVs.
Can I use Command Strips for floating shelves?
No. Command Strips are for pictures and signs only. They will fail under shelf weight.
How much weight can a floating shelf hold?
Forty-five to 50 pounds per stud. A two-stud shelf holds approximately 90 to 100 pounds. Deeper shelves hold less due to leverage.
Can floating shelves hold books?
Yes, if installed into studs, the shelf is at least 1.5 inches thick, and the bracket is heavy-duty rated. Use HD or XD brackets for bookshelves.
Can I put a TV on a floating shelf?
Yes, if the shelf is at least 12 inches deep, the bracket is TV-rated, and it is mounted into multiple studs or blocking. Consider Yuri or Drake brackets for large TVs.
Why is my floating shelf sagging?
Common causes include uneven wall (shim behind the bracket), bracket installed upside down (rods must face up), and not enough stud attachments. Fix with thicker wood, better brackets, or blocking.
How deep should floating shelves be?
Kitchen shelves should be 10 to 12 inches. Living room shelves work best at 6 to 10 inches. Bathroom shelves need 6 to 8 inches. Desks and TV stands require 14 to 24 inches with specialty brackets.
Key Takeaways for Installing Floating Shelves
Floating shelves are more than decor. They are engineered storage systems that require proper installation to work safely and effectively.
Always anchor into studs, use blocking when possible for maximum strength, choose solid hardwood over particleboard, and match bracket type to shelf depth and load requirements. Install with precision using a level and proper tools, distribute weight wisely by placing heavy items over studs, and maintain regularly by checking for wobble and tightening hardware.
When installed into studs with quality materials and the right bracket, floating shelves are strong, safe, and stunning. Follow these guidelines, and your shelves will float without failing.





