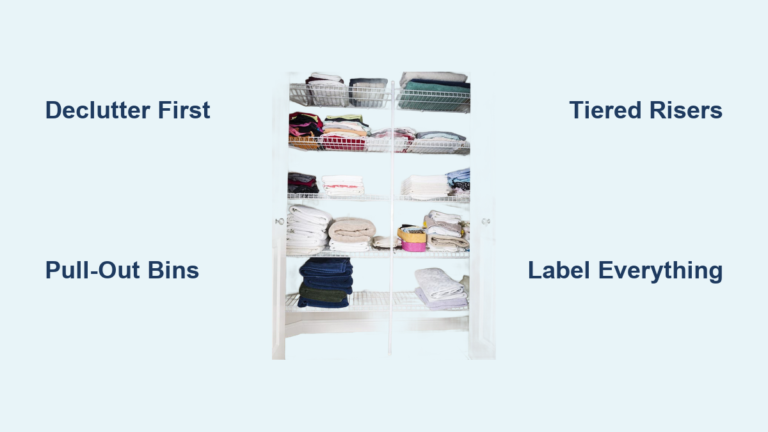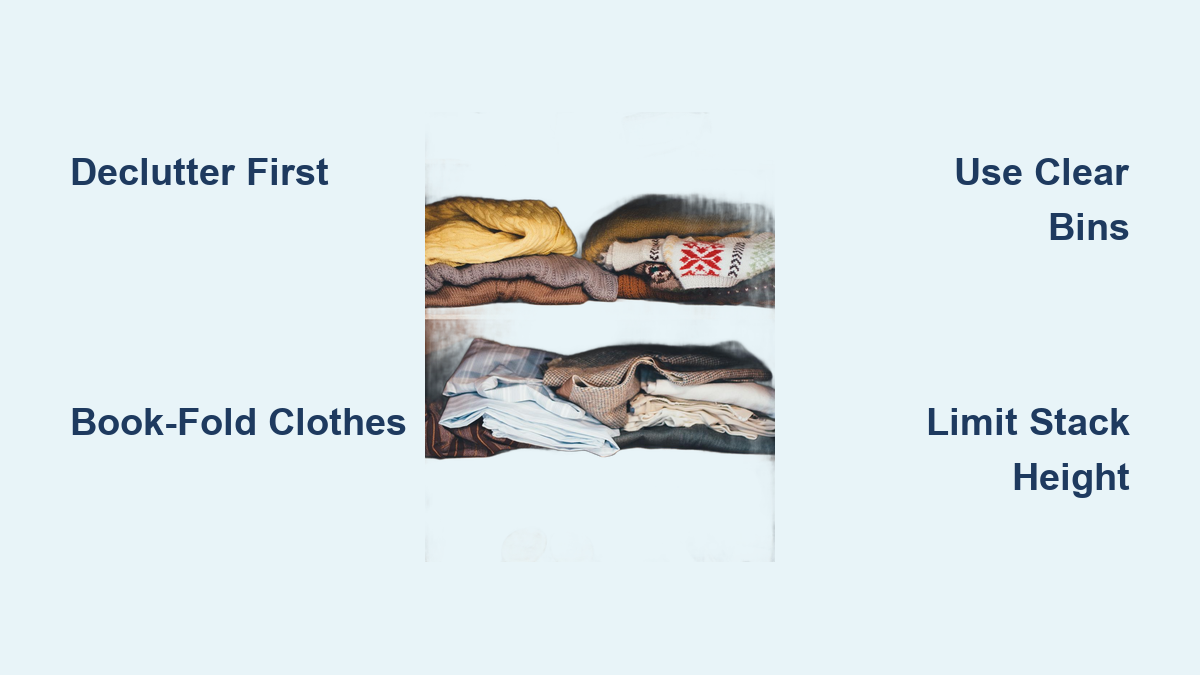
How to Organize Clothes on Shelves: Easy Tips
If your shelves are overflowing with piles of clothes you can never find, you are not alone. Disorganized shelves make getting dressed stressful and time-consuming every single morning. The good news is that with the right system, you can transform cluttered chaos into a clean, functional wardrobe in just a few hours. Organizing clothes on shelves is not just about stacking neatly, it is about creating a space where every item is visible, accessible, and easy to maintain long term.
This guide walks you through every step, from decluttering your entire wardrobe to labeling each container, to build a shelf organization system that actually lasts. You will learn smart folding techniques, strategic categorization methods, and the best storage solutions for every clothing type.
Declutter Before Organizing
Before placing anything back on your shelves, you need to clear everything out completely. A full purge ensures you only keep what you truly wear and love, rather than simply reorganizing clutter.
Sort by Use and Fit
Go through each clothing item and ask yourself three simple questions. Does it fit? Have I worn it in the last year? Is it in good condition? Create three distinct piles labeled keep, donate or sell, and toss. Be honest with yourself. If an item has not been worn in twelve months, it is likely not essential to your daily life.
This mindset shifts your focus from hoarding to usability. Store a donate bag right in your closet and add items as you identify them. When the bag is full, simply drop it off at your local donation center with no second-guessing.
Reassess Shelf Space After Decluttering
Once your shelves are completely cleared, wipe them down and evaluate the available space. You may discover that you need fewer bins than before, or that you can reconfigure shelf heights to fit your actual wardrobe better. This step prevents overcrowding and sets the foundation for a sustainable organization system that will work for years to come.
Categorize Clothes by Type and Use
Grouping similar items together streamlines access and keeps your shelves looking visually clean and organized. Proper categorization is the secret to maintaining order over time.
Separate by Clothing Category
Sort your clothes into clear groups such as t-shirts, jeans, sweaters, pajamas, undergarments, and accessories. This makes it significantly easier to locate items when you are getting dressed and much simpler to maintain order as you put laundry away.
Organize by Frequency of Use
Place your daily-wear clothes like t-shirts and jeans at eye level for easy access. Store seasonal or occasional items such as winter sweaters or formal wear on higher or lower shelves. This zone-based approach ensures convenience for the items you reach for most often.
Group by Function
Create specific zones for different uses such as workout gear, sleepwear, and work clothes. This reduces decision fatigue in the morning and supports intentional dressing so you can quickly find what you need.
Fold Clothes Vertically for Visibility
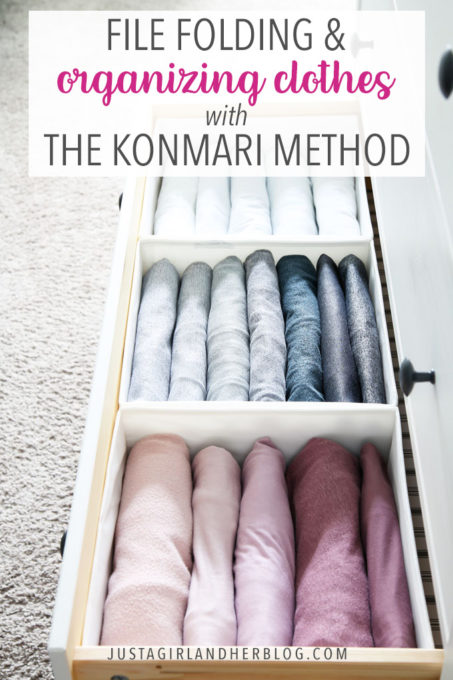
How you fold your clothes directly determines how easily you can see and access them when you need them. The folding method you choose makes a enormous difference in daily usability.
Use the Book-Fold Method
Fold your clothes vertically so they stand upright like books on a shelf. This method, popularized by the KonMari system, allows you to see every single item in a stack without digging through piles. It works especially well for t-shirts, tank tops, and pajamas.
To book-fold, start by laying the garment completely flat. Fold the sides inward to create a rectangle shape. Then fold the bottom up and the top down to form a compact piece that stands upright. This technique prevents toppling and makes retrieval effortless every time you reach for a piece of clothing.
Avoid Horizontal Stacking
Laying clothes in flat piles hides items underneath and leads to disarray very quickly. Vertical folding prevents stacks from collapsing and makes it simple to grab exactly what you want without disturbing the rest of your neatly organized clothes.
Choose the Right Storage Containers
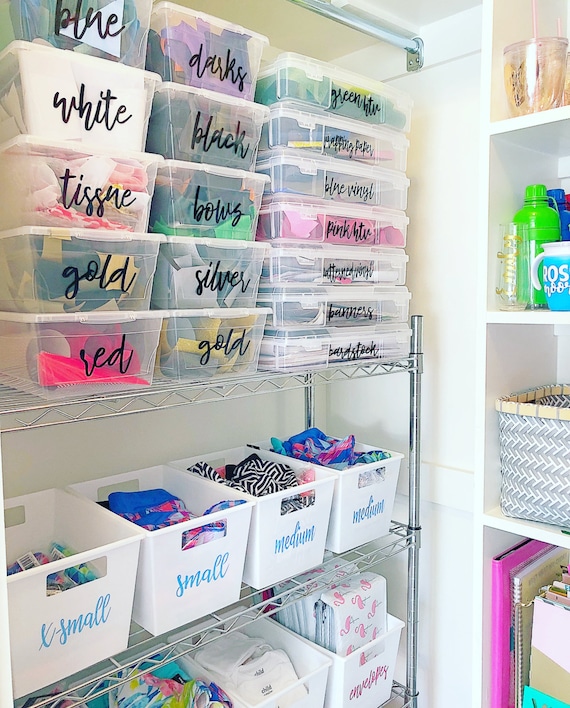
The right containers protect your clothes, maximize your shelf space, and keep everything looking tidy and professional.
Use Clear, Labeled Baskets
Opt for transparent bins or baskets with front-facing labels so you can see contents instantly. Clear sides eliminate the guesswork of what is inside each container. Label every single container with specific contents such as Black Tees, Workout Leggings, or Winter Sweaters to maintain order over time.
For DIY labeling ideas, consider chalkboard tags that can be rewritten, printable vinyl labels for a polished look, or luggage tags clipped to basket handles with handwritten paper inserts. Labeling each box helps you know what you have at a glance without opening anything.
Select Stackable, Foldable Baskets
Four-piece foldable basket sets are affordable and incredibly space-efficient. They work especially well for cotton kurtas, palazzos, or jeans. Use liner boards inside baskets to keep them rigid and prevent sagging under weight.
Pro tip: Avoid overfilling your containers. Keep baskets at approximately eighty percent capacity for easy access and to prevent contents from spilling out when you pull them off the shelf.
Optimize Shelf Depth and Layout
Shelf design impacts how well your system works long-term, so it is worth getting this right from the start.
Stick to 12-Inch Shelf Depth
Organizing expert Meryl Starr recommends twelve inches as the ideal depth for clothing shelves. Deeper shelves waste valuable space in the back where items become forgotten. Shallower ones limit your total storage capacity. If your shelves are deeper than twelve inches, use pull-out trays or forward-facing bins to access rear items easily.
Use Ventilated Shelves
Wire or slatted wood shelves allow air to circulate, reducing moisture buildup that can lead to mold or mildew. This is especially important in humid climates where trapped moisture can damage your clothes over time.
Install Adjustable Shelves
Customize your shelf heights to fit your specific wardrobe needs. Adjust them seasonally to accommodate bulkier winter layers in cold months or lighter summer stacks during warm weather.
Organize by Clothing Type
Different garments need different storage strategies to stay in good condition and remain easily accessible.
Sweaters and Knits: Fold, Do Not Hang
Hanging sweaters stretches the shoulders and ruins their shape over time. Instead, fold them neatly and store in baskets on mid-to-lower shelves. Use cotton or breathable bins to prevent compression damage that can occur in plastic containers.
Jeans: Fold or Roll
Fold your jeans neatly or roll them for a compact look that saves space. Store them in medium-sized baskets at eye level for easy access. Denim is durable, so stacking is perfectly fine, but limit stack height to twelve inches to prevent collapse.
T-Shirts and Tanks: Vertical Folding
Use the book-fold method discussed earlier and store your folded shirts in labeled bins at eye level. Group them by color or sleeve length for a polished, visually appealing look that makes getting dressed easier.
Undergarments and Socks: Use Sectioned Organizers
Pre-divided plastic boxes keep underwear, bras, and socks paired and visible. Store these organizers on lower shelves or in drawers where they are still accessible. Roll your socks to save space and prevent the frustrating loss of single socks.
Pajamas and Nightwear: Bundle and Bin
Fold complete sleepwear sets together and store them in foldable bins on lower shelves. Label containers with seasonal markers such as Summer PJs or Winter Sets for clarity when rotating your wardrobe throughout the year.
Maximize Vertical and Hidden Space
Use every inch of your closet wisely to avoid clutter and maximize storage capacity.
Add Tiered or Double Shelves
Double shelving doubles your storage capacity without expanding your closet’s footprint. This approach works wonderfully in small closets where space is at a premium. Use the top tier for lighter items like t-shirts and the bottom for heavier jeans or sweaters.
Store Shoes on Shelves
Use slanted or stackable shoe racks on lower shelves to keep your footwear organized. Clear plastic containers let you see pairs at a glance without opening anything. Label each container with descriptions like Black Pumps or Running Shoes for quick identification.
Use Shelf Dividers
Metal or acrylic dividers keep your stacks upright and prevent collapse from daily use. Place dividers between different clothing categories such as t-shirts and sweaters, or to separate kids clothes by size. Acrylic dividers look particularly sleek on glass or light-colored shelves.
Protect Delicate and Cultural Clothing
Special fabrics and traditional garments need extra care to maintain their beauty and longevity.
Store Saris in Cotton Covers
Use breathable cotton sari covers with zippers and transparent fronts. These covers protect silk and zari from dust while preserving the fabric’s natural sheen. Each cover holds one sari and its matching blouse together in one convenient package.
Use S-Hangers for Dupattas and Saris
S-shaped hangers lock garments in place and save valuable vertical space in your closet. Hang multiple dupattas on a single multi-hanger. Wooden hangers offer elegance while plastic options are more budget-friendly.
Keep Woolens in Waterproof Boxes
Store winter woolens in sealed, waterproof bins with side zippers and transparent windows. These containers prevent humidity damage and allow bottom access without having to unstack everything on top.
Rotate Seasonally to Save Space
Keep only current-season clothes on your active shelves to maximize accessibility and minimize clutter.
Pack Off-Season Items in Vacuum Bags
Compress coats, parkas, and blankets in vacuum-seal bags made of mold-resistant polypropylene. Store these bags under beds or on top shelves where they are out of the way. Always ensure clothes are completely dry before sealing to prevent mold growth.
Use Labeled, Closed Containers
Store off-season items in clearly labeled bins marked Winter Sweaters, Summer Dresses, or similar descriptions. Waterproof boxes protect your clothes against dust, pests, and humidity damage while in storage.
Maintain the System Long-Term
Even the best organization system fails without regular maintenance and attention.
Do a 6-Month Closet Audit
Every six months, reassess your wardrobe using the hanger test. Turn all hangers backward. When you wear an item, hang it forward normally. After six months, donate anything still facing backward. This simple test reveals exactly what you actually wear versus what is taking up space.
Refresh Labels and Folding
Over time, stacks get messy and labels fade. Re-fold your clothes periodically and refresh labels as needed. This keeps your system functional and visually appealing for years to come.
Use Picture Labels for Kids
For children is shelves, use photo labels or drawings so they can identify their clothes independently. This encourages responsibility and reduces daily battles over finding specific items.
Upgrade with Smart Add-Ons
Enhance your closet usability with small upgrades that make a big difference in daily function.
Add LED Closet Lighting
Install battery-powered LED strips or top-mounted lights for better visibility in dark closets. No wiring is needed. Simply peel and stick these lights wherever you need extra illumination.
Hang a Fashion Idea Board
Pin outfit combinations on a small corkboard inside your closet. Attach a pencil on a ribbon to jot down new looks you want to try. This is especially great for fashion enthusiasts who love coordinating their wardrobe.
Install Door and Wall Organizers
Use over-the-door pockets for scarves, belts, or socks. Self-adhesive hooks hold hats or bags. PVC pipe cut to size stores rolled scarves neatly in drawers.
Avoid Common Organization Mistakes
Steer clear of these pitfalls that sabotage your organization efforts before they even begin.
Do Not Overcrowd Shelves
Overfilling leads to collapsed stacks and frustration every time you reach for something. Limit your stack height to twelve inches and leave six inches of clearance above for easy hand access.
Avoid Opaque Containers
You will not use what you cannot see. Stick with clear bins or label every single opaque box so you know exactly what is inside without opening them.
Skip Wire Hangers
Wire hangers stretch clothes and look messy throughout your closet. Use uniform, sturdy hangers instead for a clean, cohesive appearance that protects your garments.
Do Not Ignore Airflow
Sealing clothes in non-ventilated spaces invites mildew, especially in humid climates. Use breathable bins and ventilated shelves to protect your wardrobe from moisture damage.
Customize for Your Lifestyle
The best organization system fits your habits and lifestyle, not someone else is ideal setup.
Small Closet? Maximize Every Inch
Use stackable bins, vacuum bags, and door organizers to squeeze every bit of storage from limited space. Double rods create room for more hanging items above or below shelves.
Walk-In Closet? Add Lighting and Mirrors
Improve visibility with LED lights that make finding clothes effortless. A full-length mirror makes the space feel larger and helps with outfit checks before you leave the house.
Parent? Prioritize Durability and Simplicity
Use fabric bins and picture labels that make it easy for children to find their own clothes. Double rods let kids reach their items easily without asking for help constantly.
Minimalist? Go Neutral and Hidden
Use uniform baskets in neutral tones and store infrequently used items completely out of sight. Focus on clean lines and open space to maintain a calm, uncluttered aesthetic.
Frequently Asked Questions About Organizing Clothes on Shelves
What is the best way to fold clothes for shelf storage?
The book-fold method works best for shelf storage. Fold clothes into rectangles that stand vertically so you can see every item at a glance. This prevents the common problem of digging through piles to find what you need.
How high should I stack clothes on shelves?
Limit stack height to twelve inches maximum. Taller stacks become unstable and collapse easily. Leave six inches of clearance above each stack for comfortable hand access when reaching for items.
Should I use clear or opaque storage containers?
Always choose clear containers whenever possible. You cannot use what you cannot see, and clear bins let you identify contents instantly without opening anything. If you must use opaque containers, label them very clearly.
How often should I reorganize my closet?
Perform a thorough closet audit every six months using the hanger test. Refresh your folding and labels as needed throughout the year to maintain the system you have built.
What is the ideal shelf depth for clothing storage?
Twelve inches is the ideal shelf depth according to organizing experts. Deeper shelves waste space in the back where items get forgotten. Use pull-out trays if your shelves are deeper than twelve inches.
Key Takeaways for Organizing Clothes on Shelves
Organizing clothes on shelves is more than just tidying up. It is about creating a system that works for your specific lifestyle and needs. Start by decluttering your entire wardrobe before organizing anything, keeping only what you truly wear and love.
Use the book-fold method to fold clothes vertically so every item remains visible and accessible. Choose clear, labeled containers that let you see contents at a glance, and maintain twelve-inch stack heights with six inches of clearance above for easy retrieval.
By following these principles and customizing your system to fit your space and habits, you will transform your closet into a stress-free dressing zone. Whether you have a tiny reach-in closet or a spacious walk-in wardrobe, the right shelf strategy saves time, protects your clothes, and makes getting dressed a genuine joy. Start today, and within a few hours, you will have a closet you can navigate blindfolded and still look great every single day.