
How to Build Shelves on a Concrete Wall
Mounting shelves on a concrete wall transforms blank, unused space into functional storage, but doing it right demands precision, the right tools, and proper anchoring. Unlike drywall or wood studs, concrete won’t support standard screws. You need mechanical fasteners like Tapcon screws or expansion anchors that bite into the dense material to hold weight securely. This guide walks you through every step, from selecting the right anchoring system to final alignment, ensuring your shelves stay level, stable, and safe under load.
This process is doable with basic DIY skills, but skipping key steps like hole cleaning or misjudging bracket spacing can lead to wobbly shelves or collapse. You’ll need a hammer drill, masonry bits, and a solid understanding of load distribution. We’ll cover choosing brackets, drilling into concrete without breaking your drill bit, and avoiding the most common installation mistakes.
Select the Right Anchoring System for Concrete Walls
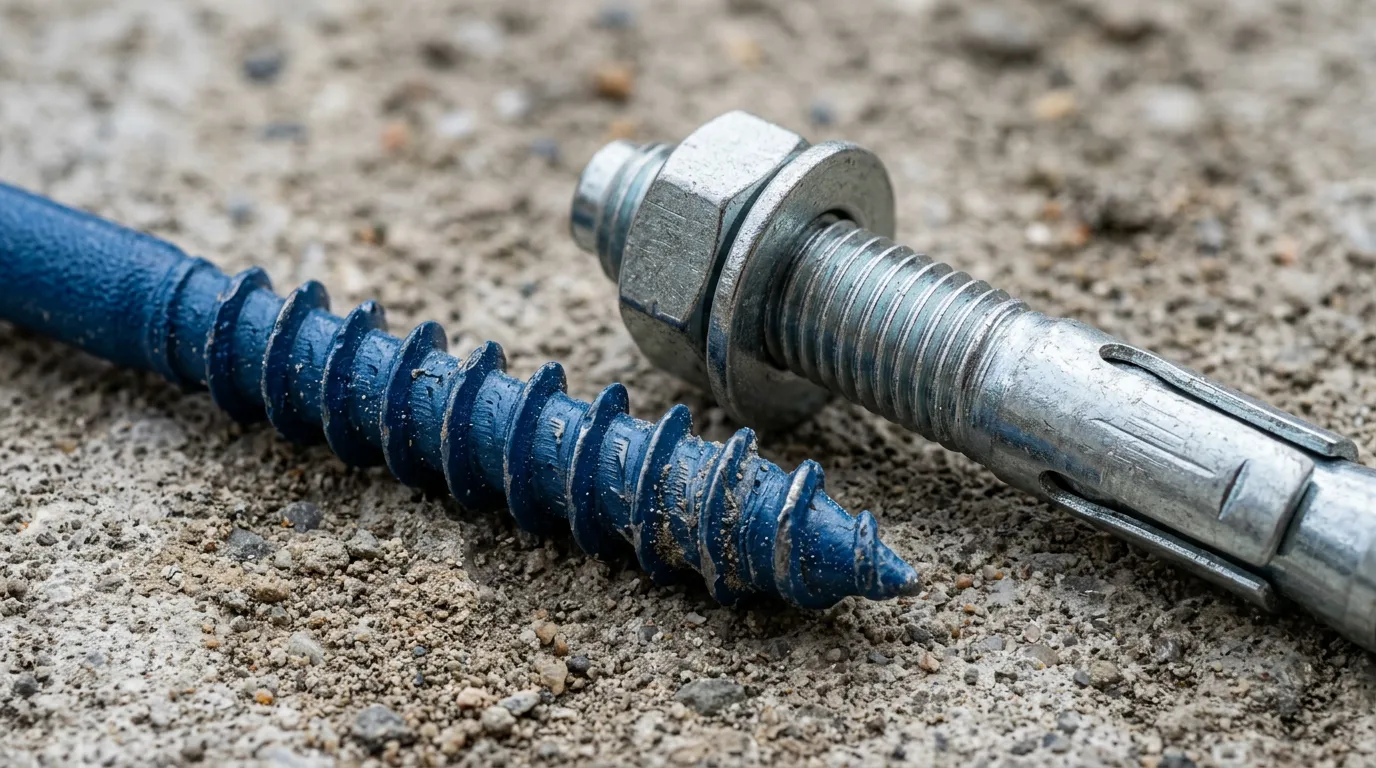
The strength of your shelves depends entirely on how well they’re anchored. Concrete demands specialized fasteners. Regular screws simply won’t hold. Two primary systems dominate reliable installations.
Use Tapcon Screws for Light to Medium Loads
Tapcon screws are self-tapping masonry screws ideal for most shelf projects. They cut threads directly into pre-drilled concrete holes, offering strong holding power without complex installation. Consider these specifications when selecting:
• Available in 3/16″ and 1/4″ diameters with lengths from 1.5″ to 4″
• Work best with L-brackets or floating shelf supports under 50 lbs per bracket
• Use grade 5 or 8 hex-head Tapcons for heavier loads
• Always drill with a hammer drill and clean holes thoroughly
Pro Tip: Dust in the hole can reduce grip by up to 50%, making thorough cleaning essential.
Install Expansion Anchors for Heavy-Duty Support
When mounting shelves that will carry tools, canned goods, or power equipment, expansion anchors provide superior holding strength. These anchors work differently than Tapcons:
• Consist of a sleeve that expands against the hole wall when a lag screw is tightened
• Ideal for floating brackets with long arms or modular track systems
• Require precise hole sizing and full-depth drilling
• Tap the anchor flush with a hammer before inserting the screw
Test each anchor by gently tugging after installation. It should feel solid, not loose.
Gather Essential Tools and Materials
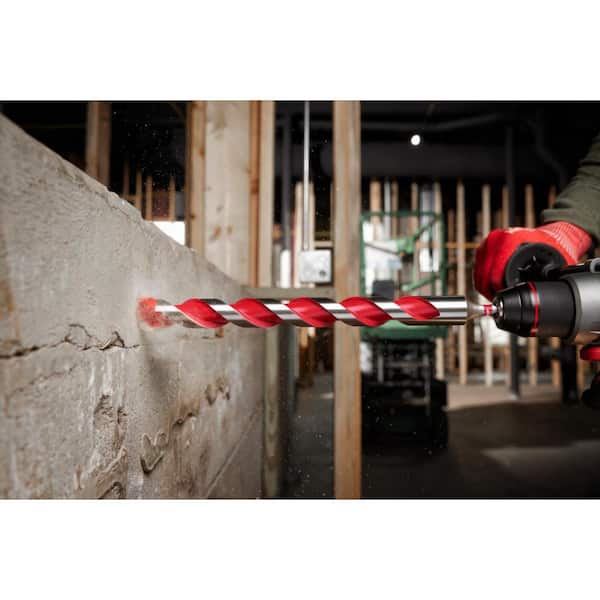
Success starts with the right gear. Working on concrete is unforgiving. Using the wrong bit or skipping safety steps leads to frustration or injury.
Required Drilling and Measuring Tools
You can’t drill into concrete without a hammer drill. A standard drill lacks the percussive action needed to break through masonry. Here’s what you need:
• Hammer drill with variable speed and hammer mode
• Masonry bit sized for your anchor (3/16″ bit for 1/4″ Tapcons)
• Torpedo level or laser level for perfect horizontal alignment
• Blow-out bulb or compressed air can for hole cleaning
• Vacuum to control fine cement dust
• Tape measure and pencil for layout work
Mark depth on the bit with tape. Drill 1/4″ deeper than screw length to catch dust.
Necessary Hardware and Shelf Components
Choose 3/4-inch birch plywood or solid wood for shelves. Thinner material may sag under weight. Select brackets based on your project:
• L-brackets for visible support with classic look
• Floating brackets for minimalist, hidden support
• Metal rails for modular systems like Everbilt
Brackets must extend at least 70% of shelf depth. A 10-inch shelf needs 7-inch minimum arms. Use 1.5-inch pan-head screws to attach shelves to brackets. They should grip firmly without piercing the top surface.
Plan Bracket Placement and Spacing
Poor spacing is the number one cause of sagging or uneven shelves. Get this right before drilling a single hole.
Calculate Bracket Spacing for Stability
Follow these spacing guidelines to prevent mid-span flex:
• Maximum spacing: 36 inches apart
• Recommended spacing: 32 inches or less
• Heavy loads: Install a bracket every 12 inches
Example calculation: A 10-foot shelf (120 inches) minus 2 inches from each end equals 116 inches of usable space. Divide by 32 equals 3.6 brackets. Round up to 4 brackets, spaced 29 inches apart. Place the first bracket 2 inches from the edge, then every 29 inches.
Position Brackets for Floating Shelves
Floating shelves rely on hidden brackets with long support arms. The measurement process differs from standard brackets:
• Measure from the outer edge of the shelf to the center of the bracket hole
• Add 1/2 inch to this measurement
• This offset prevents the shelf from touching the wall, reducing contact damage and allowing for thermal expansion
Mark this distance on your level line. Use masking tape on the wall to create a clean surface for pencil marks and reduce chipping when drilling.
Prepare the Wall and Mark Drill Locations
A clean, accurate layout prevents costly re-drilling. Concrete walls are often uneven. Account for this early in the process.
Clean and Inspect the Wall Surface
Before marking or drilling, prepare the surface properly:
• Remove dust, insulation scraps, or old adhesives
• Wear gloves and a mask. Concrete dust is hazardous if inhaled
• Check for rebar or embedded conduit using a stud finder with metal detection
• If metal is present, adjust bracket positions slightly to avoid drilling into it
• Wipe the area with a damp cloth to remove fine particles
Mark Drill Points with Precision
Accurate marking ensures brackets align correctly:
- Use a laser level or torpedo level to draw a straight reference line at shelf height
- Apply masking tape along the line to protect the surface and make marks visible
- Transfer bracket hole positions from your spacing plan
- For floating brackets, double-check the offset measurement
- Label each hole (L, R) if installing multiple brackets to avoid confusion
Drill Into Concrete Safely
Drilling into concrete is physically demanding. Technique matters as much as the tools you use.
Use Hammer Drill Mode Correctly
Set your drill to hammer mode. This combines rotation with rapid pounding to break through masonry. Follow this sequence:
- Start slowly to avoid bit wandering
- Apply steady pressure, but let the tool do the work
- If the bit stalls, it may have hit rebar or aggregate
- Stop immediately. Forcing it can overheat the motor
Options when hitting obstacles: Switch to a carbide-tipped bit, use a more powerful drill, or shift the hole by 1 inch if structurally acceptable.
Prevent Overheating and Clogging
Drill in short bursts. Pull the bit out every few seconds to clear dust. Use a vacuum nozzle nearby to capture debris. For deep holes, alternate drilling in and out to avoid jamming.
Warning signs: If the bit smokes or glazes over, it’s too hot. Replace it immediately. Dull or warped bits increase the risk of slipping and injury.
Clean Holes Before Anchoring
This step is non-negotiable. Dust in the hole acts like ball bearings, dramatically reducing anchor grip.
Blow Out Dust Completely
After drilling, remove all debris from each hole:
• Use a blow-out bulb or compressed air can to remove loose particles
• Angle the nozzle to dislodge particles stuck in the sides
• Follow with a vacuum to capture fine dust
• Never skip this step. Dirty holes can reduce holding strength by half
Test by peering into the hole. It should look clean and dry before proceeding.
Install Anchors and Mount Brackets

Now it’s time to secure the anchors and position the brackets. This is where your preparation pays off.
Drive Tapcon Screws Without Stripping
Insert the Tapcon screw into the hole and drive it with an impact driver or screwdriver. Never use hammer mode, as it can strip threads. Follow these guidelines:
• Turn slowly until the screw is snug, then stop
• Over-tightening cracks the concrete or strips the screw head
• Use hex-head screws for better torque control
• For modular rails, secure with 2 to 3 screws first, check alignment, then fasten the rest
Set Expansion Anchors Flush and Secure
Expansion anchors require slightly different handling:
• Tap the expansion anchor into the hole with a hammer until flush with the wall
• Insert the lag screw and tighten with a wrench
• The sleeve should expand inside the concrete, creating a tight fit
• Gently tug on the anchor to confirm it doesn’t move
If the anchor spins or pulls out, the hole may be oversized. Use a larger anchor or relocate the hole.
Attach Shelves to Brackets
With brackets secured, it’s time to mount the shelf itself. This step requires attention to detail for a professional finish.
Secure Shelves with Proper Screws
Use 1.5-inch pan-head screws to attach the shelf to the bracket. Drive them through the bracket’s vertical hole into the shelf’s underside. For 3/4-inch plywood, this length provides full engagement without penetrating the top.
Critical tips:
• Avoid over-tightening. This can split wood or warp thin material
• Leave screws slightly loose until all brackets are connected
• Final-tighten after leveling all brackets
Install Floating Shelves Smoothly
Floating shelf installation has unique considerations:
• Slide the shelf onto the bracket arms. Movement should be smooth, not binding
• If it binds, check for debris or misalignment
• Align the upward-facing screw holes in the bracket with the shelf’s pre-drilled holes
• Insert screws while gently wiggling the shelf to help threads catch
• Once secured, perform a final level check. The bubble must be centered
If off, loosen screws slightly and adjust.
Handle Uneven Walls and Modular Systems
Not all concrete walls are flat. Some systems handle this better than others.
Use Track Systems on Irregular Surfaces
Modular systems like Everbilt use metal rails mounted to the wall with repositionable brackets. These allow you to lift and slide brackets along the track, compensating for unevenness.
Installation steps:
• Install rails every 16 inches
• If the wall has high spots, chisel them down so the rail sits flush
• Once rails are secure, snap brackets into place
• Adjust height or position as needed
Add Triangle Brackets for Extra Support
On bumpy or porous walls, use triangle support brackets behind standard L-brackets. These small metal braces fill gaps and distribute load. Attach them between the wall and bracket base for a rock-solid connection.
Maximize Load Capacity and Safety
Even well-installed shelves can fail if overloaded or poorly balanced. Plan for your intended load.
Distribute Weight Evenly
Weight distribution matters more than overall capacity:
• Place heavy items like books or tools near bracket points, not in the middle of spans
• For shelves holding over 50 lbs, reduce bracket spacing to 12 to 16 inches
• Never concentrate weight on one end
• Test the shelf by pressing down gently. There should be no flex in the plywood or bending in the brackets
Avoid Over-Tightening Risks
Snug is sufficient. Forcing screws can crack concrete, especially near edges or corners.
Warning signs:
• If you feel sudden resistance, stop immediately
• Further pressure may strip the anchor
• Use washers under screw heads to spread pressure on thin bracket metal
Final Tips for Professional Results
Small details make a big difference in durability and appearance. Don’t skip these finishing steps.
Label Components for Reassembly
If using a modular system, label rails and brackets with masking tape during installation. This helps with future adjustments or disassembly. Keep spare screws and anchors on hand. Concrete drilling can go wrong.
Vacuum and Inspect Thoroughly
After installation, vacuum the area to remove residual dust. Inspect each screw and anchor point. Confirm shelves are level from front to back and side to side. For floating shelves, ensure the 1/2-inch gap from the wall is consistent.
Frequently Asked Questions About Building Shelves on Concrete Walls
Can I use regular screws in concrete walls?
No. Regular screws cannot hold in concrete. You must use mechanical anchors like Tapcon screws or expansion anchors that are specifically designed for masonry. These fasteners cut threads or expand against the concrete to create a secure hold.
How much weight can concrete wall shelves hold?
Properly installed Tapcon screws can hold 60 to 100 lbs per anchor, depending on diameter and embedment depth. Expansion anchors offer even higher pull-out resistance. With proper bracket spacing (32 inches or less), a single shelf can easily support 50 to 100 lbs or more.
Do I need a hammer drill to mount shelves on concrete?
Yes. A hammer drill is essential. Standard drills lack the percussive action needed to break through concrete. Without hammer mode, you’ll stall the motor, overheat the bit, and likely never complete the hole.
What is the best bracket spacing for heavy loads?
For heavy loads exceeding 50 lbs per shelf, install brackets every 12 to 16 inches. This reduces the span each bracket must support and prevents mid-span sagging. Always place heavy items directly above brackets when possible.
How do I fix a shelf that’s not level after installation?
Loosen the screws holding the shelf to the brackets slightly. Place shims behind the bracket or adjust the screw depth to level the shelf. Re-tighten while checking with a torpedo level. For floating shelves, the bracket arms may be adjustable.
Can I install floating shelves on a concrete wall myself?
Yes. With basic DIY skills, the right tools (hammer drill, masonry bits, level), and proper anchors, you can install floating shelves on concrete. The key steps are accurate marking, proper hole cleaning, correct anchor selection, and careful leveling during final installation.
Key Takeaways for Building Shelves on a Concrete Wall
Building shelves on a concrete wall is a high-reward project when done correctly. The most critical factors for success are using the right anchors (Tapcon screws for light to medium loads, expansion anchors for heavy-duty applications), spacing brackets properly (no more than 32 inches apart, closer for heavy loads), and cleaning every hole thoroughly before inserting anchors.
Always use a hammer drill with appropriate masonry bits, mark your layout precisely before drilling, and test each anchor for stability before mounting brackets. For uneven walls, modular track systems like Everbilt offer repositionable brackets that compensate for irregularities. Whether you’re maximizing garage space or adding sleek floating shelves to a basement, this method ensures professional results that last for years.





