
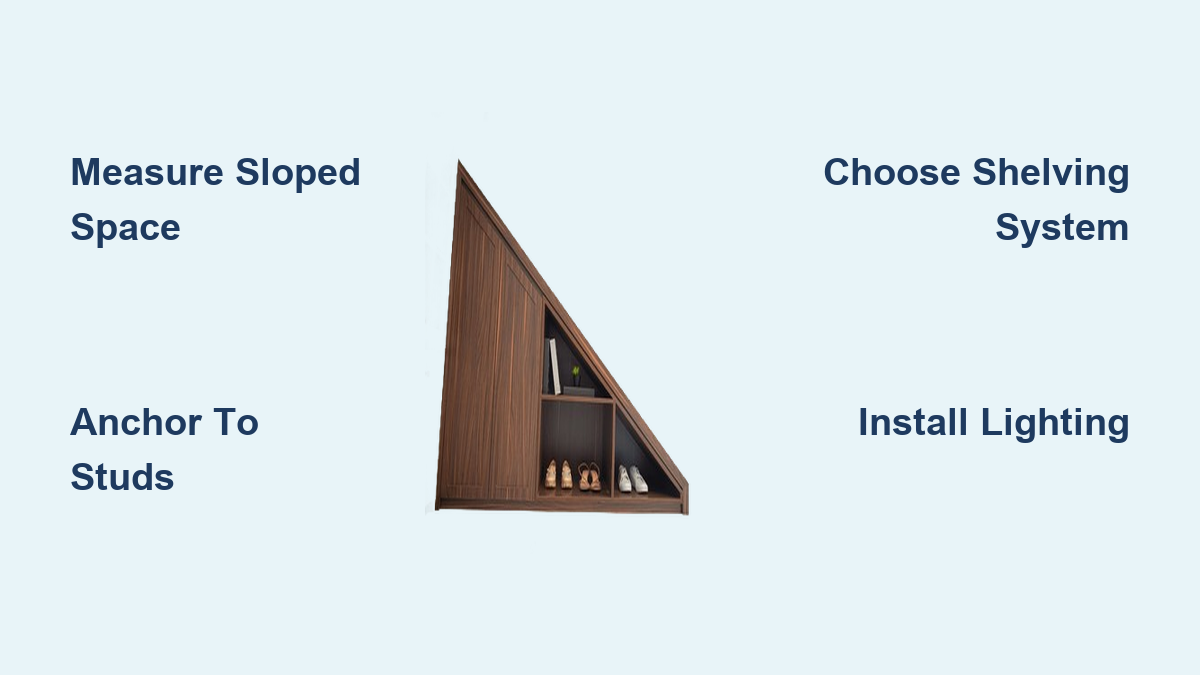
How to Build Closet Shelves Under Stairs
You’ve walked past it a hundred times. That awkward, dark space under the stairs collects forgotten shoes, mystery boxes, and stuff you don’t know what to do with. But that dead zone can become one of the most functional storage areas in your home. This guide shows you exactly how to build shelves in closet under stairs, using three proven methods that fit different skill levels and budgets. Whether you want a custom pantry, appliance storage, or organized space for seasonal items, you’ll find step-by-step instructions to transform that cluttered nook into a built-in storage powerhouse.
The process involves precise measurements, choosing the right shelving system, proper mounting techniques, and smart finishing touches like lighting and trim. Each section below walks you through the specific decisions and steps that lead to professional-looking results.
Measure the Space Accurately
Before buying materials or swinging a hammer, you need exact dimensions. The under-stair closet is rarely square, and its sloped ceiling demands precision at every step.
Account for Sloped Ceiling and Depth
Most under-stair closets range from 11 to 14 inches deep, with height decreasing along the length due to the staircase above. Use a tape measure and level to record these key measurements:
- Width at the base of the space
- Maximum height at the tallest point
- Ceiling slope angle (measure the drop per foot)
- Depth at multiple points (it may vary from front to back)
Mark the floor and wall with painter’s tape to visualize the actual footprint. This simple step helps you avoid costly cutting errors later and gives you a true sense of how much space you’re working with.
Avoid Common Measurement Mistakes
One builder assumed melamine boards were 10 inches wide, only to discover the actual width was 11.5 inches. This led to shelves that didn’t fit and wasted materials. Always verify real material dimensions before cutting. Use a straight edge and pencil to transfer measurements directly to boards. When cutting melamine, account for blade kerf (the material removed by the saw blade) to maintain accuracy.
Choose Your Shelving System

Three main approaches dominate successful under-stair shelf builds. Each has trade-offs in cost, effort, and flexibility. Choose the one that matches your skill level and storage goals.
Custom Melamine Shelves for Seamless Fit
Best for skilled DIYers who want a built-in look.
Melamine boards are pre-finished, scratch-resistant, and ideal for tight spaces. They require edging on exposed sides but deliver a clean, professional result.
Pros include full customization, durability, and seamless integration. Cons include requiring advanced tools like a miter saw and iron for edging, plus a longer build time. This method works best for pantries, appliance storage, and permanent installations.
A typical build uses 11.5-inch by 57-inch boards for vertical sides and floating shelves cut to fit the remaining space.
IKEA Billy Bookcases for Budget Efficiency
Best for beginners or those on a tight budget.
IKEA Billy bookcases (starting around $60 each) can be installed side-by-side or in L-shapes to fill the space. No custom cutting is needed. Simply assemble, anchor, and style.
Pros include affordability (around $190 for 3 to 4 units), easy assembly, and consistent design. Cons include limited depth (11 inches) and particleboard that can swell if exposed to moisture. A pro tip: cut the top of the bookcase to follow the ceiling slope if needed.
Elfa Shelving for Adjustable Storage
Best for those who want flexibility and clean lines.
The Elfa system from The Container Store uses adjustable metal standards and composite shelves that can be cut to fit angled walls.
Pros include customizable spacing, modular design, durability, and ideal fit for evolving needs. Cons include requiring precise measuring and higher upfront cost. One builder matched Elfa shelf heights to existing cabinetry for a unified kitchen-pantry flow.
Cut and Prepare Materials
Once you’ve chosen your system, it’s time to cut and prep. Accuracy is critical in these tight, angled spaces.
Cut Melamine Boards with Precision
Use a miter saw and straight edge to make clean cuts. Always measure twice and cut once. Cut 8 inches from the top edge of vertical boards to allow ceiling clearance. Label each piece (like “left side” or “floating shelf”) to stay organized.
For exposed edges, apply iron-on melamine edging using these steps:
- Cut edging to length
- Slide into the back edge of the board
- Iron with cotton setting (around 400°F) to activate adhesive
- Press firmly and move iron back and forth for full bond
This creates a finished look without paint or trim.
Assemble IKEA Units Outside the Closet
Don’t try to assemble bookcases inside the cramped space. Build them fully outside, then slide them in.
Pre-assemble all units before installation. Use a drill or impact driver to secure cam locks and dowels. Level each unit before final anchoring. Position the tallest unit near the door and shorter ones toward the back to follow the ceiling slope naturally.
Anchor Shelves to Wall Studs

No matter which system you use, secure mounting is non-negotiable. Wobbly shelves are unsafe and frustrating.
Locate Studs with a Stud Finder
Use a stud finder to locate wall studs behind drywall. Mark the center of each stud with a pencil. Anchor all vertical sides or brackets directly into stud centers.
Use #10 screws, 3/4 inch long for melamine brackets. For IKEA units, use 2.5-inch wood screws into studs and 1.25-inch screws to join adjacent units. This creates a rock-solid structure. Once anchored, the shelves should not wobble even when loaded.
Join Adjacent Units for Stability
When using multiple IKEA or custom units side by side, screw them together. Drive 1.25-inch wood screws through the side panels to prevent separation and enhance rigidity. Ensure all units are level before final tightening. One builder reported the joined units felt like one solid cabinet after securing.
Add Countertops and Shelf Toppers
A countertop or shelf topper elevates the look from basic storage to built-in, adding warmth and functionality.
Use 1×12 Pine Boards for Warm Finish
A 1×12 pine board (actual width: 11.25 inches) provides a slight overhang on 11-inch deep shelves.
Stain with Golden Oak for a warm, natural look. Seal with polyurethane for durability. Secure from underneath with 1.25-inch wood screws.
Avoid pre-assembling large L-shaped countertops. One builder learned this the hard way when the piece wouldn’t fit through the door. Instead, install in separate sections directly on the shelves.
Consider Edge-Glued Pine Panels
For wider surfaces, Lowe’s edge-glued pine panels (50 to $100) offer a solid-wood look without the price. They accept stain well and can be cut to size.
Install Trim and Base Molding
Trim work sells the built-in illusion. Proper molding ties the shelves to the room’s architecture.
Reinstall Baseboard for Seamless Look
If you removed carpet or flooring, reinstall baseboard at the new height.
Measure and cut base molding to fit shortened wall lengths. Use a narrow crown stapler for tight spaces. Score old caulk with a box cutter and carefully pry off for reuse. Fill gaps with spackle and caulk joints for a clean finish.
Add Shiplap or Beadboard for Style
Brighten dark spaces with wall treatments.
Shiplap panels install vertically or horizontally for modern farmhouse appeal. Beadboard wainscoting adds up to 4 feet high for classic charm. Pre-finished panels save time and eliminate drying waits. Paint with Sherwin-Williams Silver Strand (soft gray-green) or Pure White for a bright, clean look.
Choose Smart Flooring Solutions
Most under-stair closets have trapdoors for crawlspace access, which complicates permanent flooring.
Use Floor Paint for Easy, Accessible Finish
Behr Porch and Patio Floor Paint in “Bridal Veil” (ivory) is ideal for this project.
This paint resists stains and foot traffic, dries fast (usable in hours), provides seamless coverage without edges to lift, and doesn’t block trapdoor access. Apply Kilz primer first to smooth concrete or subfloor. Roll on two coats of paint for full opacity.
One project added a 2-foot by 5-foot runner rug (Well Woven brand) to conceal the trapdoor and add warmth.
Avoid Peel-and-Stick Tiles Near Trapdoors
While peel-and-stick vinyl tiles install in 30 minutes and add pattern, their edges can peel over time, especially around trapdoors. If used, seal edges with clear caulk.
Install Practical Lighting
Under-stair closets are dark. Without light, they’re unusable.
Use Battery-Powered Motion-Sensor Lights
No wiring? No problem. Mount a battery-powered motion-sensor light on the ceiling or wall.
It turns on automatically when you enter and shuts off after about 5 minutes. Secure with a 1/4-inch screw into the back plate. Place it near the front for broad coverage.
Opt for Rechargeable LED Lights
Two soft white rechargeable LED units provide even lighting. Install one on the ceiling and one on the side wall to illuminate rear shelves. Recharge every 2 to 3 months. Avoid dim, yellow bulbs.
For hardwired options, install white LED lighting with a dimmer switch to reduce blue-rich light that can disrupt sleep.
Organize with Bins and Labels
Shelves are only half the solution. Organization makes them functional.
Use Inexpensive Bins for Cohesive Storage
Buy handled bins (under $5 each) in matching colors. Store spices, baking supplies, or snacks in these bins. Label clearly for quick identification. Place heavier items on lower shelves.
One pantry uses medium storage tubs for canned goods and small baskets for bookcase cubbies.
Optimize Shelf Heights by Use
Lower shelves work best for slow cookers, rice makers, and platters. Middle shelves hold rolling pins and kitchen gadgets. Upper shelves are perfect for light, infrequently used items. Adjust spacing based on appliance height to prevent wasted vertical space.
Avoid Common DIY Mistakes
Even experienced builders make errors. Learn from others’ lessons to avoid frustration.
Don’t Pre-Assemble Large Countertops
Trying to install a pre-built L-shaped pine countertop led to wall damage and frustration. Install in pieces directly on shelves instead.
Don’t Skip Stud Anchoring
Floating shelves or unsecured bookcases can tip. Always anchor into studs, not just drywall anchors.
Don’t Ignore the Trapdoor
Flooring that blocks access is a long-term headache. Paint the floor or use a rug instead of permanent solutions that impede access.
Maintain and Upgrade Over Time
A well-built under-stair shelf system lasts for years with minimal upkeep.
Clean and Inspect Regularly
Wipe melamine with a damp cloth. Check screws and anchors annually. Re-seal wood countertops if they show wear.
Recharge or Replace Lights as Needed
Recharge LEDs every 2 to 3 months. Replace motion-sensor batteries when dim.
Expand with Modular Systems
Elfa or IKEA units can be added later. One builder planned for a future 48-inch-wide shelf extension.
Key Takeaways for Building Shelves Under Stairs
Building shelves in a closet under stairs transforms wasted space into highly functional storage. Three proven approaches work for different skill levels: custom melamine for seamless built-in results, IKEA Billy bookcases for budget efficiency, and Elfa systems for adjustable flexibility. Success depends on accurate measurements of the sloped space, secure mounting into wall studs, and smart finishing touches like lighting and trim.
The project typically costs $300 to $600 depending on materials chosen. After completion, these shelves consistently rank as some of the most practical DIY improvements homeowners make. Whether you store kitchen appliances, seasonal decor, or household supplies, the result is more room, less clutter, and a smarter home.
Frequently Asked Questions About Building Shelves Under Stairs
How much does it cost to build shelves under stairs?
The total project costs between $300 and $600. IKEA Billy bookcases run around $190 for 3 to 4 units. Custom melamine builds cost more depending on material pricing and tools required. This excludes labor since most homeowners tackle this as a DIY project.
What’s the best shelving system for beginners?
IKEA Billy bookcases are the easiest for beginners. They come pre-engineered, require no custom cutting, and assemble with simple cam locks. Just assemble outside the closet, slide in, and anchor to wall studs.
How do I handle the sloped ceiling when building shelves?
Measure the ceiling slope angle and account for it in your design. Cut vertical boards with angled tops, or position shorter shelving units toward the back of the closet where the ceiling drops. Mark everything with painter’s tape first to visualize the fit.
Can I install flooring in an under-stair closet with a trapdoor?
Floor paint is the best solution. It applies seamlessly, doesn’t block trapdoor access, and can be easily removed if needed. Avoid peel-and-stick tiles near trapdoors, as edges tend to peel over time.
Do I need to anchor shelves to wall studs?
Yes, absolutely. Secure mounting into wall studs is non-negotiable for safety. Use a stud finder to locate studs, then anchor all vertical sides, brackets, or bookcase units directly into stud centers. This prevents tipping and wobbling when shelves are loaded.
How do I light an under-stair closet without wiring?
Battery-powered motion-sensor lights work perfectly. Mount one near the door entrance for broad coverage. Alternatively, use rechargeable LED units mounted on the ceiling and side walls. Recharge every 2 to 3 months for consistent brightness.





