
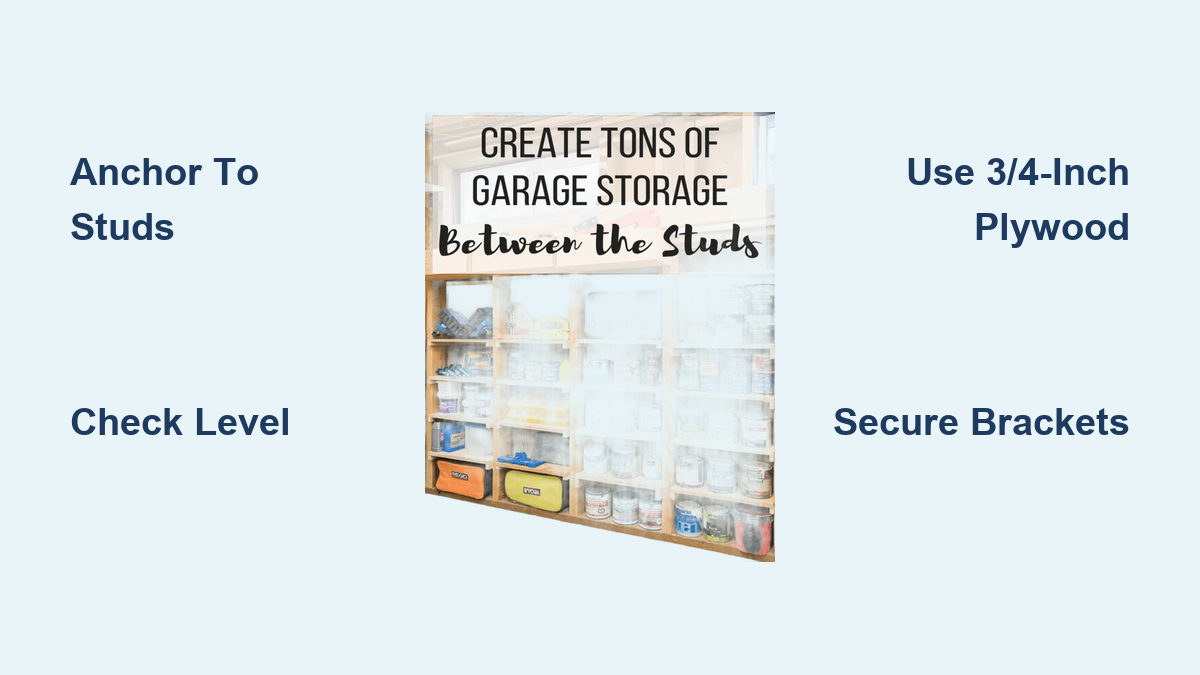
How to Build Shelves on Exposed Studs
If you have a bare wall with exposed studs in your garage, workshop, or utility room, you have the perfect foundation for strong, durable storage. Building shelves directly on exposed studs eliminates the need for drywall anchors and gives you maximum load capacity without worrying about weight limits. This guide covers four proven methods, from heavy-duty bracket systems to quick scrap-wood builds, so you can choose the approach that fits your tools, budget, and storage needs.
Whether you need to store heavy garden tools, paint cans, or hand tools, anchoring shelves to studs ensures your storage system will last for years without sagging or failing. Each method below uses basic materials and standard tools, with build times ranging from one to six hours depending on complexity.
Stud-Straddling Bracket System for Heavy Storage

This method creates the strongest possible anchor by clamping brackets around the stud from both sides, giving you access to fasten from either direction.
Build a Bracket Jig for Repeatable Results
A simple jig ensures every bracket is identical and perfectly aligned. Use scrap wood to create a template with a recessed area that matches your stud and backing thickness. Place an ER bracket upside down in the jig, then butt a second bracket against it. Secure the pair with glue and 1.5-inch screws. Once the adhesive cures, remove the assembled bracket sandwich. This design allows screw access from both sides of the stud.
Build the jig upside down so brackets assemble right-side up and are easy to remove after assembly.
Install Level Brackets in Pairs
Hold the first bracket against the stud, use a torpedo level to ensure it is perfectly horizontal, then mark your screw holes. Start with one screw per side to allow minor adjustments during final positioning. Repeat on the opposite stud, checking alignment across both before fully tightening all fasteners.
Cut and Attach Your Shelves
Use three-quarter-inch plywood for strength. Cut shelves to fit between brackets, notching the ends if needed to clear any wall obstructions. Secure shelves directly to brackets with screws. A typical three-shelf setup includes a top shelf for full-depth storage, a middle shelf for easy-access tools, and a corner shelf for odd-sized items.
This system replaces flimsy plastic cabinets and stores weed sprayers, hand tools, and accessories with excellent weight capacity.
Flush 2×4 Support Shelf for Tight Spaces
This budget-friendly method hides a two-by-four support brace behind a flush-mounted plywood shelf, perfect for narrow gaps between studs.
Install the Support Brace
Measure the exact width between studs and cut a two-by-four to fit snugly. Check for level before securing with two 1.5-inch screws at each end, driven directly into the stud. For extra strength, mount the brace to the face of the studs instead of between them.
Never install a shelf without full-length support. Unsupported ends will sag under load and could collapse.
Notch the Shelf for a Seamless Fit
Trace the stud locations and brace depth onto a three-quarter-inch plywood board. Use a jigsaw to cut out the sections where the shelf wraps around the studs. This allows the board to sit flush against the wall while resting securely on the hidden two-by-four.
Secure and Finish the Installation
Slide the notched shelf into place, tap gently if needed, then screw it down into the two-by-four. For longer spans, add a second support brace in the center of the shelf for additional reinforcement.
This method works best in tight spaces where you want hidden support using only scrap materials.
Adjustable Dado Slot Shelving System
This method maximizes vertical space with height-adjustable shelves using routed slots in vertical side boards mounted between studs.
Mark and Route Dado Slots
Use one-by-six boards for side panels, marking vertical lines every two inches along both edges. Transfer marks to the opposite side to ensure mirror symmetry. Mark the cutting side with an X so you route the correct section.
Build a U-shaped scrap wood jig that fits over the board edge and clamp it securely to guide your router. Cut three-quarter-inch-wide dado slots at approximately three-eighths-inch depth, ideal for half-inch plywood shelves. Include entry and exit notches at the top and bottom of each board for router clearance.
Mount Side Panels to Studs
Pre-drill holes every two feet along the side boards. Screw directly into wall studs using 1.5-inch drywall screws. Ensure both panels are plumb and aligned before final tightening.
Insert Adjustable Shelves
Cut half-inch plywood shelves to fit between the dado slots, making them one-eighth inch narrower than the slot spacing for easy movement. Slide shelves in at the desired height and adjust as needed for bottles, bins, or tools.
This system works exceptionally well for floor-to-ceiling storage in narrow wall cavities like garages or utility closets.
Quick Bracket-Supported Shelves for Workshops

The fastest way to add storage uses scrap wood brackets and simple sliding shelves, perfect for beginners.
Measure Between Studs Accurately
Standard stud spacing is 16 inches on center, but actual openings vary between 14¼ and 14¾ inches. Measure precisely at your installation location. Shelf depth can extend to 5.5 inches using a one-by-six board or more if your space allows.
Build and Level Wooden Brackets
Cut 5.5-inch-long supports from scrap plywood or one-by-two material. Position the first bracket at your desired height, align its top edge with your mark, and attach with one brad nail. This allows slight pivoting for adjustment. Use a small level, then secure with additional nails. Repeat on the opposite stud, ensuring both brackets are perfectly level and parallel.
Install Sliding Shelves
Cut shelves slightly undersized for easy fit. Slide onto brackets and tap gently with a hammer if needed. For extra security, nail or screw the shelf to the brackets. A tight fit may not require fasteners at all.
This approach completes in one to two hours and holds paint cans, Dremel tools, push sticks, and small bins with surprisingly high load capacity.
Choosing the Right Method for Your Project
Match your shelf system to your specific needs based on tools, load requirements, and available time.
For heavy-duty garden tool storage, the stud-straddling bracket system provides the strongest support and handles heavy sprayers and equipment without sagging. Build a jig once and reuse it for all brackets, ideal for weekend projects.
For quick workshop organization, go with bracket-supported sliding shelves. Using a brad nailer and scrap wood, you can install multiple shelves in under two hours, perfect for keeping paint, tools, and accessories off the workbench.
For narrow wall cavities between studs, the flush two-by-four support shelf or dado slot system works best. One hides the support entirely, the other offers full adjustability, and both maximize vertical storage without protruding into your workspace.
For adjustable height flexibility, the dado slot shelving gives you complete control over shelf placement. Route slots every two inches, then slide in shelves as needed. This works great for closets, pantries, or tool storage where item sizes vary.
For scrap-only zero-budget builds, use the two-by-four flush shelf method. All you need is a piece of three-quarter-inch plywood, a leftover two-by-four, and screws. Cut, notch, mount, and finish in minimal time.
Universal Best Practices for Strong Shelves
Follow these rules regardless of which method you choose.
Always anchor only to studs. Never rely on drywall anchors for heavy loads. Use a stud finder or knock on the wall to locate studs, then use 2.5-inch screws or lag bolts for heavier items.
Check level at every step. Use a torpedo level on brackets, supports, and side panels before final tightening. A one-degree tilt becomes obvious over a 16-inch span.
Choose the right shelf material. Three-quarter-inch plywood works best for heavy or wide shelves. Half-inch plywood suits light to medium loads, especially in adjustable systems. One-by-six boards provide a rigid, attractive front edge for visible areas.
Mind clearance and ergonomics. Place frequently used items at waist to eye level. Leave extra height at the top for tall containers. Avoid deep shelves in high-traffic zones unless clearance is sufficient.
Seal wood in damp areas. In sheds or garages, apply water-resistant sealant or paint to prevent warping and moisture damage. Wipe shelves clean monthly to avoid dust buildup.
Customization and Upgrade Options
Make your shelves more functional with smart additions.
Add corner shelves by adapting any method to fit L-shaped stud layouts using triangular brackets or custom-cut plywood.
Create dual-depth shelves by using a one-by-six front board with a deeper back support like a two-by-six, creating tiered storage for both tools and supplies.
Integrate organization by mounting screw bins, adding labeled dividers, or placing a pegboard insert behind shelves for additional tool storage.
Finish for style by painting for a clean modern look, staining for a warm natural tone, or leaving raw for an industrial workshop aesthetic.
Frequently Asked Questions About Building Shelves on Exposed Studs
Can I build shelves on exposed studs without finding the exact stud locations?
No. Finding and anchoring to studs is essential for load capacity. Use a stud finder or tap the wall to listen for solid sounds versus hollow drywall. Mark each stud location with tape before planning your layout.
What is the maximum weight shelves can hold when mounted to studs?
Load capacity depends on your method. Stud-straddling brackets support very heavy loads like garden tools and equipment. Bracket-supported shelves hold medium loads like paint cans and tool boxes. Always err on the side of more support for heavier items.
Do I need special tools to build adjustable dado slot shelving?
Yes, a router is required to cut the dado slots accurately. You can build a simple jig from scrap wood to guide the router and ensure consistent, mirror-image slots on both side panels.
Can I use this methods in a damp basement or shed?
Yes, but seal all wood with water-resistant sealant or paint to prevent warping and moisture damage. Inspect fasteners annually for loosening, especially in damp environments.
How long does it take to build shelves on exposed studs?
Build time ranges from one to two hours for simple bracket-supported shelves to four to six hours for a complete stud-straddling bracket system with jig fabrication.
Key Takeaways for Building Shelves on Exposed Studs
Building shelves on exposed studs transforms bare walls into strong, functional storage without the need for drywall or expensive cabinetry. The four main methods each serve different needs: stud-straddling brackets for heavy loads, flush two-by-four supports for tight spaces, dado slots for adjustable height, and simple brackets for quick organization.
Always anchor screws directly into studs, check level at every step, and choose appropriate shelf materials based on your load requirements. Whether you use a router and jig or just scrap wood and a brad nailer, the key is securing everything to the studs for maximum strength and durability.
Pick the method that fits your space and tools, follow the leveling and fastening guidelines, and you will have durable, functional shelves in just a few hours. Your bare wall now works for you.





