
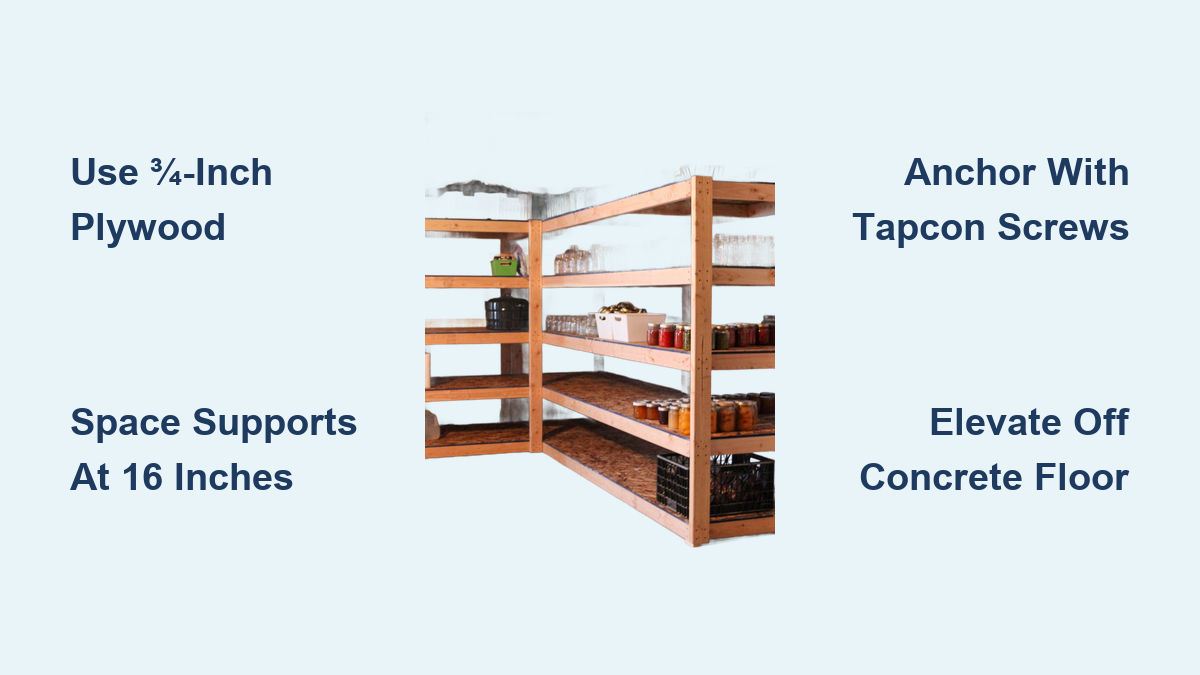
How to Build Wood Shelves for Basement Storage
A cluttered basement can make storage feel impossible until you build your own heavy-duty wood shelves. Custom wood shelving is one of the most cost-effective, durable, and flexible solutions for organizing tools, holiday decorations, electronics, and more in unfinished basements. Unlike expensive pre-made units that cost $800 or more, you can construct a full wall of sturdy shelving for under $200 using basic materials and tools.
In this guide, you will learn how to choose between plywood and OSB, space supports correctly, anchor to concrete walls or ceiling joists, and assemble a system that is both functional and expandable. Whether your basement is dry or prone to dampness, these step-by-step instructions will help you build shelves that last and support heavy loads.
Choose the Right Shelf Design
Pick Your Shelving Type
Your basement layout and storage needs determine the best shelving style. Four main types work well for DIY builds:
Freestanding units are built on the floor without wall attachment. They work best in open areas where wall mounting is not possible. Use bricks or blocks to elevate the frame off concrete and prevent moisture damage.
Wall-mounted shelves attach directly to concrete walls using Tapcon screws. This approach saves floor space and stays stable when properly secured.
Joist-mounted systems connect vertical supports to ceiling joists. This is ideal for basements with high clearance and reduces pressure on the floor.
Hybrid designs combine a wall ledger with vertical posts. This offers maximum stability for long spans and heavy loads.
For most basements, a hybrid or wall-mounted design provides the best balance of strength and space efficiency.
Set Dimensions Based on Storage
Standard basement shelf dimensions depend on what you plan to store:
Depth should be 21 to 24 inches to fit 18 to 27 gallon storage totes. Use 24-inch depth if storing bins, or 21-inch if using a 3-inch-thick front frame.
Height typically ranges from 6 to 9 feet depending on your ceiling clearance. Measure around HVAC units, washers, or pipes before finalizing size.
Width is custom to your wall length, usually ranging from 8 to 16 feet.
Plan Support Spacing
Supports must be close enough to prevent sagging under heavy loads. Follow these spacing guidelines:
Maximum span between vertical supports should not exceed 4 feet.
On-center spacing should be 16 inches for ½-inch plywood or OSB. Twenty-four inch spacing is acceptable only with ¾-inch plywood and light loads.
For 8-foot spans, use 2×6 front framing and center supports at 4 feet. Add middle bracing under seams where two shelf boards meet to prevent sag and boost rigidity.
Select Materials That Last

Use 2×3s or 2×4s for Framing
Both lumber sizes work, but 2×3s save money and gain 1 inch of usable depth. Here is a quick comparison:
2×3 lumber costs about $1.38 to $2.18 per 8-foot piece and provides adequate strength for most builds.
2×4 lumber is the standard choice and offers slightly stronger framing.
2×6 lumber is recommended for front rails on long spans over 8 feet to reduce flex.
For a 10-foot shelf unit, you will need about 12 to 15 pieces of 8 to 10-foot lumber depending on your design.
Choose Shelf Surface: Plywood vs OSB
The shelf surface material affects durability, appearance, and cost. Here is how they compare:
¾-inch plywood is best for heavy loads and smooth sliding. It costs about $50 per sheet and offers high durability with resistance to sag and moisture. This is the recommended choice for storing heavy bins or sliding totes.
½-inch or 5/8-inch OSB works for budget builds in dry basements. It costs only about $6 per sheet but has lower durability and may sag over time. The rough surface also makes sliding bins more difficult.
Use ¾-inch plywood if storing heavy items. Use OSB only in dry basements with 16-inch support spacing.
Pro Tip: Have your plywood or OSB ripped to 21 to 24-inch width at the store. This saves time and avoids needing a table saw.
Gather Essential Tools
Must-Have Tools for the Job
You do not need a full workshop. These key tools will get the job done:
A cordless drill and impact driver are essential for driving long screws into dense wood. The impact driver makes a huge difference with 2½-inch screws.
A circular saw handles cutting lumber and sheet goods. A miter saw is optional but speeds up repeat crosscuts like 21-inch shelf pieces.
A laser level is critical for long, straight installations. A tape measure and speed square ensure accurate layout and square corners.
Clamps and a mallet help hold frames in place and tap pieces into alignment.
Time-Saver: Most hardware stores offer free cutting services. Use them to prep plywood and OSB before bringing it home.
Fasteners for Every Step
Using the right fasteners ensures structural integrity. Match the fastener to the application:
For frame assembly, use 2½-inch deck screws or self-tapping screws. For attaching shelf boards, use 1-inch flat-head screws or 16-gauge brad nails.
For concrete wall attachment, use 3-inch Tapcon screws with a masonry bit. For joist mounting, use 3-inch structural screws into ceiling joists.
For ledger to wall connection, use 3-inch screws into wall studs or Tapcons for concrete.
Avoid Ramset nails for primary structural connections. They are fast but unreliable under horizontal load.
Build the Frame Correctly
Assemble Freestanding or Wall Frames
Start by building rectangular frames from 2×4s or 2×3s:
Cut two long sides to your desired length and two short ends to your chosen depth. Assemble into a rectangle using 2½-inch screws.
Check for square by measuring diagonals. Adjust until both measurements are equal before driving final screws. Use clamps if needed to hold alignment.
Add intermediate bracing at 2.5-foot, 5-foot, and 8-foot marks to support seams between shelf boards. This prevents gaps and maintains strength.
Construct Ladder-Style Supports
For double-sided or tall units, build ladder-style supports:
Use two parallel 2×3s spaced 24 inches apart. Attach 2-foot crosspieces every 18 inches on center as rungs.
Build two identical supports for front and back. Keep everything square to ensure a flat shelf surface.
These ladder supports act as vertical frameworks that hold each shelf level and evenly distributed.
Install Ledger for Wall-Mounted Shelves
For hybrid or wall-mounted designs, attach a ledger board to the wall:
Mount a 2×4 ledger to the wall at 19-inch height. Use a laser level to ensure it is perfectly level across long runs.
Secure with Tapcon screws into concrete or wood screws into studs. The ledger supports the back edge of shelves, reducing load on vertical posts.
Depth Tip: A 19-inch ledger plus ½-inch plywood equals 19.5-inch depth. To reach 24 inches, use a 21-inch front frame.
Attach to Concrete or Joists

Mount to Concrete Wall with Tapcons
This is the most reliable method for securing to concrete:
Mark ledger or frame attachment points on the wall. Drill holes with a masonry bit slightly deeper than the screw length.
Insert 3-inch Tapcon screws and drive them flush. Repeat every 16 to 24 inches along the ledger.
Do not use Ramset nails for shelf supports. They can fail under lateral stress and are not recommended for this application.
Elevate Off the Floor
Protect wood from moisture and minor flooding by elevating the structure:
Place cinder blocks, bricks, or plastic spacers under vertical posts. This raises shelves 1 to 2 inches off concrete.
Elevation prevents wicking and rot in damp basements. Even in dry basements, this small lift adds longevity to your build.
Connect to Ceiling Joists (Optional)
For top-supported systems, attach rails to ceiling joists:
Attach 2×3 rails to ceiling joists every 16 inches on center. Drive 3-inch screws through the rail into joists.
Then secure vertical supports to these rails. This transfers load upward and reduces floor pressure.
Only attempt this if you have 7 feet or more of clearance and safe ladder access.
Install Shelf Boards
Cut Plywood or OSB to Size
Rip 4×8 sheets to 21 to 24-inch width using a circular saw and straight edge guide. Crosscut into 2-foot, 4-foot, or 8-foot lengths based on your shelf depth.
Label each piece to avoid confusion during assembly. Use a stop block on a miter saw for repeatable 21-inch cuts if you have one.
Secure Boards to Frame
Place the board on the frame or ledger. Attach with 1-inch screws or 16-gauge brad nails every 6 to 8 inches.
Screws allow future disassembly while nails are faster but permanent. Drive 2½-inch screws up through the front frame into the shelf edge for extra stiffness.
Sag Prevention: For long shelves over 4 feet, add a 2×2 cleat under the front edge or use a 2×6 front rail for added rigidity.
Handle Seams in Long Runs
If your shelf exceeds 8 feet, butt two 8-foot boards together over a vertical support. Add middle bracing underneath to support the seam.
Avoid floating seams that are not supported by a post or rail. This prevents gaps and maintains strength across the entire span.
Finish and Optimize
Paint or Seal for Looks and Protection
Sand rough edges before finishing. Apply latex paint or wood sealant to protect against moisture and make cleaning easier.
Try Rust-Oleum Chalked Paint for a clean, modern look. Sealing helps in slightly humid areas but is not a substitute for moisture control.
Customize for Your Storage
Set shelf heights to match your specific storage totes. Leave 12 to 14 inches for small bins, 18 to 20 inches for double-stacked 27-gallon totes.
Reserve the bottom shelf for heavy items like tools, amplifiers, or equipment. Leave the top open for infrequently used seasonal items.
Pro Tip: Flush-cut the top of front supports to hang cords, hoses, or power strips for easy access.
Design for Expansion
Build with the future in mind:
Leave space for an L-shaped extension. Use matching materials and spacing throughout.
Repeat the same frame design on an adjacent wall. Screw the new unit into the end of the existing one for seamless connection.
Modular design lets you grow your system over time without starting from scratch.
Prevent Common Mistakes
Avoid Sagging Shelves
Sagging is the number one failure point. Prevent it by:
Using ¾-inch plywood for spans over 4 feet. Spacing supports at 16 inches on center for thin materials.
Adding a front 2×6 rail on long shelves over 6 feet. Supporting all seams with bracing underneath.
Half-inch OSB without proper support will sag within months under heavy loads.
Do Not Skip the Level
A crooked shelf looks bad and stores poorly:
Use a laser level for runs over 8 feet. Check level at start, middle, and end.
Adjust with shims if needed before final fastening. Even a ¼-inch slope over 10 feet becomes very noticeable once loaded.
Do Not Use Wrong Screws
Running low on fasteners? You can reuse leftover screws from other projects but only if:
They are corrosion-resistant like deck or structural screws. They are the same or larger size than required.
They are not stripped or bent. Never substitute drywall screws. They snap under load and are not designed for structural connections.
Real-World Performance and Cost
How Much Will It Cost?
Total cost varies by size and materials:
A budget OSB build measuring 12 feet costs about $42, saving roughly $758 compared to commercial shelving.
A mid-range build at 10 feet costs about $130, saving approximately $670.
A premium plywood build at 16 feet costs $200 to $289, saving $500 or more compared to store-bought units.
Cost-Saving Tips: Use 2×3s instead of 2×4s. Choose OSB for non-heavy-duty zones. Use store cutting services. Buy materials during holiday sales.
How Long Do DIY Shelves Last?
With proper construction, your shelves can last for decades:
In a dry basement, expect 10 to 30-plus years of service. In a damp basement, expect 5 to 10 years if elevated and using plywood.
Inspect annually for loose screws, warping, or moisture damage. Shelves built with ¾-inch plywood and 16-inch supports can last decades with minimal maintenance.
Final Tips for Success
Building custom wood shelves for basement storage is a rewarding weekend project that transforms chaotic spaces into organized, functional areas. Follow these final recommendations:
Build square, level, and plumb. Use your measuring tape, speed square, and laser level throughout the process.
Work with a partner for lifting and alignment, but solo work is possible with clamps.
Start small. Build one section, test it, then expand. Prioritize safety by wearing gloves, goggles, and a dust mask when cutting.
Test load gradually. Do not stack 500 pounds on day one. Add weight slowly to ensure stability.
Custom wood shelves are cheaper, stronger, and more adaptable than anything you can buy. With the right materials, spacing, and installation, your DIY basement shelves will support heavy loads for years.
Frequently Asked Questions About Building Wood Shelves for Basement Storage
What is the best material for basement storage shelves?
The best material is ¾-inch plywood for heavy loads and smooth functionality. It resists sagging, handles moisture better than OSB, and provides a smooth surface for sliding bins. Use OSB only in dry basements where budget is a primary concern.
How far apart should shelf supports be spaced?
Maximum spacing should not exceed 4 feet between vertical supports. For ½-inch materials, space supports at 16 inches on center. For ¾-inch plywood, 24-inch spacing is acceptable for lighter loads.
Do I need to anchor shelves to the concrete wall?
Yes, anchoring provides stability and prevents tipping. Use 3-inch Tapcon screws with a masonry bit for concrete walls. For wood-frame walls, use 3-inch screws into studs. Freestanding units work but are less stable than anchored designs.
How much do DIY basement shelves cost compared to buying them?
DIY shelves cost between $42 and $289 depending on materials and size. Commercial shelving units typically start at $800. You can save $500 to $750 or more by building your own.
Can I build basement shelves myself if I have no carpentry experience?
Yes, this is a beginner-friendly project. The most important skills are measuring accurately, checking for square, and using a level. Start with a simple design, follow the steps carefully, and take your time with alignment.
Key Takeaways for Building Durable Basement Shelves
Building wood shelves for basement storage requires choosing the right materials, planning proper support spacing, and securing the structure correctly to your walls or floor. Use ¾-inch plywood for durability and 2×3 lumber for cost savings. Space supports no more than 4 feet apart and use 16-inch on-center framing for thinner materials. Anchor to concrete with Tapcon screws or to ceiling joists for a sturdy system that lasts decades. With basic tools and this step-by-step approach, you can build a full wall of shelving for under $200 that outlasts and outperforms commercial options.





