
How to Make Floating Shelves for Laundry Room
Tired of cluttered laundry rooms with no place to store detergent, fabric softener, or ironing supplies? Floating shelves offer a sleek, space-saving solution that combines practicality with modern style. Unlike bulky cabinets, floating shelves use hidden supports to create the illusion of shelves hovering on the wall, maximizing vertical storage without sacrificing floor space. Whether you’re tackling a small utility closet or a full-sized laundry area, these custom-built shelves can be tailored to fit any wall, support heavy loads, and match your home’s aesthetic.
In this guide, you’ll learn how to build strong, durable floating shelves using three proven methods, from beginner-friendly box-and-cleat designs to heavy-duty ladder-frame systems. We’ll walk through every step: measuring your space, choosing the right wood, building the support structure, securing it to wall studs, and finishing with a polished look.
Plan Your Laundry Room Shelf Layout
Measure Wall Space Accurately
Start by measuring the available wall space where you want to install shelves. Use a tape measure to record the width, height, and depth of the area, especially above or beside your washer and dryer. Note any obstructions like vents, outlets, or plumbing that could interfere with shelf placement. For proper clearance, leave at least 6 inches above appliances to prevent heat damage and allow airflow.
Since walls are rarely perfectly square, measure at the top, middle, and bottom of the wall. Even a half-inch variation can affect shelf fit. Write down all dimensions before cutting any wood.
Locate Wall Studs First
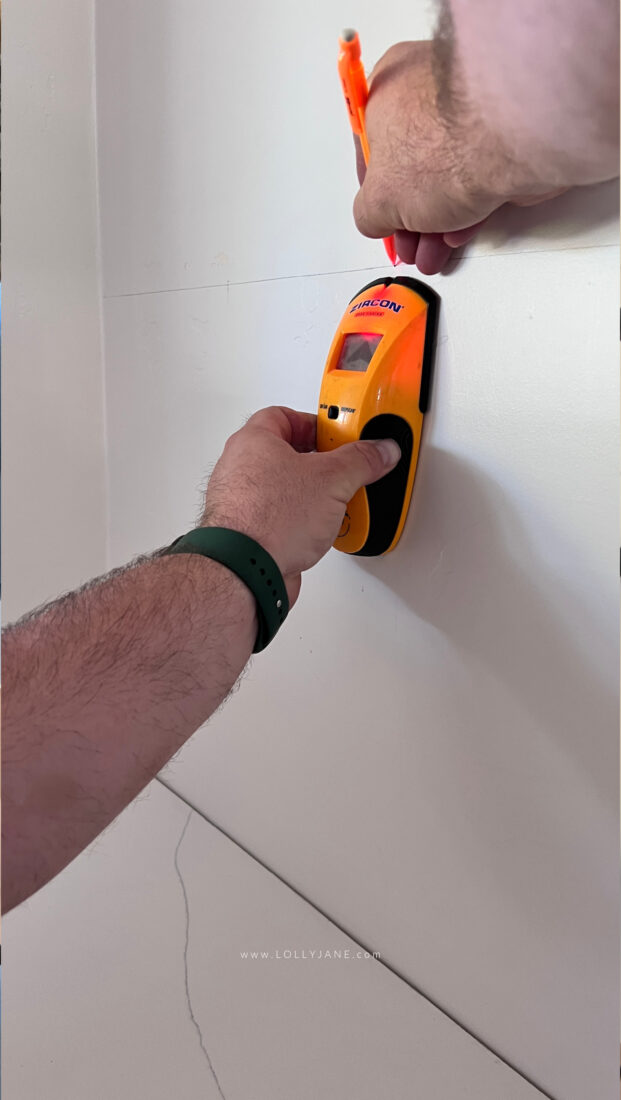
Floating shelves must be anchored into wall studs for strength and safety. Use a reliable stud finder to locate studs behind drywall and mark their positions lightly with a pencil. Standard stud spacing is 16 inches on center, but always verify, especially near corners or around windows.
If your desired shelf location does not align with studs, consider adjusting the shelf length or using heavy-duty toggle bolts rated for at least 50 lbs each. However, anchoring into studs is strongly recommended, especially for shelves holding heavy laundry products or baskets.
Choose Shelf Configuration
Decide how many shelves you need and how they will be arranged. A single full-width shelf works well for minimalist looks or small spaces. Double or staggered shelves, with one long shelf and a shorter one below, add visual interest. A vertical stack with multiple shelves spaced 12.5 to 18 inches apart provides maximum storage.
A staggered layout works well when upper wall space is blocked by a vent or light fixture. A full-wall setup maximizes storage in deep laundry areas.
Select Materials for Strong, Stylish Shelves
Choose the Right Wood Type
Use kiln-dried, straight boards to minimize warping. Recommended options include pine, poplar, or aspen for the shelf surface. For the support frame, use 2×2 furring strips or 2×4 construction lumber. The front facing can be made from 1×3, 1×4, or 1×6 boards ripped to width. Use quarter-inch plywood or underlayment board for underneath.
Pine is affordable and easy to stain. Poplar takes paint well. Aspen offers a rustic look. A 1×12 board provides ample depth for storing bottles and bins.
Gather Essential Supplies
You will need wood glue, one to 1.25-inch finish nails for plywood and trim, 2.5 to 3-inch wood screws for frame assembly, and 3.5 to 4-inch coarse-thread screws for wall mounting. Gather stainable wood putty, Minwax Pre-Stain Wood Conditioner, stain, and optional Minwax One Coat Polyurethane for moisture resistance. Pre-finish all wood components before installation for easier access and a smoother result.
Build Floating Shelves: Three Proven Methods
Method 1: Box-and-Cleat for Beginners
Best for lightweight to medium loads like detergents and cleaning sprays.
Cut and Assemble the Shelf Box
Cut two side pieces from a 1×8 board to match your shelf depth minus 0.75 inch. For a 12-inch-deep shelf, cut two 11.25-inch-long pieces. Cut a front piece from a 1×4 to the full shelf width. Assemble into a U-shape using wood glue and finish nails. Leave the back open.
Build the Wall Cleat
Cut a 2×2 furring strip to match shelf length minus 0.25 inch. Attach four to six 5.5-inch-long 2×2 blocks perpendicularly along the strip, spaced every 12 inches. Use two 3.5-inch screws per block.
Install and Mount
Attach the cleat to wall studs using 3.5-inch screws, positioned 0.75 inch below the desired shelf top. Slide the shelf box over the cleat until flush. Secure from the top with finish nails driven through the shelf into the cleat. Fill holes with wood putty.
Pro Tip: Pre-stain the cleat to hide it behind the shelf.
Method 2: Ladder Support Frame for Heavy Loads
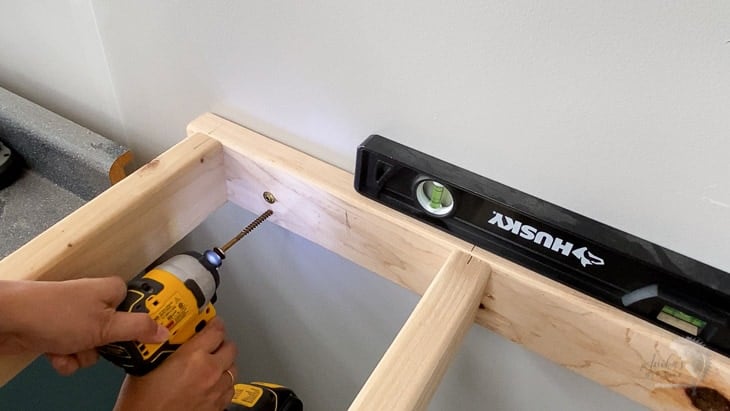
Ideal for large, wall-to-wall shelves carrying heavy baskets or appliances.
Build the Ladder Frame
Cut two 2×4s to exact wall width. Cut 14-inch-long cross supports from 2×4s and space them 12 inches apart. Screw together with 2.5-inch wood screws to form a ladder-like grid.
Mount Frame to Wall
Hold the frame against the wall at your marked height. Use a level to ensure it is straight. Attach to every stud with 4-inch screws. Use a right-angle drill in tight corners.
Skin with Plywood
Cut quarter-inch plywood to 17-inch depth and shelf width. Sand edges. Stain both sides if desired. Tap into place with a mallet and secure with a nail gun along all edges.
Add Front Facing
Rip a 1×6 aspen plank to 4-inch width on a table saw. Stain to match. Nail to the front edge with finish nails for a clean, professional finish.
Warning: Never skip the ladder frame if storing heavy items.
Method 3: Hidden Supports for Farmhouse Style
Perfect for rustic or modern laundry rooms.
Build Support Structure
Cut two 2×2s to wall length. Attach four 9.75-inch-tall vertical support blocks between them, spaced to align with studs. Pre-drill and secure with 3-inch screws.
Mount to Wall
Mark position 0.75 inch below desired shelf top. Use level to draw a straight line. Attach support to studs with screws.
Attach 1×12 Shelf Board
Cut 1×12 board to length. Place over supports. Secure from back and front with 3-inch screws. Countersink front screws so they will not show after adding front board.
Install Bottom Underlayment
Cut quarter-inch underlayment to 11.25-inch width. Attach to bottom of support frame to hide structure. Creates a seamless underside.
Repeat for Second Shelf
Install another shelf below the first, maintaining 12.5-inch vertical spacing. Ensures even, balanced look.
Finish and Install for a Polished Look
Sand and Prepare Surfaces
Sand all wood pieces with 120-grit sandpaper. Round sharp edges slightly for safety and aesthetics. Wipe away dust with a tack cloth before staining.
Stain for Uniform Color
Apply Minwax Pre-Stain Wood Conditioner to softwoods like pine to prevent blotchiness. Wait 15 minutes, then wipe off excess. Mix stain as needed, for example 75 percent Special Walnut plus 25 percent Classic Gray for warm gray-brown. Apply evenly with brush or cloth. Let dry 6 to 8 hours.
Pro Tip: Test stain on scrap wood first.
Seal Against Moisture
Laundry rooms are humid. Apply Minwax One Coat Polyurethane for durable, wipeable protection. Or skip poly for a rustic, lived-in look.
Paint for Clean, Bright Look
Use FrogTape to protect walls. Paint shelf backs and edges to match wall color to hide gaps. Semi-gloss or satin finishes resist moisture and are easy to clean.
Install with Precision and Safety
Use Level at Every Step
Even a slight tilt is noticeable. Check level across the entire cleat or frame before fully tightening screws. Re-check after mounting.
Drive Screws Into Studs Only
Each 3.5-inch screw into a stud holds 80 to 100 lbs. For a 5-foot shelf hitting six studs, that is a potential load of 480 to 600 lbs. Distribute weight evenly, avoiding single-point overloading.
Fix Common Installation Issues
Warped lumber requires applying pressure during install and selecting straight boards at the store. Gaps at the wall can be hidden by painting back edges black or using caulk. Visible screws should be countersunk and filled with stainable putty. Tight corners call for a right-angle drill adapter. Overhang beyond studs requires adding blocking between studs for support.
Customize for Style and Function
Space Shelves for Usability
Vertical spacing of 12.5 to 18 inches between shelves works well. A staggered layout adds visual interest and avoids obstructions. Full-wall coverage provides best storage for deep needs.
Add Aesthetic Touches
Match stain to flooring or cabinets. Paint shelves white for a bright, clean look. Add quarter round molding at ceiling and corners. Install vintage mirrors or cage lighting for character. Use fabric bins to hide valves or hoses.
Include Functional Upgrades
Mount LED strip lights underneath for task lighting. Add brass rails to hang drying clothes or towels. Plan for future countertop to conceal plumbing.
Maintain Longevity and Strength
Wipe shelves with a damp cloth, avoiding soaking. Re-tighten screws annually for heavy loads. Touch up scratches with matching stain. Do not place wet items directly on wood. In humid areas, use sealed pine or moisture-resistant wood.
Budget Smartly for Your Project
A 1×12 pine board costs $15 to $20. Furring strips run $5 to $8. A quarter-inch plywood sheet is $20 to $30. A 1×6 aspen plank costs $10 to $15. Screws and nails are $10 to $15. Stain and polyurethane are $10 to $20 each. Total cost per shelf is approximately $50 to $80.
Save money by having wood ripped at the hardware store. Many stores offer free cuts.
Frequently Asked Questions About Building Laundry Room Floating Shelves
What is the easiest method for building floating shelves for a laundry room?
The box-and-cleat method is the easiest approach for beginners. It involves creating a U-shaped shelf box and mounting a cleat to the wall that slides into place. This method works well for lightweight items like detergent bottles and cleaning supplies.
How much weight can laundry room floating shelves hold?
When anchored properly into wall studs, floating shelves can support significant weight. Each 3.5-inch screw into a stud holds approximately 80 to 100 lbs. A 5-foot shelf attached to six studs can potentially support 480 to 600 lbs when weight is distributed evenly.
Do I need to stain or seal laundry room floating shelves?
Yes, sealing is highly recommended for laundry room shelves due to humidity. Apply a stainable wood conditioner followed by stain, then finish with a coat of polyurethane. This protects the wood from moisture and makes cleaning easier.
Can I install floating shelves without finding studs?
While possible using heavy-duty toggle bolts rated for at least 50 lbs each, this is not recommended. Anchoring into studs provides the strongest and safest support. If studs do not align with your desired shelf placement, consider adjusting the shelf length or adding blocking between studs.
How much does it cost to build floating shelves for a laundry room?
The total cost per shelf is approximately $50 to $80, depending on wood type and finish. This includes the 1×12 board, support materials, screws, stain, and polyurethane. A minimal budget version can cost around $15 using fewer materials.
Key Takeaways for Building Laundry Room Floating Shelves
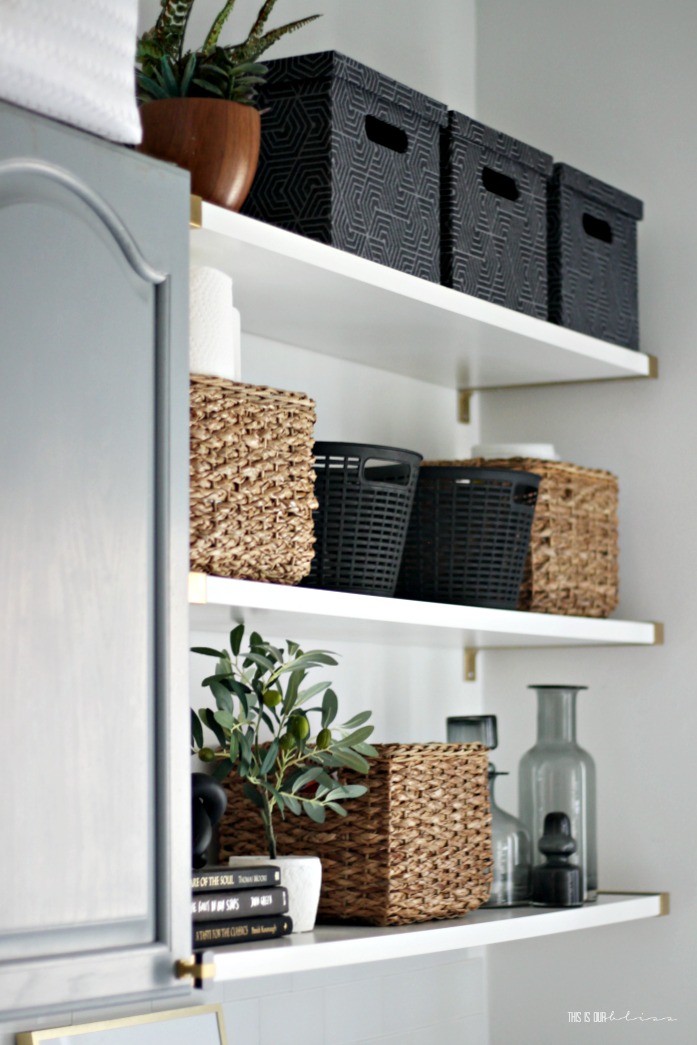
Building floating shelves for your laundry room is a rewarding DIY project that transforms cluttered spaces into organized, stylish areas. The three construction methods, from simple box-and-cleat to heavy-duty ladder frames, each serve different needs and skill levels. Choose the box method for lightweight storage, the ladder frame for heavy baskets and appliances, or the hidden support method for a rustic farmhouse look.
Successful installation hinges on three critical steps: accurate measuring with checks at multiple points, anchoring securely into wall studs, and using a level constantly throughout the process. Pre-finishing all wood components before installation makes staining and sealing much easier. With proper planning and attention to detail, your custom floating shelves will provide years of durable, functional storage that makes laundry day more manageable.





