
How to Build Built-In Shelves Around a Fireplace
Installing built-in shelves around a fireplace instantly transforms your living room into a custom-designed space. These tailored units blend storage, style, and functionality, elevating the fireplace from a simple heat source to the architectural heart of the room. Whether you’re hiding wires, displaying cherished decor, or balancing an off-center fireplace, built-in shelving adds value, symmetry, and sophistication.
This guide walks you through every step of building fireplace built-ins: from planning and materials to wiring, assembly, and finishing. You’ll learn how to integrate cabinets seamlessly with your home’s trim, hide electronics, reinforce shelves for durability, and solve common challenges like remote signal blockage and uneven walls.
Design Built-Ins That Match Your Home’s Style
Built-ins should echo existing details in your home, whether it is Craftsman trim, shaker cabinetry, or modern minimalism. Use the same wood species, molding profiles, and paint finish as nearby doors or baseboards to create visual harmony.
For traditional homes, use raised-panel doors and thick crown molding. For modern spaces, opt for flat panels, minimal trim, and floating shelf illusions. For Craftsman bungalows, incorporate exposed joinery and stained wood.
Take a photo of your baseboard or door casing and bring it to a millwork shop to find matching moldings.
Balance an Off-Center Fireplace
If your fireplace sits to one side of the wall, extend the shelving unit across the entire wall to create symmetry. Place the fireplace within the larger composition, flanked by cabinets on both sides or set between two mirrored units.
Use full-height cabinets on the shorter side to balance visual weight. Consider incorporating a TV cubby on the opposite side to maintain equilibrium.
Plan for TV and Media Storage
Most built-ins now house a television and entertainment system. Decide early whether the TV will go above the mantel or within the cabinetry, and plan how wires will be hidden.
Mount the TV within a center opening, flanked by display shelves. This keeps sightlines low and allows safe, direct wall mounting.
Choose the Right Materials for Your Built-In Shelves
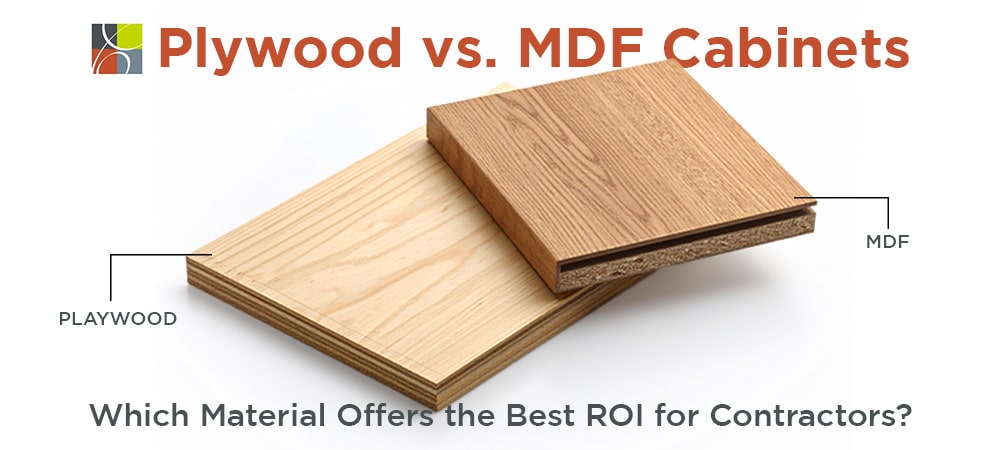
Selecting appropriate materials ensures durability and a professional finish. The right choice depends on your budget, the room’s moisture levels, and your desired aesthetic.
Plywood vs. MDF for Cabinet Boxes
Use ¾-inch birch plywood for cabinet sides, shelves, and dividers because it is strong, stable, resists warping, and is ideal for paint. Use MDF for shelves, face frames, and moldings because it paints flawlessly with no grain bleed-through. Use hard maple for face frames, trim, and reinforcement because it is durable, smooth, and perfect for crisp paint lines.
Avoid particleboard, as it swells with humidity and will not hold screws well over time.
Edge Treatment Options
Raw plywood edges look unprofessional. Cover them with iron-on veneer tape for a budget-friendly option, solid wood strips glued and nailed for a premium finish, or MDF banding for painted units.
Use a router with a roundover or ogee bit on MDF edges before painting for a custom look.
Prepare the Space and Update the Fireplace
Before building, clear the area completely. Remove the existing mantel using a pry bar and oscillating tool, then demolish any outdated brick, stone, or tile surround. Repair the wall behind with drywall or backer board if tiling.
Turn off gas or electricity to the fireplace before starting. Use dust containment if renovating.
Install a Modern Fireplace Surround
Upgrade the look with tile such as subway tile or marble mosaic for a clean, timeless look. Use heat-resistant porcelain if near active flames, and apply thin-set mortar with spacers for even grout lines.
Extend tile beyond the firebox to create a full-width surround that integrates with the new shelving.
Modify the Mantel for Wire Access
To hide cords, trim the sides of the mantel so cabinets fit flush against it. Drill a 1½-inch hole through the mantel from front to back, then route HDMI, power, and audio cables through this hole into lower cabinets.
Never route wires through combustible material near active flames. Keep all cables at least 6 inches from the firebox.
Cut Panels to Size for Your Built-Ins
Most built-in shelves are 12 to 16 inches deep, 84 to 96 inches tall, with shelf spacing at 20 inches on center. Adjust dimensions based on your wall space and storage needs.
Have panels pre-cut at Home Depot or Lowe’s using their panel saw. Bring a written cut list to save time and improve accuracy.
Example Cut List for Two 84-Inch Tall Bookcases
Cut four side panels at 15 inches by 84 inches from ¾-inch plywood or MDF. Cut ten shelves at 15 inches by 35½ inches, adjusting for your exact cabinet width. Cut dividers to match shelf height.
Join Shelves Securely for Maximum Strength
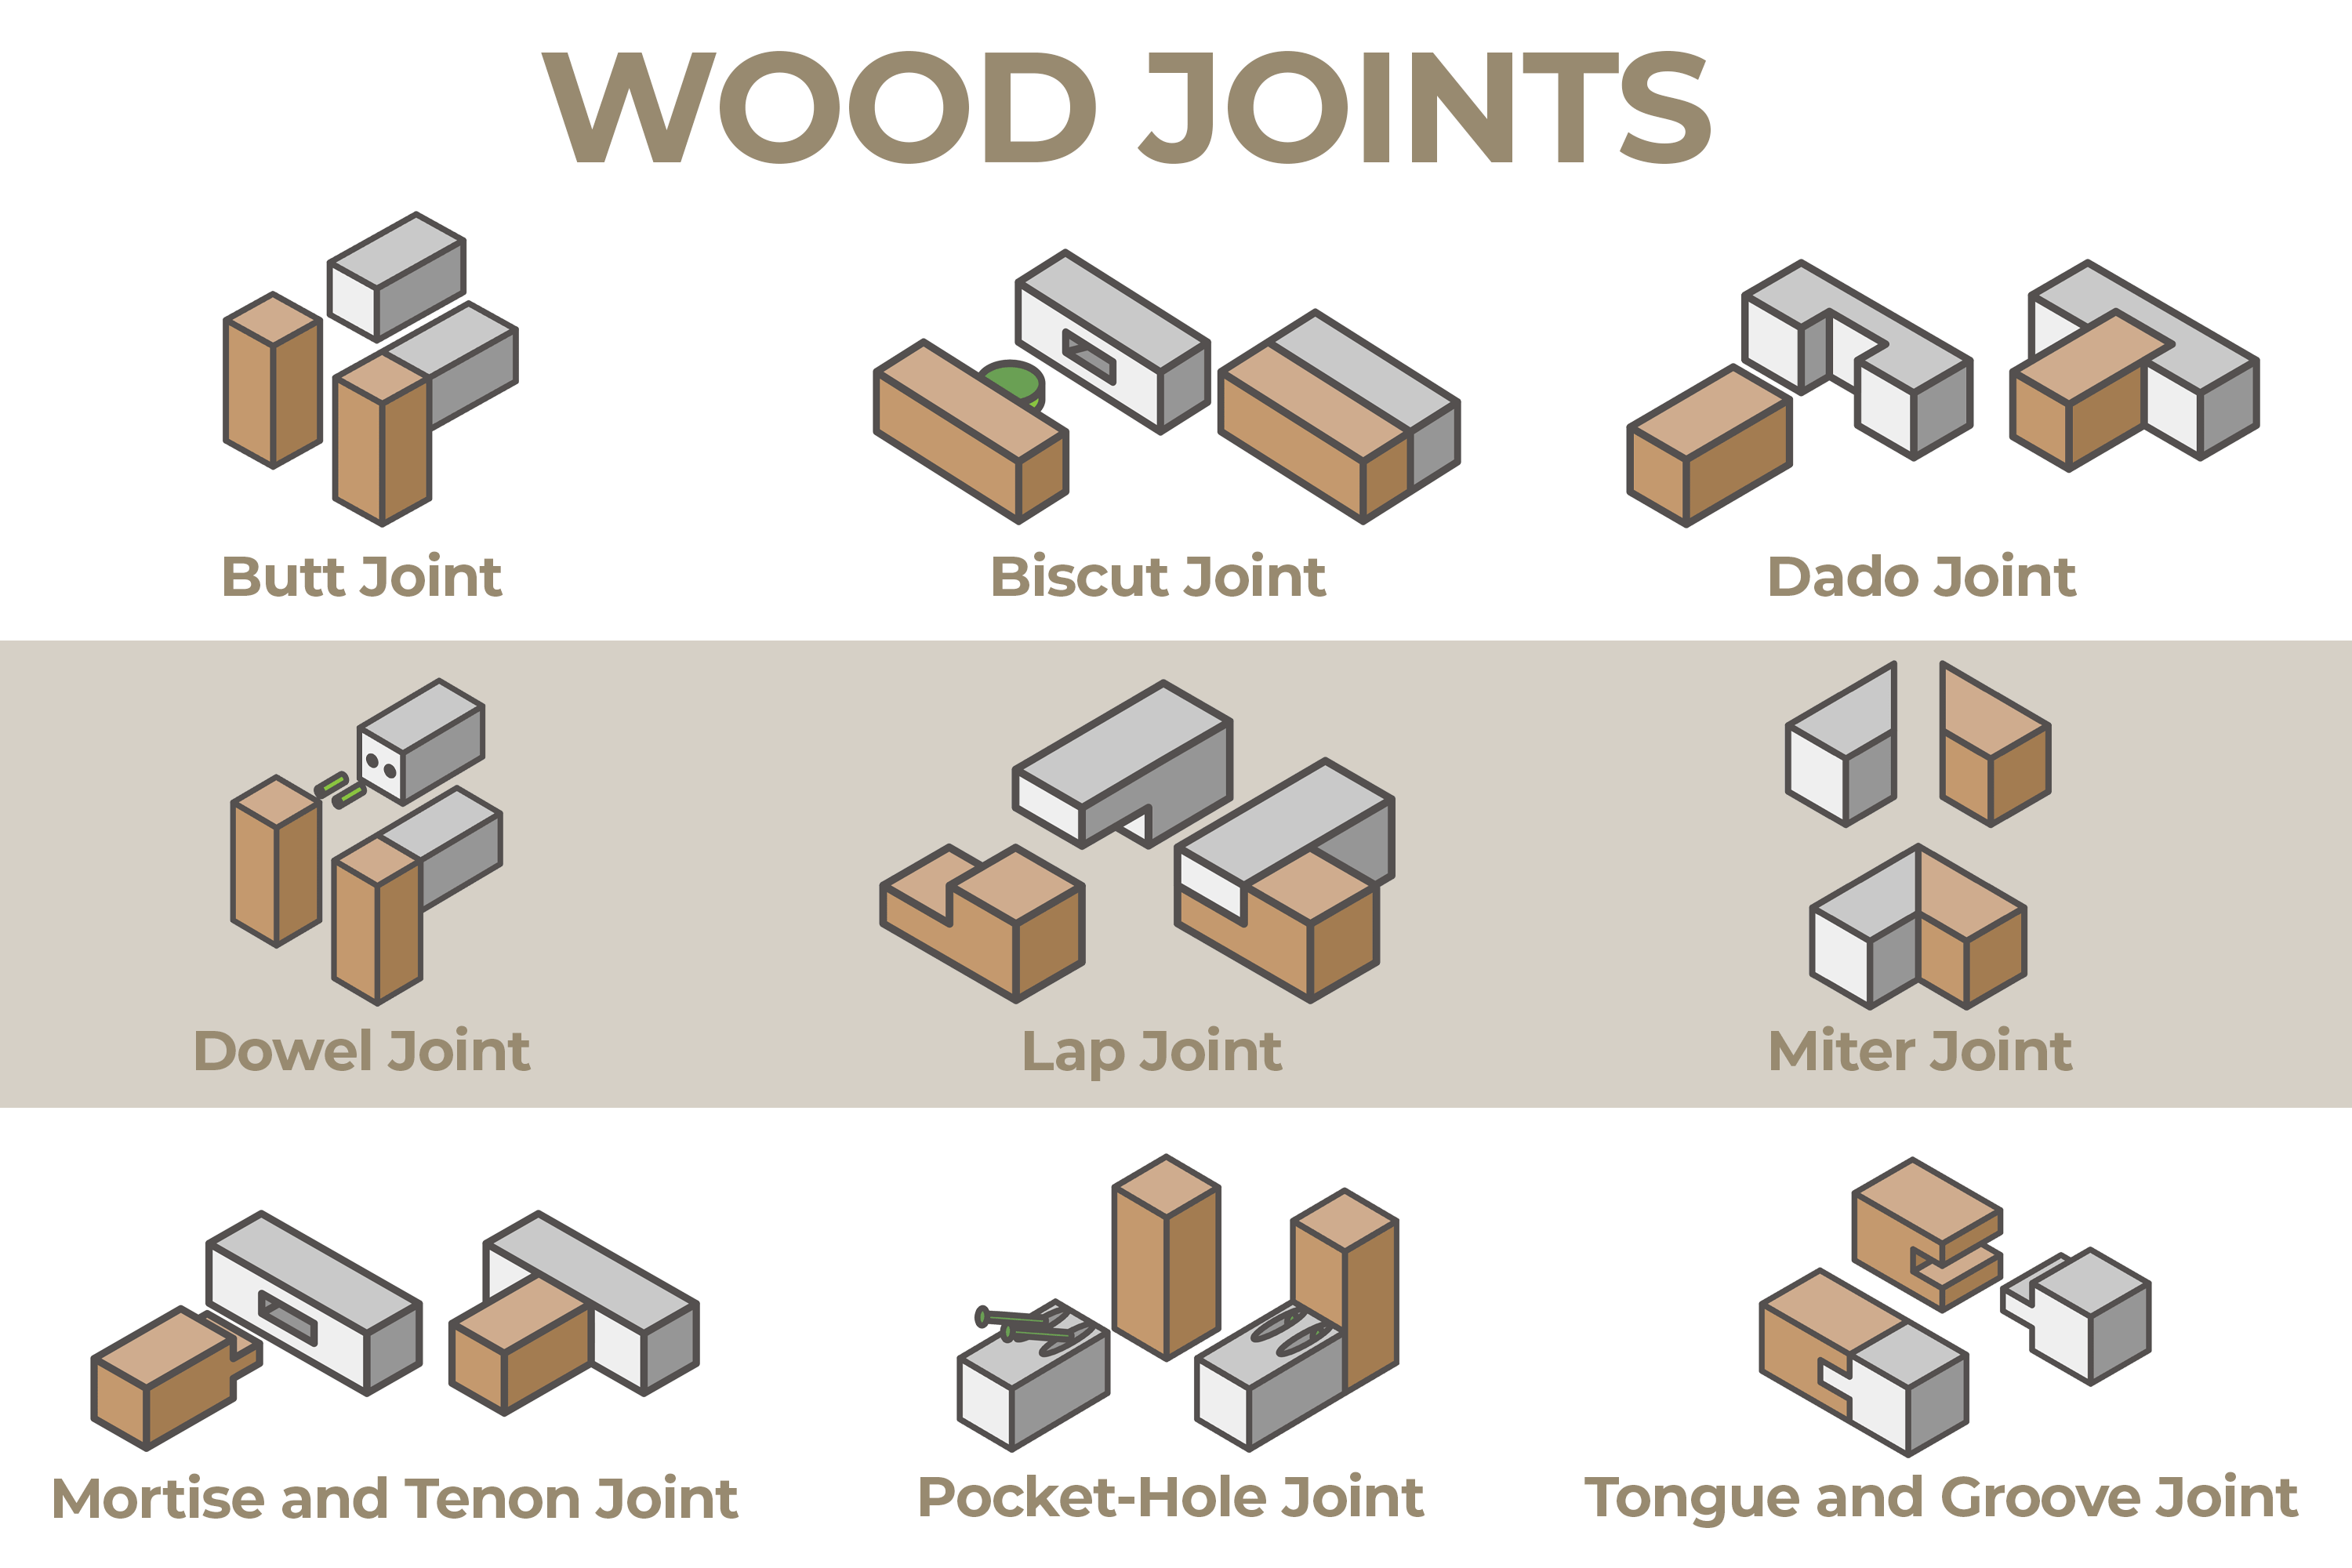
The joinery method you choose affects both strength and ease of assembly. Two primary options work well for DIY builders.
Use Dado Joints for Strength
Dado joints lock shelves into side panels for maximum support. Set a router with a ¾-inch dado bit to 3/8-inch depth, then cut horizontal grooves into the inside face of side panels. Slide shelves into dados, glue, and pin with brad nails.
Build a simple guide from scrap wood and a framing square to keep cuts straight.
Or Use Pocket-Hole Joinery for Speed
The Kreg Jig method is faster and ideal for on-site assembly. Drill pocket holes on shelf ends, apply wood glue, clamp, and screw into side panels. Fill holes with wood plugs or filler, then sand smooth.
This method works best for DIYers or tight spaces where large tools will not fit.
Level Shelves Across Multiple Units
Accurate leveling prevents gaps and ensures a professional appearance. Use the bottom edge of side panels as your reference point, not the floor.
Mark from the Bottom Up
To ensure shelves align across multiple cabinets, measure shelf height from the bottom edge of the side panel and mark all locations on the interior face. Use a laser level or 4-foot bubble level to transfer lines across units.
Avoid using the floor as a reference because most floors are not level.
Shim Behind Cabinets for Uneven Floors
If the floor slopes, place shims under cabinet bases. Level side-to-side and front-to-back, then secure shims with screws before final mounting.
Assemble Cabinets On-Site
Follow this step-by-step build order for successful assembly. First, attach shelves to side panels using glue and screws. Second, install vertical dividers with pocket screws through the cabinet bottom. Third, add 1×2 reinforcement strips under long shelves, screwing them to wall studs. Fourth, install a ¼-inch back panel to stiffen the box. Fifth, trim flush with a router or jigsaw.
Back panels prevent racking and hide wall imperfections.
Reinforce Shelves Against Sagging
For shelves over 30 inches wide, glue and screw a 1×2 maple strip to the underside, running front to back. Anchor the strip to wall studs with 2½-inch screws.
A 1×2 edge-grain strip can support over 100 pounds without sag.
Hide Wires and Electronics Seamlessly
Creating a clean look requires planning for cable management during construction, not after.
Create a Wiring Channel
Install 1×3 furring strips vertically on the wall over studs. Position cabinets over the strips, creating a ¾-inch gap behind. Run HDMI, power, and Ethernet cables down this cavity.
Alternatively, use the modified mantel as a wire chase by drilling holes into lower cabinets.
Store Devices Out of Sight
Place cable boxes, soundbar receivers, streaming devices, and power strips inside a base cabinet with vented doors or a pull-out tray.
Never fully enclose heat-producing devices. Add 1-inch vents or use a mesh grille.
Add Face Frames and Trim for a Professional Look
Face frames cover raw panel edges and provide a nailing surface for doors. Cut 1×2 maple or primed MDF into stiles for vertical pieces and rails for horizontal pieces. Assemble with pocket holes and glue, then attach directly to the cabinet front.
Install Architectural Molding
Use crown molding at the top, mitering corners at 45 degrees. Match baseboard at the bottom to your existing trim. Apply side trim to frame the entire unit, and add header and footer molding to cap top and bottom edges.
In older homes, match new wood crown to original plaster crown by tracing the profile and cutting with a coping saw.
Mount Cabinets Securely to the Wall
Safety requires proper anchoring to wall studs, not drywall anchors.
Anchor to Wall Studs
Position cabinets next to the fireplace and check for level and plumb. Drive 3-inch wood screws through the cabinet sides into studs. Use angle iron brackets at top and bottom if side access is limited.
Never rely on drywall anchors. Always fasten to wood framing.
Stabilize Freestanding Units
If only one side hits a stud, install L-brackets from the back of the cabinet into the wall. Add a floor-to-ceiling support rail at the rear for additional stability.
Paint brackets before installation so they disappear against dark walls.
Finish with Paint and Doors
Apply primer to all surfaces, especially MDF. Use high-quality paint such as Benjamin Moore Advance or Sherwin-Williams Emerald. Apply 2 to 3 coats with a mini roller for a smooth finish. Paint crown molding and doors before final installation.
Use pre-mixed white such as Chantilly Lace to match existing trim exactly.
Install Shaker or Recessed-Panel Doors
Buy pre-made shaker doors from Home Depot or JELD-WEN, or build your own with rabbeted stiles and rails. Use soft-close hinges to prevent slamming.
Add adjustable shelf pins behind doors for future reconfiguration.
Solve Remote Control Signal Issues
Wood cabinets block infrared signals, preventing remotes from working through closed doors.
Upgrade to RF Remote Systems
Replace your cable box with an RF-enabled model such as Xfinity X1. Use a universal remote with RF capability such as Logitech Harmony. Alternatively, install an IR repeater kit for $20 to $50 that relays signals from outside the cabinet.
Test first by placing devices in the cabinet and trying to change channels before closing doors.
Real-World Cost and Value
Building custom built-ins requires a significant investment, but the payoff in aesthetics and functionality is substantial.
Budget Breakdown for Two Full-Height Units
Materials including plywood, MDF, and trim cost $800 to $1,200. Moldings and hardware add $300. Paint and supplies run $150. If hiring labor, expect to pay $1,500 to $2,500. Total project cost ranges from $2,750 to $3,500.
Building it yourself cuts cost by 40 to 60 percent.
Resale Impact
Custom built-ins add perceived value and luxury. They appeal to buyers seeking move-in-ready homes and deliver high ROI, especially in updated living rooms.
Frequently Asked Questions About Building Built-In Shelves Around a Fireplace
What is the best material for painted built-in shelves?
MDF is the best choice for painted built-ins because it paints flawlessly with no grain bleed-through. Use ¾-inch birch plywood for structural components that need more strength.
How do I hide wires running to a TV above the fireplace?
Run wires through furring strips installed over wall studs behind the cabinets, or drill through a modified mantel to route cables down into lower cabinets. Never route wires through combustible material near the firebox.
Can I install a TV inside built-in cabinets?
Yes, mount the TV within a center opening flanked by display shelves. This keeps sightlines low and allows direct wall mounting. Ensure proper ventilation and consider RF-compatible remotes for controlling devices inside closed cabinets.
How do I prevent shelves from sagging over time?
Limit shelf span to 36 inches without support. Use thicker shelves for heavy items and anchor long shelves to wall studs every 16 inches. Glue and screw a 1×2 maple strip to the underside of shelves for additional reinforcement.
What height should built-in shelves be?
Most built-ins extend from floor to ceiling, typically 84 to 96 inches in homes with 8 to 9-foot ceilings. Adjust shelf spacing to 20 inches on center or customize based on your storage needs for books, decor, or TV components.
How much does it cost to build custom built-ins around a fireplace?
Materials and labor total approximately $2,750 to $3,500 for two full-height units. DIY building cuts this cost by 40 to 60 percent, bringing materials alone to around $1,250.
Key Takeaways for Building Fireplace Built-Ins
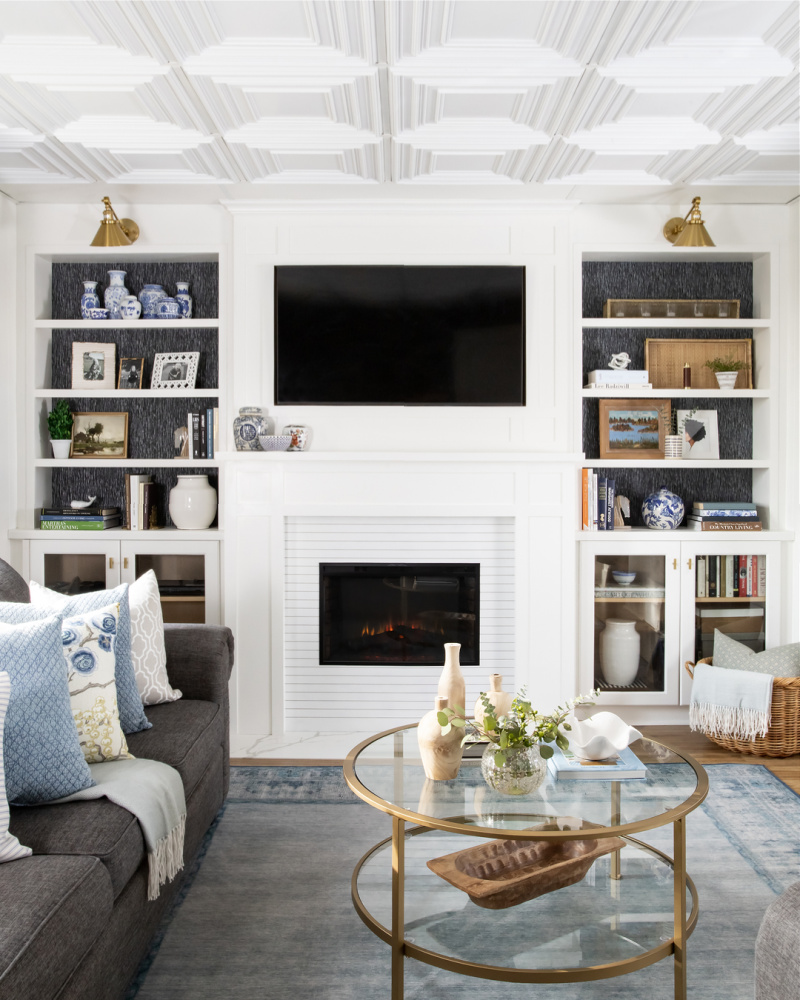
Plan wiring first because it is harder to fix later. Match trim profiles for seamless integration with your home’s existing architecture. Use a laser level for perfect alignment across multiple cabinet units.
Paint samples on the wall to test color before committing. Secure cabinets to wall studs for safety, and upgrade electronics to support RF remotes if storing devices inside closed cabinets.
Built-in shelves around a fireplace are more than storage. They are a statement piece that elevates your entire living space. With careful planning, quality materials, and attention to detail, you can create a custom installation that delivers lasting beauty, smart functionality, and a focal point that draws the room together.





