
How to Hang Floating Shelves in an Apartment
You love the clean, modern look of floating shelves but worry about drilling into your apartment walls. What if your landlord deducts from your deposit? What if you can’t find studs? The good news is you can install stylish, sturdy floating shelves without breaking your lease or damaging your walls. With renter-friendly options like no-drill systems and smart placement strategies, you can add functional storage and personality to your space safely and temporarily. This guide walks you through the best tools, step-by-step installation methods, weight limits, removal tips, and alternatives so you can decorate confidently, even on a lease.
Choose Renter-Friendly Floating Shelves
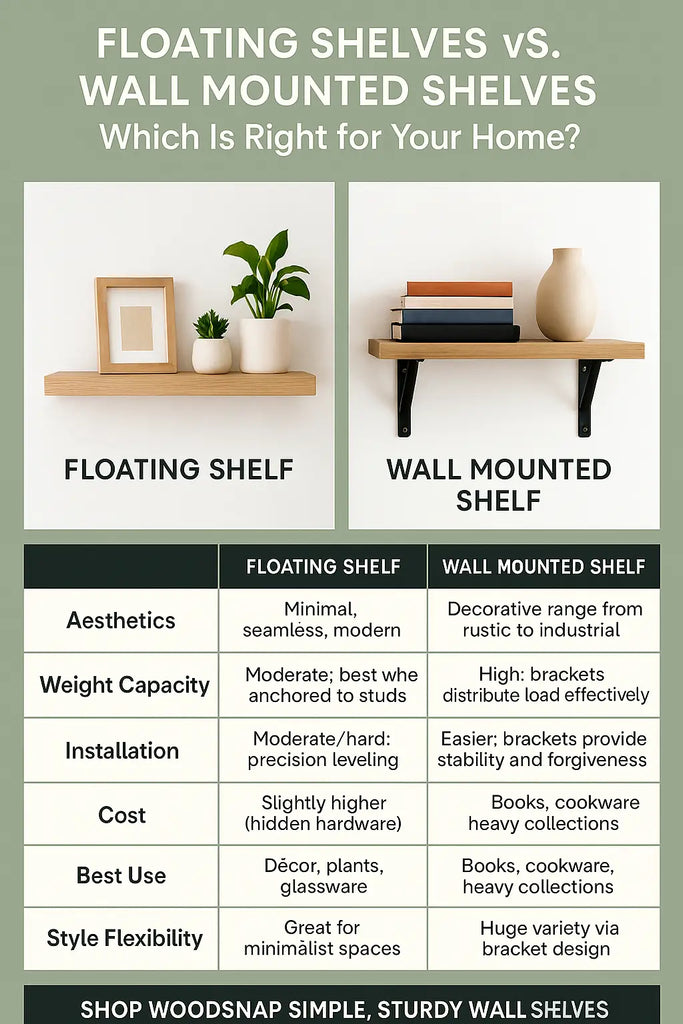
Not all floating shelves are created equal, especially for apartments. Your best bet is a system designed to minimize wall damage while supporting real weight.
Pick No-Drill Shelves First
High & Mighty stands out as the top choice for renters. These shelves use hardened steel pins that slide into drywall without drilling. They support up to 25 pounds on the 36-inch model, lock securely, and leave only pin-sized holes when removed. These holes are often considered normal wear and tear by landlords.
Other low-impact options include:
- Fixwal: Tool-free installation with lightweight capacity
- Sorbus: Minimal hardware with small anchor holes
- Yamazaki Home: Sleek design with low-profile mounting
Pro Tip: If your lease bans any wall penetration, skip even pin systems. Use tension rods, adhesive ledges, or freestanding shelves instead.
Avoid Heavy-Duty Mounting Unless Allowed
Shelves like West Elm or AllModern solid wood models look great but require screws and anchors. Only install these if your lease permits minor modifications, and always plan for patching before you move out.
Find the Best Wall Locations
Where you install shelves affects both function and risk. Choose spots that maximize utility without compromising wall integrity.
Use Walls with Drywall
Most no-drill shelves like High & Mighty require standard half-inch drywall or thicker. Avoid tile, plaster, or lath walls. These are harder to penetrate and more likely to crack or crumble during installation.
Ideal Spots in Your Apartment
Consider these high-value locations:
- Beside the bed: Replace nightstands with slim shelves for lamps or books
- Kitchen backsplash: Store oils, spices, or mugs while keeping counters clear
- Bathroom wall: Display towels, plants, or skincare products
- Entryway: Create a drop zone with a shelf plus hooks for keys and bags
- Closet or pantry: Add extra storage behind doors or on blank walls
- Living room: Showcase photos, books, or plants without bulky furniture
Expert Tip: “A small shelf with hooks near the entryway is a game-changer,” says Suzanna Schumacher, Co-Founder of Character. “It creates a landing spot for everyday items like keys and wallets.”
Gather the Right Tools
Your tool list depends entirely on the shelf type you choose.
For No-Drill Shelves: Almost Nothing Needed
You likely need no tools at all. Installation is hand-powered for most pin-based systems.
- Optional small hammer: Helps tap steel pins if drywall is dense
- Adhesive level: Often included with High & Mighty and sticks to the wall to guide pin placement
For Traditional Shelves If Drilling Allowed
- Stud finder: Locate wood studs for secure mounting
- Power drill: For pilot holes and screw installation
- Drywall anchors: Use toggle bolts or self-drilling anchors if no studs align
- Laser level: Ensures straight, professional-looking results
- Tape measure and painter’s tape: Mark placement and protect paint
- Screwdriver set and spackle kit: For final touches and repairs
Warning: Never assume you’re hitting a stud. Always verify with a stud finder before drilling.
Install No-Drill Floating Shelves Step-by-Step
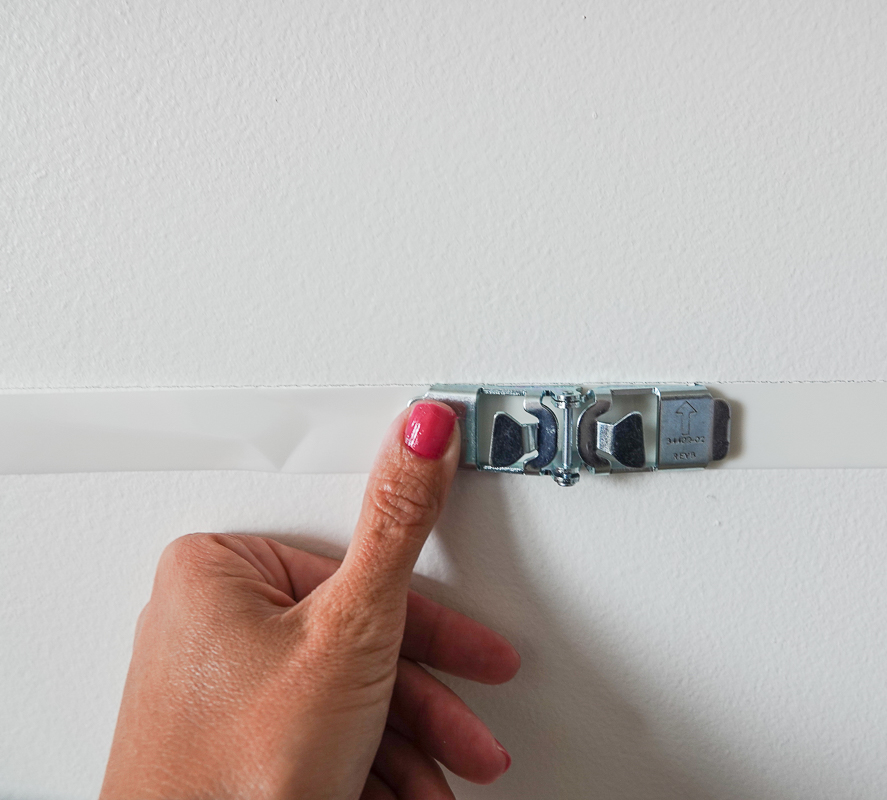
This method works for High & Mighty and similar pin-based systems. Installation takes under 15 minutes.
Mark Level Placement
Peel off the backing of the adhesive level included with your shelf. Stick it to the wall at your desired height. Adjust until the bubble is centered. This ensures your shelf will be straight. The level also shows exactly where to insert the pins.
Visual Cue: Look for the alignment marks on the level strip. They match the shelf’s mounting slots.
Insert Steel Support Pins
Push the hardened steel pins directly into the drywall at the marked points. Use your fingers first. If the drywall is tight, gently tap with a hammer. Do not force the pins. The pins have a curved design that locks behind the drywall surface, distributing weight across a wider area for strength.
Safety Note: Wear gloves and safety glasses. Drywall dust is minimal but can irritate your eyes or skin.
Snap the Shelf Into Place
Hold the shelf up and align the back slots with the installed pins. Slide it down firmly until you feel and hear a snap. This means the shelf has fully engaged with the pins. Test stability by gently pressing on both ends. If it wobbles, lift and reseat it.
Pro Tip: Have a friend hold the shelf while you check alignment, especially for longer models.
Mount Traditional Shelves If Permitted
Only proceed with this method if your lease allows drilling.
Locate Studs and Level the Line
Use a stud finder to identify wall studs. Mark their centers with painter’s tape. Measure your desired shelf height and use a laser level to draw a straight line across the wall. If no studs align with your shelf, plan to use heavy-duty drywall anchors instead.
Drill and Install Brackets
Drill pilot holes into studs or drywall. For drywall, insert anchors rated for your shelf’s load. Secure mounting brackets or cleats with screws. Ensure all hardware is level and evenly spaced.
Attach the Shelf
Lift the shelf onto the brackets. Some models require top screws for final securing. Double-check levelness and tighten all connections.
Common Mistake: Over-tightening screws can strip drywall. Stop when snug.
Know the Weight Limits

Exceeding capacity risks shelf collapse and wall damage. Always check the manufacturer’s specifications before loading your shelves.
No-Drill Shelves: 15 to 25 Pounds
- 24-inch shelf: Up to 15 pounds, ideal for books, small plants, or decor
- 36-inch shelf: Up to 25 pounds, can hold a mix of books and medium plants
Do not store heavy electronics, large hardcover collections, or kitchen appliances on no-drill shelves.
General Wall Load Guidelines
- Nail holes: Up to 10 pounds
- Drywall anchors: 25 to 50 pounds depending on type
- Stud-mounted: 50 pounds or more with proper fasteners
- No-drill pins: 15 to 25 pounds, safe for most decor items
Rule of Thumb: Distribute weight evenly across the shelf. Avoid loading one end more than the other.
Remove Shelves Without Damage
The real test of a renter-friendly shelf is how easy it is to take down when you move out.
Take Down No-Drill Shelves
- Lift the shelf straight up to disengage from the pins
- Use a flathead screwdriver to gently pry out the steel pins
- Fill pin holes with spackle using a putty knife
- Sand smooth, then touch up with matching paint
Result: Holes are slightly larger than nail holes but are often accepted as normal wear and tear by landlords.
Remove Traditional Shelves
Unscrew and remove brackets. Patch anchor holes with spackle. For holes larger than a quarter inch, use mesh tape or a drywall plug. Sand and repaint to match.
Final Check: Run your hand over the wall. No bumps or dents should remain.
Try Other Renter-Friendly Wall Organizers
The same no-drill pin system powers more than just shelves.
Hang Mirrors or Floating Desks
High & Mighty offers wall hangers rated for 20 to 125 pounds. Use them for full-length mirrors, floating desks, or small wall-mounted workstations.
Add Decorative Hooks
Choose from styles that hold 5 to 50 pounds:
- Key rails: Perfect for entryways
- Coat hooks: Hang robes, bags, or jackets
- Kitchen hooks: Store pots, pans, or utensils
DIY Hack: Install a hook strip under a kitchen cabinet for mugs or measuring cups.
Follow Safety and Setup Best Practices
Even simple projects need care and preparation.
Read Your Lease First
Check for clauses about wall modifications, paint changes, and deposit deductions for holes. When in doubt, ask your landlord. Some allow small modifications if you patch before moving out.
Work Safely and Smart
- Wear safety glasses, especially when drilling or prying pins
- Use a helper for alignment and stability
- Test shelf strength with light items first
- Keep packaging and hardware in case you need reinstallation or returns
Expert Advice: “Be patient with yourself,” says Suzanna Schumacher. “Everyone makes mistakes. Treat your roommate to lunch for helping. It’s worth it.”
Pick the Right Material and Style
Your shelf’s material affects durability and placement options.
Best for Renters: Wood-Plastic Composite
Used by High & Mighty, WPC resists moisture, warping, and swelling. This makes it perfect for bathrooms and kitchens where real wood might warp or MDF could bubble.
Other Materials to Know
- MDF: Budget-friendly but swells if wet
- Solid wood: Beautiful but heavy, requires stronger mounting
- Laminate: Scratch-resistant and easy to clean
Design Options
- Modern: White, black, or gray finishes
- Rustic: Wood-look with bracket styles
- Minimalist: Hidden supports with slim profiles
Match your shelf to existing decor for a built-in look.
Compare Cost and Value
| Shelf Model | Price | Tools Needed | Drilling | Max Weight | Wall Damage |
|---|---|---|---|---|---|
| High & Mighty (36″) | $50 to $70 | None (optional hammer) | No | 25 lb | Pin holes (minimal) |
| Sorbus | $30 to $50 | Drill | Yes | 15 to 20 lb | Small anchor holes |
| Fixwal | $40 to $60 | None | No | 15 to 20 lb | Minimal |
| AllModern Robin | $80 to $120 | Drill | Yes | 25 to 30 lb | Moderate |
| West Elm | $100+ | Drill | Yes | 30+ lb | Moderate to high |
Best Value: High & Mighty wins for renters. No tools, no drilling, easy removal, and solid load capacity make it the top choice.
Real User Results
Renters report positive experiences with renter-friendly shelf systems:
- “Installed in 10 minutes. No tools, no stress.”
- “Used in the bathroom for 6 months with no warping from steam.”
- “Landlord didn’t even notice the holes after spackling.”
- “Took it down and reinstalled in my new place. Perfect.”
Some users mention difficulty aligning the shelf on the first try. Patience and a second pair of hands help with this issue.
Key Takeaways for Hanging Floating Shelves in Your Apartment
Hanging floating shelves in an apartment doesn’t have to be risky. With the right no-drill system, you can enjoy the look and function of built-in storage without the long-term commitment. Choose renter-friendly options like High & Mighty that use pin-based mounting, require no tools, and leave minimal wall damage. Always check your lease before installing, respect weight limits, and patch holes properly before moving out. Whether you’re adding a nightstand alternative or creating a kitchen display, renter-friendly shelves let you personalize your space safely, stylishly, and smartly.
Frequently Asked Questions About Hanging Floating Shelves in Apartments
Can I hang floating shelves in my apartment without drilling?
Yes. No-drill systems like High & Mighty use hardened steel pins that slide into drywall without drilling. These leave only pin-sized holes that are easily patched and often considered normal wear and tear.
How much weight can no-drill floating shelves hold?
Most no-drill shelves support 15 to 25 pounds depending on size. A 24-inch shelf typically holds up to 15 pounds, while a 36-inch shelf can support up to 25 pounds. Avoid placing heavy electronics or large book collections on these shelves.
Will my landlord deduct from my deposit for floating shelf holes?
It depends on your lease terms and how well you patch the holes. Pin-sized holes from no-drill systems are usually minor and easily repaired with spackle. Always check your lease first and communicate with your landlord about any wall modifications.
What tools do I need to install no-drill floating shelves?
For most no-drill systems, you need no tools at all. Installation is hand-powered. An optional small hammer can help tap pins into denser drywall, and an adhesive level is often included to ensure straight placement.
How do I remove floating shelves without damaging the wall?
For no-drill shelves, lift the shelf straight up to disengage the pins, then use a flathead screwdriver to gently pry out the pins. Fill the small holes with spackle, sand smooth, and touch up with matching paint. Traditional shelves require unscrewing brackets and patching anchor holes.





