How to Show Shelves on Floor Plan
If you’re designing a space, whether it is a cozy reading nook, a home office, or a commercial library, knowing how to show shelves on a floor plan is essential for clear communication with builders and clients. Shelves are not just storage. They shape circulation, define zones, and contribute to the overall design intent. Omitting them or representing them incorrectly can lead to costly misunderstandings during construction. This guide walks you through the exact methods, symbols, and software tools to accurately depict all types of shelves on your architectural or interior design floor plans.
You will learn standard symbols for different shelf types, software-specific steps for popular design programs, dimensioning rules that ensure accuracy, and best practices for labeling and clearance. Whether you are working with AutoCAD, Revit, RoomSketcher, or SketchUp, these techniques will help you create professional, buildable floor plans that clearly communicate your design vision.
Standard Shelf Symbols for Architectural Drawings
Shelves require specific visual treatment in floor plans because they are neither walls nor typical furniture. Using standardized symbols prevents confusion and ensures your drawings are instantly understandable to contractors and clients.
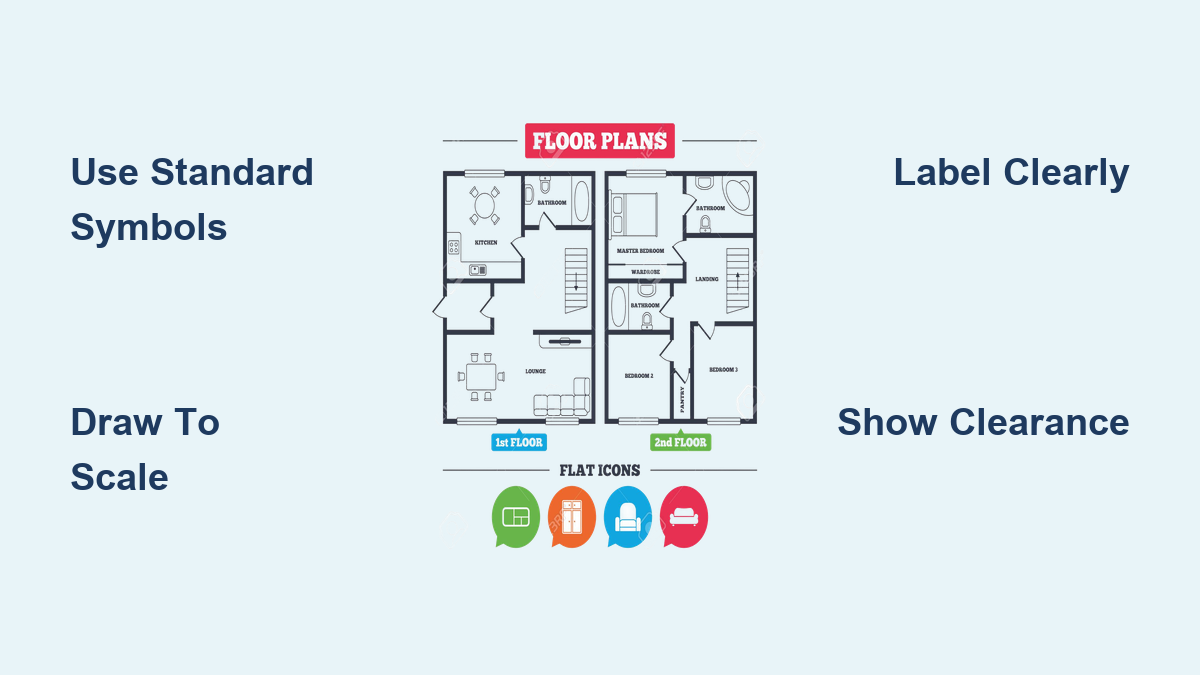
Use Correct 2D Plan Symbols
A double-line rectangle indicates depth for freestanding units, while single lines extending from walls represent floating shelves. Avoid sketching vague boxes and instead apply consistent line weights and spacing throughout your drawings. For bookshelves, draw internal vertical dividers using two to four lines to suggest individual compartments. Glass-front cabinets should use diagonal hatching to distinguish them from solid wood units.
Apply CAD blocks for consistency by using pre-made symbols like BOOKSHELF.DWG or FLOATING_SHELF.DWG at standard scales such as 1:50. These blocks come pre-dimensioned with proper hatch patterns and can be assigned to dedicated layers like FURNITURE-SHELVES for easy visibility management. In Revit, load RFA family files for parametric control where you can adjust height, depth, and number of shelves directly in the model.
Source Reliable Symbol Libraries
Rather than creating symbols from scratch, rely on trusted resources that follow industry conventions. Available libraries include architectural blueprint symbols charts with standardized icons, interior design drawing guides with shelf-specific notation, and free CAD libraries offering DWG downloads for bookcases, display units, and children is shelving. These resources reduce errors during construction or client review and ensure consistency across your drawings.
Representing Common Shelf Types on Floor Plans

Each shelf type has specific representation conventions that communicate its function and installation method clearly.
Freestanding Bookshelves
Draw freestanding bookshelves as solid rectangles with vertical lines inside to show individual bays. Standard sizes range from 76 to 91 centimeters wide, 25 to 30 centimeters deep, and 183 centimeters tall. Place these units parallel to walls or use them as room dividers. Always label clearly with BOOKCASE and add finish notes like Oak or Walnut if specified. In programs like RoomSketcher or SketchUp, drag and drop pre-built models for instant placement that auto-generates clean 2D symbols.
Built-in Shelving Units
Built-in units integrate directly into wall lines using a recessed outline. Show a break in the wall to indicate depth and apply wood-grain hatching to distinguish the material. Include callouts referencing section details, especially for custom joinery. In Revit, use wall-hosted components so the shelf moves with the wall during edits, maintaining alignment as your design evolves.
Floating Wall Shelves
Represent floating shelves with a thin horizontal line projecting from the wall, typically 200 to 600 millimeters long. Add small bracket symbols at the ends if applicable. Space multiple shelves 150 to 450 millimeters apart vertically. Annotate with Wall-mounted or Shelf @ 1200mm to specify height from the floor, ensuring contractors understand exactly where each shelf belongs.
Corner and L-Shaped Shelves
Draw L-shaped lines in room corners at 90-degree angles, maintaining standard depth of 25 to 30 centimeters. Ensure the design does not obstruct corner circulation, which is a common mistake in tight spaces. In CAD software, snap lines precisely to wall intersections for clean geometry that aligns with other elements in your drawing.
Library and Storage Shelving
For high-density library layouts, draw tight rows spaced 750 to 900 millimeters apart to allow aisle access. Use simplified rectangles with uniform shelf spacing of 300 to 350 millimeters. Children is shelves should be lower, typically 900 to 1200 millimeters tall, with rounded corners noted in elevation views. Always verify clearance meets accessibility standards for your jurisdiction.
Adding Shelves in Design Software
Different software platforms offer specific tools for placing and editing shelves on floor plans. Understanding these tools speeds up your workflow and ensures accuracy.
RoomSketcher: Drag-and-Drop Simplicity
RoomSketcher offers an intuitive approach to adding shelves. First, switch to Furniture mode. Then search for Bookcase or Shelf Lack using the magnifying glass icon. Drag the item onto your plan and resize using blue handles or input exact dimensions in the Properties panel. Stack shelves vertically by placing one above another to create built-in appearances. Enable 3D view to layer books or decor items for realistic presentations. The software auto-generates clean 2D symbols and realistic 3D snapshots ideal for client presentations.
AutoCAD: Precision with Blocks
In AutoCAD, insert shelf blocks from your library using the Insert command. Scale to match your drawing units, whether millimeters or inches. For manual drawing, create a rectangle at your desired dimensions, add internal lines to represent shelves, and apply a wood-pattern hatch. Assign all shelf elements to a dedicated Furniture layer for easy management and visibility control. Use the DIM command to label width, depth, and spacing clearly on your drawing.
Revit: Parametric Control
Revit provides powerful parametric control for shelf elements. Load shelf RFA families into your project, then select the Component tool under the Architecture tab. Place the shelf on a wall or in open space. Adjust parameters including number of shelves, height, depth, and material directly in the properties panel. Schedule shelves in the Furniture Schedule view for quantity tracking and material takeoffs. Revit syncs plan, elevation, and 3D views automatically, making it perfect for comprehensive documentation.
SketchUp: 3D Warehouse Models
SketchUp leverages the 3D Warehouse for shelf models. Open the 3D Warehouse and search for floating shelf or bookcase models. Download and insert at correct scale, then position precisely in your model. Use Section Plane tools to show internal structure in cut views, revealing how built-in shelving looks inside walls. This approach works well for visualizing complex built-ins before finalizing your floor plan.
Dimensioning and Scaling Shelf Elements Correctly
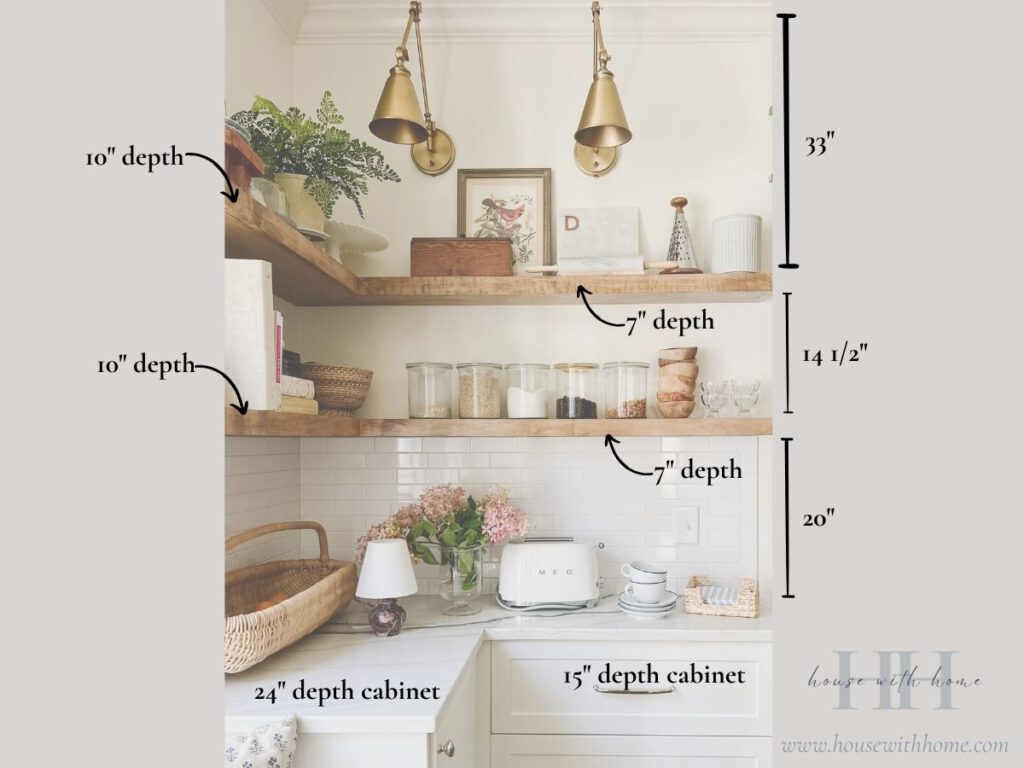
Accurate dimensions prevent costly mistakes during construction and ensure shelves fit the intended spaces properly.
Follow Standard Dimension Guidelines
Use these common sizes as baselines for your drawings. Standard bookshelves range from 600 to 1200 millimeters wide, 250 to 300 millimeters deep, and 1800 to 2100 millimeters tall with shelf spacing of 300 to 350 millimeters. Floating shelves typically measure 300 to 1200 millimeters wide and 200 to 300 millimeters deep. Built-in units can reach 2700 millimeters tall with 300 to 400 millimeter depth and 320 millimeter modular spacing. Children is shelving measures 600 to 900 millimeters wide, 200 to 250 millimeters deep, and 900 to 1200 millimeters tall with 250 millimeter spacing. Display cabinets range from 500 to 1000 millimeters wide, 350 to 450 millimeters deep, and 1800 to 2100 millimeters tall.
Apply Anthropometric Guidelines
Design shelves for real users by considering reach and accessibility. Maximum comfortable reach for adults is 1800 to 1900 millimeters. The easy access zone spans 600 to 1500 millimeters from the floor. Children is items should be placed below 1200 millimeters. For wheelchair accessibility, provide 760 millimeters of clear depth and ensure the lowest shelf sits at 400 to 700 millimeters height. These guidelines ensure functional, inclusive designs that work for all users.
Labeling and Annotating Shelves Clearly
Clear labels prevent confusion and help contractors understand exactly what to build.
Add Type and Material Labels
Never leave shelves unmarked on your drawings. Label each unit with its type, such as Floating Shelf, Bookcase, or Display Cabinet. Include material specifications like Oak Finish, Glass Front, or Metal Frame. Specify height from floor using notation like Shelf @ 1050mm. Use leader lines to connect labels without cluttering the plan, keeping annotations readable and professional.
Use Callouts for Complex Units
For built-ins or multi-tier systems, add a callout bubble referencing a larger-scale section drawing. This approach is crucial for cabinetry, recessed units, or structural installations that require more detail than the floor plan can show. Detail callouts ensure craftsmen have the information they need to execute complex work accurately.
Indicate Finishes with Hatching
Differentiate materials visually using appropriate hatching patterns. Wood shelves use diagonal or grain-style hatching. Glass elements appear with light stipple or gray fill. Metal shelving uses crosshatch patterns. In RoomSketcher, use Material Side A/B settings to apply different finishes to front and back of shelves, adding realism to your presentations.
Ensuring Proper Circulation and Clearance
Shelves must not impede movement through spaces or access to other building elements.
Maintain Minimum Front Clearance
Leave at least 750 millimeters of clear space in front of any shelf for comfortable access. For libraries or retail environments, increase clearance to 900 millimeters to accommodate two-way traffic. Blocking access paths risks failed inspections and user frustration. Mark clearance zones clearly on your drawings to communicate this requirement to contractors.
Avoid Obstructing Key Areas
Never place shelves in front of doors, maintaining minimum swing clearance of 450 millimeters. Avoid blocking windows unless the design specifically calls for window seat storage. Keep shelves away from electrical outlets and switches to maintain safe access for maintenance. Use furniture layers to test placement before finalizing your floor plan, moving elements around to find optimal positions.
Plan for Room Dividers
Double-sided bookcases function effectively as room dividers. Draw these as thick rectangles with open backs to indicate accessibility from both sides. Label clearly as Room Divider and confirm structural support if the unit will be load-bearing. Ensure both sides have adequate clearance for use, treating the divider as two functional shelf units back to back.
Handling Special Shelf Types
Some shelf designs require unique representation techniques to communicate their installation and structure.
Hanging or Suspended Shelves
Show hanging shelves with thin solid or dashed lines projecting from the ceiling. Add downward lines to indicate rods or cables supporting the shelf. Annotate with Ceiling-mounted and include dimensions. In floor plans, include notes like Hanging Shelf 600x200mm since 3D context is limited in plan view. These elements require structural notation indicating how they anchor to ceiling framing.
Recessed Wall Shelves
Draw recessed shelves as indentations in the wall line. Use dashed internal lines to show depth into the wall cavity. Dimension from the wall face to the back of the shelf. Apply hatching to distinguish the recessed cavity from solid wall areas. Recessed shelving saves floor space and creates built-in appearance without full cabinet construction.
Corner and Curved Units
Use L-shaped lines for 90-degree corner shelves or smooth arcs for curved designs. Maintain consistent depth throughout curved sections. In CAD software, use FILLET or ARRAY commands to create even spacing on curved shelving. These special shapes require additional detail to ensure contractors understand the geometry.
Best Practices for Professional Shelf Representation
Follow these guidelines to create clear, accurate floor plans that communicate effectively with all project stakeholders.
Draw to Scale Always
Use 1:50 scale for residential plans and 1:100 for large commercial drawings. Verify scale using a known dimension such as door width at 800 millimeters. Scaled drawings prevent costly mistakes during build-out and ensure furniture proportions remain consistent relative to room size. Never guess at proportions or sketch without measurement references.
Prioritize Clarity Over Detail
Do not overcrowd the plan with excessive detail. Use simple symbols, consistent labeling, and clean spacing between elements. If a shelf is not fixed or permanent, consider omitting it unless it is part of the design concept. Clients and contractors need to understand the overall layout quickly without parsing cluttered drawings.
Include Shelves in 3D Views and Schedules
Generate 3D snapshots in RoomSketcher or Revit to validate placement and visualize the final result. In BIM workflows, add shelves to furniture schedules for material takeoffs and cost estimates. 3D views reveal how shelves interact with other elements and help clients visualize completed spaces.
Verify Accessibility Compliance
Ensure all shelves meet ADA or local accessibility codes, especially in public spaces. Provide clear floor space and reachable heights for all users. Check that wheelchair users can access required shelves and that aisles meet minimum width requirements. Accessibility compliance is not optional and must be verified on every project.
Frequently Asked Questions About Showing Shelves on Floor Plans
What is the standard symbol for a bookshelf on a floor plan?
The standard symbol for a bookshelf is a rectangle with internal vertical dividers, typically two to four lines, representing individual compartments or bays. Solid rectangles with hatching indicate depth and materiality. This symbol distinguishes bookshelves from other furniture and wall elements on the drawing.
How do you represent floating shelves on a floor plan?
Floating shelves appear as thin horizontal lines extending perpendicular from the wall, usually 200 to 600 millimeters long. Small bracket symbols at the ends indicate support hardware. Annotate with height specifications like Shelf @ 1200mm to communicate exact positioning to contractors.
What software is best for adding shelves to floor plans?
The best software depends on your workflow. RoomSketcher offers drag-and-drop simplicity for quick placement. AutoCAD provides precision for technical drawings. Revit delivers parametric control with automatic schedule generation. SketchUp excels at 3D visualization. All four programs can produce professional results when used correctly.
How much clearance should be in front of shelves?
Maintain minimum clearance of 750 millimeters in front of shelves for comfortable access. Increase to 900 millimeters in libraries and retail spaces to allow two-way traffic. This clearance ensures users can reach items on shelves without difficulty and prevents the shelf from becoming an obstacle.
Should I include decorative shelves on floor plans?
Include all permanent or semi-permanent shelves that affect space planning or are part of the design concept. Even non-load-bearing decorative shelves should appear on drawings if they are fixed installations. Exclude moveable shelves that clients might reposition, but include anything attached to walls or ceilings.
How do you dimension built-in shelving on floor plans?
Dimension built-in shelving from wall to shelf edge and between units. Include overall width, depth, and height dimensions. Add callouts referencing section details for complex joinery. Label materials and finishes using leader lines. Built-ins require more annotation than freestanding units because they involve custom construction.
Key Takeaways for Showing Shelves on Floor Plans

Accurately representing shelves on floor plans requires understanding standard symbols, proper dimensioning, and clear labeling conventions. Choose the correct symbol for each shelf type, whether freestanding bookshelf, built-in unit, floating shelf, or corner configuration. Use CAD blocks or software libraries for consistency across your drawings, and always draw to scale to prevent construction errors.
Apply proper dimensioning using standard sizes as baselines and consider anthropometric guidelines for accessible design. Label every shelf with type, material, and height specifications. Use callouts for complex built-in units and hatching patterns to indicate different materials. Maintain minimum clearance of 750 millimeters in front of shelves and avoid blocking doors, windows, or electrical outlets.
Whether you work with hand-drawn plans or advanced BIM software, the goal remains clear communication. By applying standard symbols, correct dimensions, and smart labeling, you ensure your floor plans are not just visually appealing but fully buildable. Take time to verify accessibility compliance on every project and include shelves in 3D views and schedules for complete documentation.